Camellia Cultivation Methods and Care Key Points
How are camellias cultivated? An introduction is given below. Camellias are semi-shade plants, suited to growing in diffused light and afraid of direct sunlight scorching, so seedlings need shading. However, long-term overly shady conditions are unfavorable for camellia growth, resulting in thin leaves and few flowers, which affects ornamental value. Mature plants need more light to promote flower bud formation and blooming...
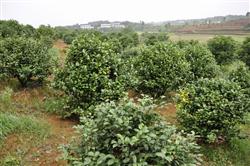
How are camellias cultivated? An introduction is given below.
Camellias are semi-shade plants, suited to growing in diffused light and afraid of direct sunlight scorching, so seedlings need shading. However, long-term overly shady conditions are unfavorable for camellia growth, resulting in thin leaves and few flowers, which affects ornamental value. Mature plants need more light to promote flower bud formation and blooming.
For open-field cultivation, choose deep, loose soil with good drainage and a pH of 5 to 6, which is most suitable; alkaline soil is not suitable for camellia growth. For potting soil, use fertile, loose, slightly acidic loam or leaf mold.
[Propagation Methods] Cuttings, grafting, layering, sowing and tissue culture propagation are commonly used.
Cuttings propagation: Mid-June and around the end of August are the most suitable times. Select current-year semi-ripened branches from the outer part of the canopy that are firm, with intact leaves and plump leaf buds, as cuttings, 8 to 10 cm long, keeping 2 leaves at the tip. When cutting, keep a little old branch at the base if possible, as this makes it easy to form callus tissue after insertion and roots develop quickly. Cut the cuttings in the early morning and insert them immediately after cutting, inserting about 3 cm into the medium. During insertion, the leaves should overlap each other, and after insertion press firmly with your fingers. Shallow insertion is better, as this allows air circulation and faster healing and rooting. The cutting bed needs shade, with daily misting of the leaf surface to keep it moist, and the temperature maintained at 20 to 25°C. About 3 weeks after insertion, healing begins, and roots form after 6 weeks. When the roots are 3 to 4 cm long, transplant into pots. When taking cuttings, dip the base of the cuttings in a 0.4% to 0.5% indolebutyric acid solution for 2 to 5 seconds, which has a clear effect of promoting rooting.
Grafting propagation: Often used for varieties that are difficult to root from cuttings or have little propagation material. Grafting from May to June, when new shoots have become semi-lignified, gives the highest survival rate, and after successful grafting, buds sprout and shoots grow quickly. The main rootstock is oil tea (Camellia oleifera); seeds are collected in October, stored in sand in winter, sown in early April of the following year, and when the seedlings grow to 4 to 5 cm, they can be used for grafting. Using the softwood cleft grafting method, use a blade to cut off the embryo bud part of the bud rootstock, make a vertical cut upward along the pith at the center of the cross-section of the hypocotyl, then take one camellia scion node and cut the base below the node into a regular wedge shape, immediately insert the prepared scion into the bottom of the rootstock cleft, align the cambium on both sides, tie with cotton thread, and cover with a clean plastic bag. Remove the bag after about 40 days, and sprouting and shoot growth can occur only after about 60 days.
Layering propagation: In the plum rain season, choose robust 1-year-old branches, make a ring girdle 20 cm from the tip, 1 cm wide, bind with leaf mold and then wrap with plastic film; roots form after about 60 days, and the cut-off layered shoot can be directly potted, with a high survival rate.
Seed propagation: Suitable for single-petaled or semi-double varieties. Seeds mature in mid-October and can be sown immediately. Shallow sowing is better; use vermiculite as the medium, cover with 6 mm, keep at room temperature 21°C, and provide 10 hours of light each night to promote seed germination. Germination begins 15 days after sowing, seedlings reach 8 cm in height within 30 days, and are transplanted when the seedlings have 2 to 3 leaves.
Tissue culture propagation: Seedlings are often used as explants; after routine disinfection, cut into 1 cm lengths and inoculate on MS medium supplemented with kinetin 1 mg/L, 6-benzylaminopurine 1 mg/L and indoleacetic acid 0.1 mg/L. After 4 weeks of culture, only callus tissue forms, without shoots. After transferring to new medium, single shoots 4 cm long begin to form, then soak in indolebutyric acid 0.5 mg/L solution for 20 minutes, then transfer to 1/2 MS medium, and roots grow after 4 weeks. After growing for 8 weeks on the rooting medium, transplant the plantlets into pots filled with perlite and peat.
[Cultivation Management] For potted camellias, 15 to 20 cm pots are commonly used. Camellia roots are fragile, so care must be taken not to damage the root system when transplanting. For potted camellias, repot every spring after flowering or in September to October, prune off leggy branches or dead branches, and replace with fertile leaf mold. Camellias like moisture, but the soil should not be too wet, especially in pots; excessively wet potting soil easily causes root rot. Conversely, if irrigation is insufficient and conditions are too dry, leaves curl, which can also affect flower bud development.
After repotting camellias in spring, there is no need to fertilize immediately. After summer begins, during the vigorous growth period of stems and leaves, fertilize once every half month or use "Huiyou" 21-7-7 acid fertilizer. From bud appearance in September to the flowering period, apply 1 to 2 additional applications of phosphorus and potassium fertilizer. In late summer and early autumn, camellias begin to form flower buds; each branch tip should keep 1 to 2 flower buds, not too many, so as to avoid consuming nutrients and affecting the blooming of the main flower bud. When removing buds, pay attention to the position of leaf buds to maintain a beautiful plant shape. At the same time, remove dried and useless buds as you go.
[Pest and Disease Control] When camellias are cultivated indoors or in greenhouses, if ventilation is poor, they are susceptible to damage from red spider mites and scale insects, which can be controlled by spraying with 40% omethoate emulsifiable concentrate at 1000 times dilution or by washing them clean. In the plum rain season, when air humidity is high, anthracnose damage often occurs, which can be controlled by spraying with equal-part Bordeaux mixture or 25% carbendazim wettable powder at 1000 times dilution.
[Post-Production Handling] Camellias have beautiful crowns, bright green leaves, large and colorful flowers, and a long flowering period, blooming right around New Year's Day and Spring Festival. Potted plants placed in living rooms, studies and balconies present an elegant and luxurious atmosphere. When planted in courtyards, accompanied by flower walls and rocks in front of pavilions, the scenery is natural and pleasant. During storage and transportation, prevent high temperatures and dry air, otherwise flower buds and flowers are prone to falling off, affecting quality.
Click to get more camellia planting techniques
Click to get more flower and tree planting techniques