What are the cultivation methods for edible aloe?
How do you grow edible aloe? Please give a detailed introduction
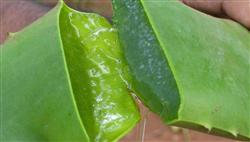
The edible part of aloe is the succulent, juicy leaf. The leaf contains very rich nutrients, mainly including fairly large amounts of B vitamins, cellulose, wound-healing hormones, 11 free amino acids, 21 organic acids, 18 trace elements such as molybdenum, zinc, germanium and boron, chlorophyll, antioxidant enzymes and other physiologically active and enzymatic substances, as well as fruit acids, polysaccharides and monosaccharides, and it also contains antibacterial and anti-ulcer medicinal components such as aloin, aloe-emodin and aloesin. So growing edible aloe has good prospects, and the planting method can refer to the following methods:
Aloe's temperature requirements:
Aloe likes warmth and can withstand high temperatures of 40°C; it is not cold-tolerant, and suffers cold damage when the temperature is 0°C. Its low-temperature tolerance varies by variety, among which tree aloe is relatively cold-tolerant.
Aloe's water requirements:
Aloe is strongly drought-tolerant and afraid of waterlogging. In moist soil it very easily rots at the roots and dies, and too much watering that leaves the soil airless also easily causes root rot and death.
Aloe's light requirements:
Aloe likes light, but excessive exposure to strong sun will put aloe into a semi-dormant state or stop its growth, especially during the seedling stage, when exposure to strong sun will turn the leaves purple or dry and wrinkled.
Aloe's soil requirements:
Aloe is not strict about soil and tolerates poor soil, but in poor soil and in heavy clay soil its root system is underdeveloped and it grows slowly with small plants. In loose, fertile sandy soil that drains and irrigates well and is rich in organic matter, it grows fast, with thick leaves that are deep green and glossy, and the yield is good. The most suitable pH value is 6-6.5.
Aloe sowing period:For protected cultivation, sowing can be done in both spring and autumn.
Aloe sowing method:Raise seedlings in seedling pots or a seedling bed. Use clean river sand for the bed soil, or mix 1 part each of vermiculite, peat and perlite thoroughly, then put it into seedling pots or level it on the seedling bed, water thoroughly, then sow, either by dibbling or drilling, and cover with plastic film after sowing to keep warm.
Aloe seedling-stage management methods:From sowing to emergence, if the temperature is 15-30°C, emergence takes about 30 days. After the seedlings come up evenly, remove the covering promptly. Only water or spray thoroughly after the seedling pot or bed soil has dried, and do not water again until it dries again.
When the young seedlings are about 2 cm tall, spray with a 0.1% potassium dihydrogen phosphate aqueous solution, applying a small amount according to the seedlings' growth vigor. Seedling-bed raising requires pricking out: separate the overly dense plants and plant them elsewhere. Pricking out is done when the seedlings are about 3-5 cm tall, or thin them to 6-8 cm square spacing. When thinning, dig them up with the roots and divide them into another temporary planting bed at 6-8 cm square spacing. When the seedlings are about 10 cm tall and have 6 leaves and 1 heart, they can be transplanted into small flower pots, or planted in the ground in a greenhouse.
Aloe propagation methods
Choose varieties suitable for division and offshoot separation: Chinese aloe and Curaçao aloe (also called American aloe) have a very strong ability to produce divisions; tree aloe (that is, Japanese aloe) has slightly weaker division ability at the base than the above varieties, but it can produce offshoots in the leaf axils; next is variegated aloe, whose leaf axils rarely produce offshoots; while Cape aloe (that is, prolific aloe or Cape of Good Hope aloe) lacks the ability to produce divisions, tillers and offshoots, and its planting stock is mainly propagated by tissue culture.
Cultivation of divisions and offshoots: after the daughter seedlings separated from the mother plant are planted and take root, they can in turn produce new young shoots. After a young shoot is separated from the mother plant and cultivated for one year, one plant can produce more than 20-30 small seedling shoots or tiller shoots. The survival rate of cuttings from tiller shoots can reach 100%. From small seedling to mature plant takes about a year and a half, reproducing quickly at low cost.
1. Cultivation of the mother plant: use robust plants over half a year old and plant them in a mother stock plot with fertile, loose soil, or use a clay pot 20 cm tall with an inner diameter of 25 cm. For the pot soil, mix fertile garden soil with river sand and peat, and place a horse hoof or fermented, decomposed dried poultry and livestock manure or sesame paste residue at the bottom of the pot as base fertilizer. The fertilizer and growing medium used are best treated to be sterile and insect-free, then planted.
The planting depth should be such that the base of the lowest leaf of the planted stock is 0.5-1 cm from the soil surface. One to two months after the mother plant is planted, new plants successively appear at the base and root cluster. For those that have not produced new shoots for a long time, you can loosen the soil with a small-toothed rake, and use a knife to score wounds around the base of the mother plant's stem at a certain interval, then the next day cover with sandy soil, and tiller seedlings will soon appear one after another.
2. Pulling out division seedlings: when the daughter plants growing from the roots reach 5-10 cm, they can be pulled out and transplanted. Although slightly smaller seedlings can also be transplanted, they root slowly and grow slowly, so it is better to leave them on the mother plant until they grow larger before transplanting. Rooted daughter seedlings grow faster and more robustly than unrooted ones, so one week before pulling out the daughter seedlings, gently twist daughter seedlings reaching 5 cm or more by about a 90-degree angle by hand, and cover with sand, or loosen the growing medium near their roots, to encourage rooting. When pulling them out after rooting, pinch the root of the daughter seedling with your hand and pull it up with a sudden force, and then it can be planted. Tiller seedlings arising from the stem base are often large but mostly have no roots, or you need to gently twist them by hand and then cover with sand to encourage rooting, or insert them by hand, and plant them after they grow roots.
3. Cutting period: indoor cuttings can be taken at any time. As long as the seedling bed temperature can be kept between 15-28°C, it is fine.
4. Substrate for cuttings: use clean, fertilizer-free river sand or mountain sand after sieving through a 1 mm mesh screen, or use 2 parts vermiculite mixed with 1 part perlite, stirred evenly, and set aside.
5. Cutting method: after unrooted daughter seedlings are separated from the mother plant, place them in a cool place, and take cuttings after the wounds are slightly dry. The standing time is 0.5-1 day in summer and 2-3 days in spring and autumn. The row and plant spacing for cuttings in the seedling bed is 6-8 cm, with the soil covering 0.5-1 cm deep. Never bury the heart of the seedling into the substrate.
6. Management after cutting: after cutting, spray thoroughly, and do not water again until rooting begins. The seedling bed can be covered with film to control temperature and humidity. The most suitable temperature is 15-28°C and humidity 75%-85%. The minimum must not be lower than 8°C and the maximum not higher than 35°C, otherwise seedling rot easily occurs.
For winter cuttings, the daytime ground temperature in the greenhouse should preferably be kept above 20°C, and the night temperature above 5°C. When necessary, use a ground heating wire to control the temperature.
For summer cuttings, use a shade net for moderate shading, and during high-temperature periods it is best to use groundwater spray to cool down, carried out in the morning and evening. 20-30 days after cutting, after the young seedlings have rooted, spray 0.1% potassium dihydrogen phosphate 1-2 times. After about 2 months they can leave the nursery for planting. For unrooted tiller seedlings and daughter shoots, applying rooting hormone to the cut surface before cutting can promote rooting.
Aloe field planting methods:
(1) The most basic conditions for aloe cultivation. Since aloe originated in tropical regions, it is a perennial plant that likes warmth, tolerates heat and fears cold. In North China, cultivation must use a greenhouse with good light and high moisture retention, where the indoor temperature in winter cannot be lower than 5°C, in order to survive the winter safely. If the room temperature cannot reach above 5°C, heating facilities must be provided. At present, the energy-saving solar greenhouse structure is relatively suitable; in Beijing, the lowest winter temperature can reach above 8°C.
(2) Greenhouse ground planting: choose well-drained, fertile, loose sandy loam soil for greenhouse ground planting.
Making beds: follow the principle of convenient drainage and irrigation and no standing water on the ground, so raised beds are better. Generally the bed width is 1 m, height 15-20 cm, and the bed ditch (also used as a walkway) width is 35-40 cm. The bed direction should preferably be parallel to the greenhouse orientation, that is, an east-west orientation. This makes full use of the greenhouse's internal space structure, reduces mutual shading between plants, and facilitates ventilation and light penetration.
Field aloe planting period:For greenhouse planting, except during the period of lowest temperatures, planting can be done at other times.
Field aloe planting methods:40 cm or 50 cm square spacing. Different varieties have different planting densities. Appropriate density can increase early-stage yield, but after the plants grow larger, too dense planting cannot produce broad leaves. Therefore, the method of dense planting in the early stage and thinning and transplanting in the middle stage can be adopted. In a 1 m wide bed, plant 3 rows with both plant and row spacing of 20 cm. Half a year or one year after planting, when the plants are 20-30 cm tall, thin out the middle row, leaving 2 rows, and among the 2 rows, following a zigzag pattern, dig out every other plant, resulting in a plant spacing of 40 cm and a vertical row spacing of 40 cm.
Dig up the thinned plants with soil and transplant them to another plot, planting at 40 cm square spacing. Mark the points, dig planting holes and plant, with the depth such that the seedling clod surface is level with the soil surface, and the lowest leaves must be off the soil surface and must not be buried by soil. After planting, water thoroughly to settle the roots.
Field aloe management:After planting and watering, do not water continuously before new roots grow. Generally, in summer when the temperature is higher, give water about every 5 days; in winter when the room temperature is lower, give water about every 7 days. Each watering should be thorough. Water in the morning and evening in summer, and around noon in winter.
Aloe does not need topdressing, but appropriate topdressing can promote aloe growth and increase leaf thickness. Use mainly decomposed organic fertilizers, with an appropriate amount of phosphorus and potassium fertilizer added. Topdressing can be applied in furrows, in holes or by watering, and the application rate is determined according to plant size and growth stage. In principle, fertilize with small amounts and greater frequency.
Organic liquid fertilizer needs to be diluted 6-15 times, and the concentration of inorganic fertilizers such as potassium dihydrogen phosphate should be below 0.1%. After each watering or irrigation, loosen the soil once as soon as the soil surface dries, or earth up once. After harvesting the lower leaves, also earth up to prevent lodging. After tree aloe grows large, its upper part is heavy and it easily lodges, so supports need to be set up to prevent lodging.
Aloe pest and disease control methods:
1. Pests: aloe is almost never seen to suffer pest damage. If pest damage is found by any chance, such as aphids, red spider mites, scale insects or cotton bollworms, you can spray clean water to wash them off, or use botanical pesticides such as a 0.5% veratrine pure solution sprayed at 800-1,000 times dilution, which works very well. But scale insects must be treated by dipping a brush in the pesticide and smearing it on.
2. Diseases: mainly black spot disease, which may occur in low-temperature and high-humidity environments. Its symptoms are that at the initial stage of fungal invasion into the leaf, silky dirty spots appear on the diseased part of the leaf surface, later developing into nearly round dark brown spots, with the edges of the spots radiating outward and surrounded by a yellow halo. In the later stage of the disease, many black scab-like granules appear on the spots, and in severe cases purple to black streak-like spots form, and the leaf epidermis sinks.
To control this disease, first choose disease-resistant varieties. Among aloe varieties, variegated aloe is the most resistant to black spot disease. Strengthen field management; the minimum greenhouse temperature should preferably not be lower than 8°C, and heating measures should be taken when the room temperature drops. During the period of lower winter temperatures, reduce water spraying, pay attention to ventilation, and increase light duration as much as possible. When planting, apply sufficient base fertilizer and appropriately apply 0.1% potassium dihydrogen phosphate, or 0.1% zineb, or 0.1% sodium tetraborate, which can enhance the plant's disease resistance.
At the early stage of the disease, spray 75% chlorothalonil wettable powder at 800 times dilution, or 50% carbendazim wettable powder at 1,000 times dilution, or 70% thiophanate-methyl wettable powder at 800 times dilution, or 70% zineb wettable powder at 800 times dilution, or fungicides such as "Nongliling".
However, spraying liquid preparations during low-temperature periods will further increase the humidity in the greenhouse, so attention must be paid to strengthening ventilation and air exchange. For greenhouses covered with plastic film, when ventilating, do not lift the plastic film at the outer edge of the greenhouse; instead, open ventilation openings at the top of the greenhouse during the highest temperature of the day. When indoor humidity is high, it is best to use smoking fungicides, or fumigate with sulfur.
Aloe harvesting methods:
The higher the maturity of aloe leaves, the better the medicinal efficacy. Generally, tree aloe matures earlier and can be harvested in large quantities within 2 years of planting; varieties such as Curaçao aloe and its strains, and Chinese aloe, need to be grown for more than 3 years before they are fully grown and substantial. The initial harvest period is generally in the first year or a year and a half after planting; when the lower leaves of the aloe plant are smaller than the upper leaves, the lower leaves can be harvested.
Harvest aloe leaves in the morning. At harvest time, use a knife to cut lengthwise along one side of the leaf sheath, hold the leaf steady with one hand, and with the other hand peel the leaf off from the leaf base together with the leaf sheath. In the peak growing season, harvest about once every 2 months, picking from the bottom upward, and 2-3 leaves can be harvested per plant each time. There should be 8-9 tender leaves retained on the upper part. The harvested leaves should be neatly placed in wooden boxes or vegetable baskets and handled promptly. After harvesting, aloe leaves can be stored for a very long time in a 5-10°C cold storage room. Leaves with cuts should have the cuts sealed with cling film, and can also be kept for more than 1 month. If the leaf gel becomes soft and changes color, it has already deteriorated.
Aloe pot cultivation methods:
Aloe is suitable for pot cultivation, whether for large-scale cultivation in a greenhouse or for home cultivation (on a balcony, etc.).
(1) Pot soil: mix 3 parts garden soil, 5 parts peat soil or pine-needle leaf mold, and 2 parts decomposed poultry and livestock manure, treat with "Biemiesu" or other disinfectants, and use ferrous sulfate to adjust the pH of the growing medium to pH 6-6.5, making it weakly acidic.
(2) Potting up: when the young seedlings are first planted, use a clay pot with an inner diameter of 15-18 cm and a height of about 15 cm. If it is a new pot that has not been used, it should be soaked in water to temper it before use, to avoid burning the seedling roots when there is little water. For old pots that have been used for a long time, the old soil must be removed, and they should be washed and dried in the sun before use.
When potting up, it is best to place two layers of broken tile pieces over the drainage hole at the bottom of the pot (to facilitate drainage), put in a layer of coarser growing medium, and place in a few pieces of soaked and fermented horse hoof or dried manure crumbs, then add growing medium to about 1/3 or 1/4 of the pot height, then stand the young seedling in the center of the pot and evenly sprinkle on growing medium. When watering to settle the roots, gently lift the seedling slightly upward, and the settling water should be thorough. After water can flow out from the bottom of the pot, fill in soil and bury the roots well. Be careful not to bury the leaves, and keep the base leaves of the plant slightly below the pot rim.
(3) Repotting and changing pots: after aloe has grown for a period, much of the nutrients in the pot have been consumed, so most of the old growing medium in the original pot needs to be replaced, and new growing medium and soaked and fermented horse hoof or sesame paste residue added. It is best to change to a pot one size larger.
(4) Management methods for potted aloe:
Watering: in mild-climate seasons, give water about every 5 days; in high-temperature seasons, water every 3 days; in winter when the temperature is low, water once a week or at even longer intervals. The principle of watering is to water only 1-2 days after the surface soil has dried, and each watering should be thorough, until water seeps out from the bottom of the pot.
Fertilizing: if base fertilizer has already been applied when potting up, topdressing can be omitted, and decomposed fertilizer added again at repotting time. If topdressing is needed, be sure to use decomposed organic fertilizer, and add phosphorus and potassium fertilizer and micro-fertilizers such as boric acid, or do foliar spraying with 0.1% potassium dihydrogen phosphate. Do not carry out foliar spraying under strong sun.
Preventing lodging: set up supports in time to prevent lodging, especially after harvesting leaves, when the plant is heavy on top and light at the bottom and very easily lodges. For other management, harvesting, storage and other items, refer to the greenhouse ground-planting section.
Click to get more aloe cultivation methods
Click to get more flower cultivation techniques