Quail hatchability affects farming profitability, so how can it be effectively improved?
Quail hatchability directly affects the utilization rate of hatching eggs, the health of quail chicks during the brooding period, and their future production performance. To improve quail hatchability, the following measures should be taken.
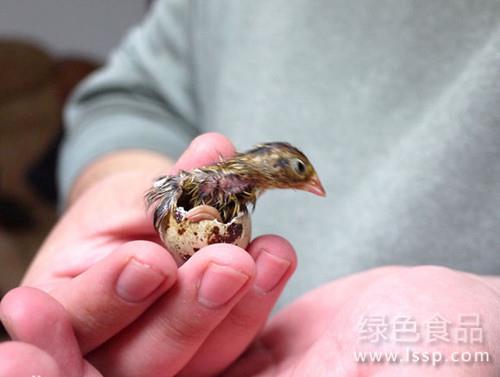
Quail hatching
1. Hatching eggs. Hatching eggs must be fresh and clean, and the shorter the time the better, preferably within 1 week after laying, with 3—5 days being best. After more than two weeks, hatchability declines, and the quail chicks are weak in constitution. Quail eggs should be moderate in size and shape; remove those that are too small or too large, rough "sand-shell eggs," and hard "steel-shell eggs." A relatively thin eggshell is not only fragile, but also allows rapid evaporation of moisture inside the egg, disrupting normal material metabolism and hindering improvement of hatchability.
2. Incubation room. It should be well insulated, easy to ventilate, clean and hygienic, and quiet. If an ordinary electric incubator is used, the effect is even better. Before setting eggs, fumigate and disinfect the incubation room and incubator: use 5.5 grams of potassium permanganate and 11 tons of formalin per cubic meter. First place the potassium permanganate in a ceramic dish, then pour in the formalin, which immediately produces smoke. Quickly close doors and windows, and after half an hour, open the door to let the mist disperse. This thoroughly disinfects all cracks and corners, improving the rate of healthy chicks and hatch-out rate.
3. Temperature. Temperature is an important factor in quail hatching, determining embryonic growth and development and productivity, and controlling temperature is the primary condition for improving hatchability. For whole-batch incubation, the method of "high at the front, level in the middle, low at the back" can be used for temperature supply. In the early stage (1—6 days), the temperature is 38°C; in the middle stage (7—14 days), 37.8°C; and in the late stage (15—17 days), 37.7°C. For batch incubation, the principle of "level at the front, low at the back" is adopted. If 1 batch is set every 5 days, then after the first batch is set, use 38°C; on the 6th day, that is, after the second batch is set, adjust to 37.8°C, and the same temperature is used after several more batches are set. After moving to the hatcher on day 15, use 37.7°C.
4. Humidity. The humidity of the incubator should be 50—55%. When hatching begins, the humidity should be slightly higher than usual. Humidity must not be too high, otherwise it will cause quail to lack oxygen and suffocate. If humidity is too low, the chicks will have short down and be dry and thin, and will easily stick to the eggshell, making it difficult to break the shell.
5. Ventilation. During incubation, the air inside the machine must be kept fresh, the air speed normal, the size and position of the ventilation holes appropriate, and the fan speed must not be too slow or too fast.
6. Turning eggs. When hatching quail, number the quail eggs of the same batch and period, with the blunt end facing up, to keep the air cell in a normal position and reduce malpositions. Turn the eggs 12 times a day. On days 4—5 and 10—12 of incubation, candle the eggs once each time, and remove infertile eggs and dead embryo eggs.
7. Hatch-out management. On the 15th day of incubation, move the quail eggs on the incubator rack into the hatcher. Increase humidity, lower temperature, and prepare for hatching. During the hatch-out period, depending on the hatching situation, pick out empty shell eggs and quail chicks whose down has already dried, so as to facilitate continued hatching and improve hatchability.