How to remove leaf spots from Cymbidium orchid leaves?
Methods for removing leaf spots from Cymbidium orchid leaves
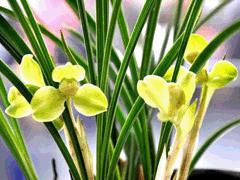 Large-floweredCymbidiumDuring the growth process, if thecultivationenvironment is unsuitable, with poor ventilation, insufficient light, improper air humidity, or the spread of pathogens in the surrounding environment, it is prone to infection by diseases such as leaf spot, anthracnose or leaf blight. In addition to chemical control, promptly removing the diseased spot areas to stop them from spreading further within the plant is very important. This is also an important part of maintaining the overall form of the large-floweredCymbidium.
Cutting out the diseased spots on the leaves is not a complicated operation, but it must be carried out carefully and conscientiously according to the operating procedures.
For large-floweredCymbidiumcultivated outdoors insummer, when cutting out disease, avoid rainy weather and mornings when the dew has not yet dried. It is best to do it on a sunny morning until before four in the afternoon. For those cultivated ingreenhouses, avoid operating before and after watering or misting for humidification, so that pathogens do not spread with the water.
Both double-edged blades and single-edged blades can be used as tools, but single-edged blades are better. A single-edged paper-cutting blade about 10 cm long is best. When using it, wrap the lower hand-held part with adhesive tape to avoid cutting your hand. The blade edge must be sharp, and it is generally replaced once every 5-7 days. A dulled blade may tear the leaves or form jagged wounds, so it should be replaced at any time when necessary.
When cutting diseased leaves, the blade should be dipped in fungicide. You can use 1000-fold Dacotech, carbendazim, or a targeted agent prepared according to the type of disease. Most fungicides are wettable powders, and will precipitate if left standing too long, so the container should be shaken frequently. The agent should be placed in a cup-shaped container with a small mouth and a large bottom and good stability.
With both hands, slowly comb upward from the base of the plant, and check both the front and back to inspect the distribution of diseased leaves on the whole plant. Some diseased spots are not obvious on the upper surface of the leaf but are obvious on the lower surface, so take care not to miss them. Make the cut 1.5-2.0 cm away from the diseased part, but there is no need to treat diseased parts that already show a tendency to heal. During the operation, hold the main vein of the leaf and grip it tightly; only when it is gripped tightly will the blade not slip. Cut quickly from the edge of the upper surface of the leaf so that the cut area is minimized; a slanted cut has a large area, so avoid cutting horizontally from the lower surface or the back of the leaf, which will cause a "peeling" phenomenon and leave a thin layer of epidermis; if you pinch the leaf edge with your hand, the pinched part is not easy to cut off.
When cutting diseased leaves, promptly remove scattered diseased leaves, dead leaves and old leaves that no longer carry out photosynthesis.
After cutting 3-4 leaves and after cutting one plant, replace the blade. Put Z blades in the container and use them in turn to ensure each blade is fully disinfected. Incomplete disinfection of the blades will cause cross-infection between plants, and pathogens will spread faster.
The diseased leaves that are cut off should be centrally handled on the same day they are cut; they can be centrally buried, and must not be thrown away anywhere. Otherwise, rain and wind will accelerate the spread of the pathogen. (Pang Pang)