Detailed explanation of the correct methods and techniques for repotting orchids
Orchid repotting techniques
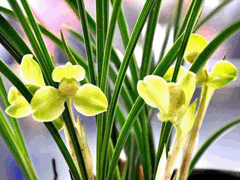 PottedOrchidsBecause they are limited by the pot,orchidsgrow year after year, and the soil nutrients are completely depleted. The root system becomes too dense and the plants too numerous, making it very difficult to grow luxuriantly again, and at the same time it is unsightly. To promote better growth and reproduction, the pot must be changed and the soil replaced, or division must be carried out.
Repotting can be done in spring, autumn, and winter of the year, as long as intense heat and freezing are avoided. The most appropriate time is after "Spring Equinox" and before "Start of Summer"; or after "Autumn Equinox" and before "Start of Winter".
The repotting method is basically the same as the division method. Before repotting, first lift off the Selaginella uncinata on the surface of the pot together with its soil and set it aside. Then invert the orchid pot, with two fingers of one hand clamping the base of the leaf cluster and supporting the soil mass, and the thumb resting on the rim of the pot, while the fingers of the other hand tap lightly along the edge of the pot. After the soil mass and pot have loosened, separate them from the soil mass and place them flat or on their side on the worktable, and break apart the soil mass. If the root system is tightly tangled and the soil mass is difficult to break apart, use a blunt-tipped bamboo skewer or another suitable tool to carefully remove the soil layer. Then choose a pot of suitable height and size, cover the bottom hole with two pieces of clam shell with the convex sides facing up and placed parallel, then use another two pieces overlapped in the same way in the opposite direction, building up to a certain height to form a cone (about 1/4 of the whole pot in height, and at most not exceeding 1/3 of the pot's depth). Then pour in coarse soil particles, about 1 cm thick, and on top add some fine soil particles like soybeans until the clam shells are covered. Then fill in fine soil (the depth can be determined according to the length of the root system and the vigor of the roots), then place the washed and air-dried root system down along the direction of growth, spreading it evenly and seating it on the conical soil mound. At this point, hold the orchid roots steady with one hand, and use a soil trowel to gradually add soil with the other; after it is full, press the soil firmly along the root system with your fingers so that the roots do not become trapped. After pressing firmly, use a horn scraper or a flexible bamboo strip, steel strip, etc., to press inward along the pot rim to form the desired pot surface shape. Then evenly lay the Selaginella uncinata with soil, and sprinkle a little sparse fine soil on its surface, then press lightly and firmly. Next, use a long-necked fine-spout watering can to trim the pot surface while watering until it is thoroughly wet. After the water has drained, maintain it for more than ten days, and only when the tender tips of the Selaginella uncinata on the pot surface show new growth and are verdant and upright may it be moved onto the orchid stand.
Lin Qingde, Mu Wei