How to care for Cymbidium orchids after flowering? Detailed guide to the key care points
Cymbidium orchid care after flowering
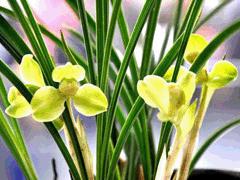 Large-floweredCymbidiumAfter it finishes flowering, it is very difficult for a home or an ordinary workplace to get it to bloom again. The author is located in the Jining area of Shandong, and through experiments in recent years, has mastered its growth patterns in the course of care and gotten it to bloom again.
Materials to prepare: a plastic flower pot (20 cm x 24 cm) or any pot a bit larger than the original one, a small electric drill with a 0.7 cm diameter bit, and an appropriate amount of fermented chunk bark and sawdust. The Cymbidium orchids generally bought from the market come in tall black pots (15 cm x 20 cm). After flowering, cut off the flower stalk from the base, repot into a slightly larger plastic flower pot, drill holes around the sides of the pot with the electric drill, with the holes arranged in a staggered triangular pattern and spaced 5 cm apart; first put a layer of chunk bark the size of a fingernail in the bottom of the pot, then spread a layer of rotted sawdust. After taking the plant out of the original pot, do not disturb any of the roots, because the roots are too dense and interwoven, so as to avoid breaking or damaging them. After setting the plant upright, fill in a mixture of half sawdust and half chunk bark around the roots; to prevent gaps, gently poke through it with a small stick, add some more, and shake gently. After potting, place it in half shade and water it the next day; when watering, do not pour from above, but use the bottom-soaking method: put it into a larger basin and let it absorb water automatically from the bottom until the surface is moist. Throughout the entire subsequent growing period, use the bottom-soaking method for both watering and fertilizing. This achieves a balance of water and fertilizer. One week after repotting, spray with a fungicide once.
Care and management: In spring, if many shoots sprout, keep about 3 and remove all the rest; place it in a sunny spot. To create a humid growing space, spread a layer of sand about 4 cm thick around the flower pot, with an area of 50 cm x 80 cm per plant being suitable; keep the sand moist at ordinary times, pay attention to ventilation, and when watering, remember to keep it on the dry side rather than wet. Every half month, apply a 1% compound fertilizer solution using the bottom-soaking method. In summer, shade it in good time, using 50% shade netting, pause fertilizing, strengthen ventilation, and when the temperature is high, increase misting. After the weather turns cool in autumn, strengthen fertilizer and water management, applying a 2% monopotassium phosphate solution every ten days, and foliar feeding can also be used along with it. Generally by mid-to-late November new shoots can be seen emerging; at this time there are two kinds of shoots, flower shoots and leaf shoots. Flower shoots are wide and thick, leaf shoots pointed and thin; the leaf shoots can be removed to control vegetative growth. After flower shoots appear, the temperature can be kept between 10°C and 26°C, and continue applying the monopotassium phosphate solution. When the flower spike has pushed up and the buds are about to open, tie it to a support stake, and then you can get ready to enjoy the flowers.
The main diseases of Cymbidium orchids are root rot, anthracnose and leaf spot, and the common pest is scale insects. During the growing period, observe frequently so that problems are found and treated promptly, but mainly rely on prevention.