A Detailed Guide to Growing Orchids in Pots at Home
How to Grow Potted Orchids at Home
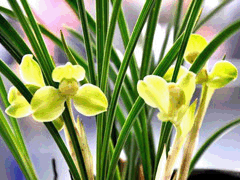 For the potting soil, generally use the mountain soil sold on the market, and black mountain soil is even better. If you use homemade potting soil, add 1/3 sand and mix evenly. Use a clay pot, and the hole in the bottom of the pot should be somewhat larger. After 1-2 years, switch to a purple clay pot, and the bottom of the pot should preferably have three or four holes. When potting, first place a piece of green gauze over the hole in the bottom of the pot (to prevent ants and others from burrowing in and making nests), then place 2-3 pieces of broken pot shards at a slant, and finally spread on wood charcoal or crushed coal cinder to a thickness of 1/3 of the pot's height. Next, spread on a layer of crushed soil granules, add mountain soil, and then put theorchidinto the pot and hold it upright so the root system spreads out. At this point, water thoroughly, place it in a warm, shaded spot for 15-20 days, and afterward move it to routine care.
2The environment where potted orchids are placed must be chosen well. First, it should face south or east; second, the surroundings should be open and the humidity high; third, place them on wooden racks or cement boards, and do not put them on the ground.
3During the high temperatures of summer, protect them from direct sunlight. In early spring, late autumn and winter, a certain amount of light is needed. When thunderstorms or heavy rain occur, prevent the potting soil from becoming too wet, so as to avoid root rot. Potted orchids should be watered frequently, following the rule of "do not water when not dry, water when dry, alternating dry and moist."
4When fertilizing orchids, adopt the principle of light fertilizer applied frequently, and absolutely avoid applying concentrated fertilizer or unfermented raw fertilizer.
5For potted orchids, promptly cut off dead leaves or diseased leaves to keep the plant shape attractive. Branches and leaves that grow poorly should be removed in time, so as to avoid consuming nutrients and affecting plant growth.
6Potted orchids should be protected against freezing. Before freezing, move them indoors, and keep the room temperature at 1-2°C, and they can overwinter safely.
How to Divide Clumps
OrchidFlower'spropagation uses the division method. When there are too many or too dense clumps in the pot, affecting further growth, they can be divided. Division is suitable in spring and autumn, once every 2-3 years or 3-4 years. Division should be done when the potting soil is slightly dry. First dig the whole plant out of the pot, remove the soil between the roots, wash clean with clear water and air-dry for 2-3 hours, cut off rotten roots, cut with a sharp knife at the pseudobulb, gently pat the "root net" loose, straighten the root fibers, follow the grain of the root system, then cut or pull it apart, without damaging the tender roots.
When dividing, generally 3-5 clumps make one pot, planted in a triangular or net-like pattern.
How to Choose and Buy
Around the Spring Festival, orchids are often available on the flower market, and at this timeCymbidium goeringiialready has flower buds, and some root systems are wrapped with Selaginella uncinata, with exposed roots. When choosing, pick those with glossy, deep green leaves, fresh, tender and robust fleshy root systems, and upright flower buds. Such orchids have strong vitality and, after potting, are easy to grow and develop and can bloom. If the leaves are withered and yellow, the root system shriveled, and the flower buds drooping, then the survival rate is low, or they cannot bloom after planting.