How to grow orchids hydroponically? A detailed guide to hydroponic flower care techniques
Hydroponic orchid care techniques_Hydroponic flowers
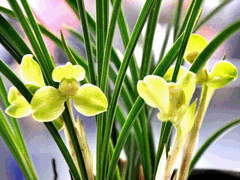 OrchidsHydroponics is a method that does not use soil or othergrowingmedia, but instead places orchid roots directly in water containing a nutrient solution to grow. It is a new type ofcultivationmethod that has changed traditionalorchid growingwhich relies on soil planting, and has rewritten theorchidclaim that orchids dislike moisture. Because roots absorb nutrients more evenly in water than in media, the plants grow more robustly, produce more seedlings, and have better quality. The specific method fororchidhydroponic cultivation is described below:
Hydroponic orchid growing is simple, easy to learn, and easy to master. It is mainly divided into six steps:
1. Choose a dedicated hydroponic flowerpot. For hydroponicorchid growinguse a dedicated hydroponic flowerpot with no hole at the bottom and a double-layer inner and outer mesh nested-pot design (water capacity between 1.5 kg and 6 kg). The outer pot holds the nutrient solution, and the inner pot is a square mesh screen with a mesh opening size of 2cm x 2cm. The ribs between the mesh openings support the pseudobulbs and hold the fixed material for the orchid plant, such as gravel or sponge.
2. Transplant the orchid plant. Pull up the orchid plant grown in soil, remove rotten roots and old roots. If there are too many roots to insert conveniently into the inner screen, use scissors to cut off some roots close to the pseudobulb, then rinse the mud and dirt sticking to the roots clean with clear water.
3. Disinfect. Before planting into the hydroponic pot, it is best to disinfect once. Use potassium permanganate at 100PPm, immerse the whole plant in the potassium permanganate solution for 10-15 minutes, then take it out and rinse off the potassium permanganate solution with clear water.
4. Plant into the hydroponic pot. Divide the roots into two to three groups and insert them into two to three mesh holes. Use your hand to pull the roots that have passed through the mesh holes slightly, so that the pseudobulb fits tightly against the central cross-shaped ribs between the mesh holes.
5. Secure the orchid. Use one hand to hold the orchid plant upright, and with the other hand place cleaned stones of 3cm x 5cm specification (used for pouring cement floors) around the plant to fill the inner screen, then shake it slightly, and the orchid plant will be fixed in the center of the inner screen (sponge can also be used as the fixing material for the orchid plant).
6. Add the nutrient solution. Use clear water once again to rinse the fixing stones clean. Fill the outer pot with clear water (drinking water can be used as planting water), and put orchid nutrient solution into the water (Meihui brand hydroponic orchid nutrient solution). In this way, the transplanting work is completed.