How to grow orchids? Basic methods for beginners to grow orchids
Basic methods for beginners to grow orchids...
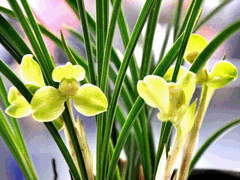 OrchidsFor the divided orchid clumps, do not split them too thinly; each clump should have at least 3-5 shoots, and it is best to keep one-year-old plants, two-year-old plants and three-year-old plants in the same clump.
1Pot lining
Cover the drainage hole at the bottom of the pot with a piece of tile, then gradually fill with bricks, tiles or shells, filling the large gaps with mud granules or pea gravel, generally to about 1/2-1/3 of the pot's internal height. The remaining clear height above is about 10-15 cm, reserved for the growing medium layer. Its specific height should be based on the orchidflower'sspecies and the length of the orchid roots and the height of the pot. Do not fill the bedding material too densely or too solidly; some pores should be retained. Practice has proven that some new roots can grow well in the pores of the bedding layer.
2Planting
On the bedding layer, first fill in 2-3 cm of growing medium, press it slightly firm with your hand, then place the orchid upright on top of it. Depending on the size of the plant and the pot, you can plant several single plants, 2 clumps, 3 clumps or more clumps in one pot. 3 clumps are best planted in a tripod arrangement. 4 clumps can be planted in a square, and 5 clumps in a plum-blossom shape. The orchid roots should spread out naturally, and the leaves should drape in all directions. Slowly place the orchid roots into the pot so that the roots spread out naturally and touch and scrape the inner wall of the pot as little as possible. After the orchid plant is in the pot, gradually fix the posture of the plant. For one clump per pot, the old pseudobulbs should be positioned to one side, leaving room for new shoots to develop. For several clumps per pot, the old pseudobulbs of each clump should be gathered relatively toward the middle of the pot, so that new roots and new shoots developing outward each have enough space.
3Filling with soil
When planting, hold the leaves with one hand and add nutrient soil with the other, hold the base of the orchid plant and lift it slightly upward to spread out the root system, while shaking the orchid pot. Let the growing medium work its way deep into the root zone; continue adding soil and shake the orchid pot to adjust the position and height of the plant. Press with your hand along the edge of the pot, but never too hard or you will damage the roots; continue adding soil and pressing until the soil surface is 2-3 cm above the pot rim, slightly in a steamed-bun shape. The growing medium should cover all the orchid roots, burying up to the base of the pseudobulbs. As for the depth of filling soil, tradition holds that:Cymbidium goeringiishould be planted shallow, and Cymbidium faberi should be planted deep, but generally the depth should not bury the leaf base on the pseudobulb. When newly sprouted orchids grow in the wild, the plants retain clear markers above and below the soil surface, and these markers can be used as the standard. The size of the pot should also match the size and number of the plants; do not use a large pot for a small and few plants, nor a small pot for large and many plants. Generally, the number of plants should be such that the pot is just filled after an estimated 2-3 years. The size of the plant should match the height of the pot. This is both good for growth and meets ornamental requirements.
4Top dressing
After planting is complete, you can spread a layer of small gravel or green moss on the surface of the pot soil, preferably high-quality moss from under the forest. It is both attractive and can regulate moisture, and can also protect the leaf surface from being polluted by muddy water; new shoots will not rot at the core from being infected by pathogens in the soil. In addition, it can also reduce the washing away of the pot soil by rain and keep the pot soil loose.
5Watering
After planting is complete, you can give the first watering a few days later; the pot soil must be thoroughly soaked, the water droplets should be fine, and the force should not be strong. If placed in a water basin to soak, never soak for too long. Once the pot soil is soaked, immediately take the orchid pot out, then move it to a shaded place for care.