Orchid Photography Tips: Easily Take Beautiful Photos
I. Be Fully Prepared
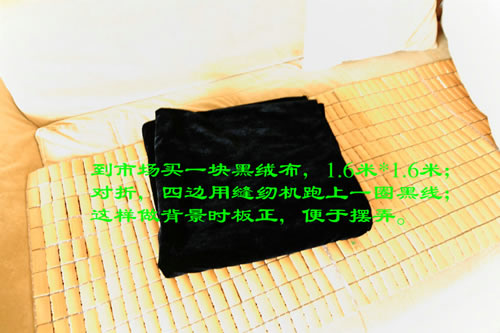
Either a digital SLR camera or a compact camera will do. A lens with an equivalent focal range of 28-200 mm is preferable. Also prepare a tripod or monopod, a shutter release cable, a small spray bottle (to create artificial dew drops when conditions permit), several background boards of various colors in suitable sizes, a small reflector, and so on.
II. Go Early
For photographing orchids, the opening day of the flower show or the following morning is the best time. First, the orchids on display have all been carefully selected, trimmed, and rested overnight, so the flower centers are full of vitality, and the photos come out full of energy. Second, the orchids are less affected by indoor light sources and have high freshness. If you photograph too late, due to the growth period and human factors, quite a number of orchids will wither ahead of time, and their graceful beauty will be gone.
III. Choose a Comprehensive Viewpoint
The viewpoint determines the photographer's approach and habits. After entering the exhibition hall, observe the orchids you want to shoot from multiple angles to present the orchids' graceful posture from the best perspective. A frontal viewpoint can fully present a single orchid plant (or a pot of orchids); a side viewpoint can better reproduce the texture and liveliness of the orchids; if there is backlighting to set them off, you can choose a high-angle shot to enhance the orchids' sense of translucency, and choosing a low-angle shot can also show the veins and outlines of the orchids.
IV. Be Particular About Lighting
Lighting is the key and soul of orchid photography. Under front lighting, the orchids receive even light and the resulting photos have bright tones, but lack a sense of layering. Backlighting can beautifully express the texture and transparency of the flowers and is very distinctive. Side lighting can both highlight the veins and outlines of the orchids and show a good sense of three-dimensionality; it is vivid and full of charm, and is the preferred lighting for many photographers when shooting orchids. Choosing a display position near a door or window to photograph orchids is a wise move, as this results in high image quality, good color saturation, and fresh, delicate images. If you use macro flash to shoot orchid close-ups, the background will turn dark. Avoid shooting at display stands with extremely strong light, as the contrast will be too great and the orchids will look harsh.
V. Exposure Must Be Accurate
Since the exhibition hall has many light sources, the camera's automatic metering often has deviations. At this time, flexibly use exposure compensation according to the on-site conditions, or use exposure bracketing.
VI. Understand Your Settings
I once met a photographer friend who had just started using a digital SLR. His orchid photos were always blurry, and it turned out he was using shutter priority at 1/15 sec, a speed that is very difficult for beginners to hand-hold and shoot clearly. Therefore, camera parameter settings are very important for photographing orchids. When the light is dim, you can appropriately increase the ISO; for DSLRs it can go up to ISO 800, and for compact cameras use at most ISO 400; when the shutter speed is lower than 1/60 sec, it is best to use a tripod (or monopod) with a shutter release cable to prevent camera shake; at indoor orchid shows, many display stands do not allow the use of background boards (cloth), so in that case you can only blur the background by setting a large aperture. For beginner photographers, setting the exposure mode to Auto will, in most cases, also produce satisfactory orchid photos.
VII. Keep the Composition Simple
A good flower still needs green leaves to set it off, and the pairing of primary and secondary elements requires care. Without a proper background to set it off, even the best orchid photo will appear bland. In indoor shooting, the vast majority of photographers use a close-up approach to composition, so that the petal shape, column, lip, and other detailed features of the orchid, as well as its noble, elegant, and understated temperament, are fully expressed. Therefore, the composition should be simple, with a moderate size and overall beauty, striving to make the main subject bright and gorgeous while the secondary elements gradually recede and blur, and keeping the image as stable as possible. At the same time, also handle well the relationships between flower and flower, flower and bud, flower and leaf, flower and visitor, and foreground and background, so that they echo one another without the secondary overshadowing the primary, letting people feel the orchid's quality of being pure and refined on the outside and detached and tranquil within. Composition should also prevent the situations of flowers being too small, details being unclear, and the main subject not standing out.