How to handle old pseudobulbs of orchids? Learn the correct method
Orchid old pseudobulbs generally refer to old orchid corms that have roots but no leaves, leaves but no roots, or neither roots nor leaves. These corms are mostly removed when repotting and would originally be discarded, but for more valuable orchids, the old pseudobulbs may as well be put to use, so that the dormant buds still present on the old pseudobulbs can sprout again, thereby cultivating new orchid plants. This is also a method of increasing the orchid sprouting rate.
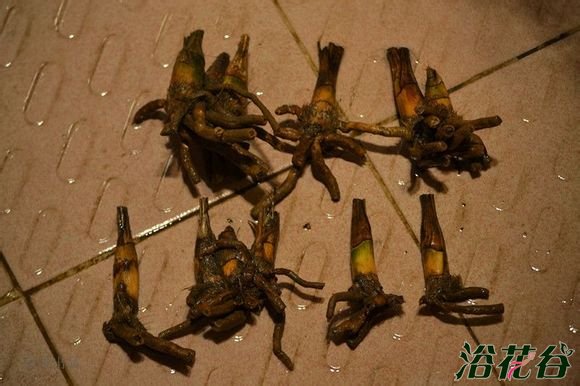
Specific method:
1. Timing: carry it out in late spring and early summer, when the daytime temperature is stably above 15oC.
2. Trim the old pseudobulbs. After removing unhealthy pseudobulbs, keep 2—3 pseudobulbs as a clump, trim off rotten roots and withered leaves, and take care not to damage the bud eyes.
3. Soak for disinfection: place the old pseudobulbs in a 1000-fold diluted thiophanate-methyl solution and soak for 10 minutes, then take them out and let them dry.
4. Drop diluted sprouting agent onto the corms, let them dry, and set them aside for planting.
5. Soak disinfected sphagnum moss in a root-promoting solution, and wrap the old pseudobulbs with it.
6. Place them into a pot, fill the surrounding area with Kanuma soil, and bury the corms 1-2 cm deep, then place them in a cool, ventilated place for care.
7. Water normally, do not let them become excessively dry or wet, and do not apply fertilizer. After 20 days, new buds can be seen stirring. Some may sprout a little later, so be patient and wait.
8. After the new buds open leaves, they can be placed in a ventilated and bright place and gradually receive light. Do not fertilize at the roots; foliar fertilizer may be applied, preferably diluted, thin, and light, otherwise it will burn the new roots and new leaves, and the loss will outweigh the gain, wasting all previous efforts.
9. In the spring of the following year, take out the orchid plants, remove the withered and rotten old corms, and they can be cultivated and managed normally like other orchid plants.
It must be explained that the orchid plants obtained by this method are ultimately small seedlings and weak grass, and this method is only suitable for propagation of valuable orchids for seed preservation. For ordinary orchids, there is no need to go to such great lengths.