Illustrated Tutorial for Potting Wind Orchids (Vanda falcata) in Sphagnum Moss Bonsai
Wind orchids have gradually become popular for being compact, easy to grow, and fragrant. In particular, wind orchid bonsai are generally made with sphagnum moss. This article is a hobbyist's potting guide, and also includes some wind orchid care methods, which are very helpful to hobbyists.
Wind orchids grow on tree trunks in the mountains or in moss clumps in well-positioned spots at cliff edges, often growing together with mosses and other plants. They are completely epiphytic orchids. After being collected from the mountains and cultivated, they must be grown according to their growth characteristics. The main growing methods include: attaching to tree trunks, attaching to bark, attaching to tree fern, attaching to stones, and other attachment cultivation methods, as well as potting in sphagnum moss. In the early stage of epiphytic cultivation, the wind orchid needs to be fixed in place, and materials such as sphagnum moss also need to be placed over the roots, especially when attaching to stones, to help new roots grow. When the roots of wind orchids grow, they have the ability to cling to the attachment surface. Once the new roots have naturally attached, the wires and other materials fixing the wind orchid can be removed, and the sphagnum moss covering the roots to encourage rooting can also be removed. Attachment cultivation can be used to create works such as wind orchid bonsai, and the overall effect looks very good. However, for mass propagation of wind orchids, the method of potting in sphagnum moss is generally used. Growing them potted in sphagnum moss is good for division and transplanting, and is also convenient for carrying and transport. Wind orchid cultivation in sphagnum moss requires basic items such as special wind orchid pots, sphagnum moss frames, and relatively long sphagnum moss. As for pots, because wind orchids are not yet widespread in China, there are very few manufacturers making them. Wind orchids are more popular in South Korea, so Korean-style wind orchid pots are now mostly the first choice. The sphagnum moss frames are also imported from South Korea; they are plastic products, similar to the drainage covers we use when growing orchids. The sphagnum moss must be relatively long, because it needs to be wrapped around the wind orchid roots; this is a necessary item.
Potting process:
1. Prepare the pot, frame, sphagnum moss, and the base inside the frame (this needs to be specially made, with the base post matching the inside of the frame; I whittled one myself from a piece of wood). The pot generally has an inner diameter of 7-8 cm and a height of 7-8 cm, and there are slightly larger or smaller ones. The one below is a plain pot. High-grade, exquisite wind orchid pots have hand-painted dragons, phoenixes, patterns, etc. on the outside, or openwork, and are outlined in gold, so they are relatively expensive.
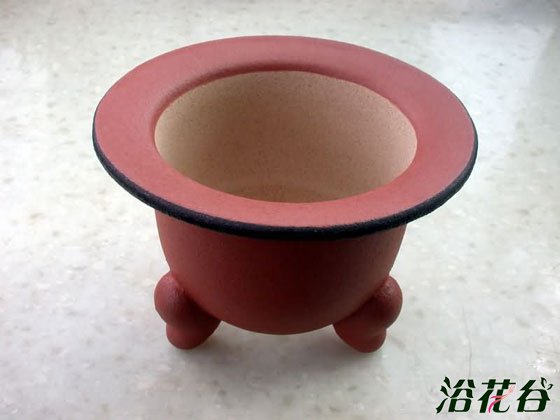
2. Soak the sphagnum moss in water to loosen it. Sphagnum moss is water moss. Commercial sphagnum moss has been sterilized at high temperature, dried, and formed, and comes in slab form and bagged form. The better long sphagnum moss is all produced in New Zealand. After the sphagnum moss is softened, pick out the longer strands and line them up.
3. Evenly spread the shorter pieces of sphagnum moss that were picked out over the outside of the frame, then squeeze out the water with both hands (the main purpose of the base is to provide support inside the frame when squeezing the moss, so the frame will not be crushed flat), and the sphagnum moss will adhere to the frame.
4. Place the wind orchid on the frame covered with sphagnum moss, and spread the roots around it.
5. Take the long strands of sphagnum moss that stick out, with the middle high and the two ends downward, and evenly wrap the roots.
6. After the wind orchid is fixed on the frame, take the whole frame out of the base and put it into the wind orchid pot. After adjusting the height and straightness of the frame, tuck the two ends of the sphagnum moss wrapping the roots into the space between the frame and the inner wall of the pot. Then take long strands of sphagnum moss one by one, with the middle high and the two ends downward, and tuck them into the space between the frame and the inner wall of the pot. When tucking in the two ends of the sphagnum moss, a thin plastic sheet can be used. When wrapping the outside with sphagnum moss, keep the direction consistent, so it looks beautiful.
Other hobbyists' wind orchid bonsai: