How to repot Oncidium? Detailed step-by-step guide with pictures
The Oncidium repotting in this article was translated by Congyou Banmian of Photosynthesis (WeChat ID) from the records of a Japanese grower (Yuhua Jiang's grandfather). The Oncidium in this article is potted on a balcony, placed in a bright shaded spot. Together with the repotting photos and text, it will be very helpful for beginner growers to understand Oncidium repotting.
ps: The blooming period of Oncidium is generally from December to March of the following year. Repotting is generally done after flowering. For plants that have not bloomed, it can be done before the growing period.
1. Prepare the basket for repotting
A new basket for repotting was prepared, size (10*12.5cm), with a relatively deep bottom, so foam plastic was used to fill it halfway up. Roots grow better in a shallow pot. Repotting was done on April 10. Roots that are often exposed to air and kept in a dry state will grow better.
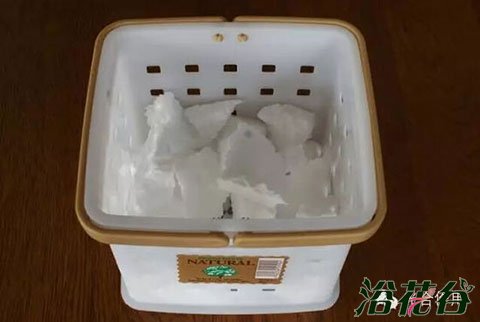
2. Plant loosely in the vertical direction
Plant with sphagnum moss, pack it tightly around the sides, but leave it loose and soft in the vertical direction. The lower half of the basket is all foam plastic. Old sphagnum moss and rotten roots should be carefully removed.
3. Hang it under the shade netThis time, the original plant was divided into 3 parts during repotting, increasing to 3 pots of the same size, hung under the shade net. It will be cared for in this state for the next few years. The reason for dividing was that the pseudobulbs had grown very crowded, which is not good for the growth of new shoots. From April to October, it is hung outdoors under the shade net.
4. New shoots appeared
Repotted on April 10, new shoots began to emerge on April 25. Everything is going smoothly! Next, it needs watering every day. Although watered every day, the basket is always in a dry state. Indoors, a place where sunlight can come through the window is ideal. When black spots appear on the leaves, cut them off immediately or apply medicine, as it is contagious. Fertilizer is only used in April, May, June and July, with Hyponex diluted 2000 times, applied once every 2 weeks.
5. The new pseudobulbs are basically completeOn August 19, the new shoots grew smoothly, and the pseudobulbs are almost complete.
6. Flower buds have emerged
On October 04, flower buds kept growing out. If it continues this smoothly, it should start blooming around the end of the year.
On October 16, a typhoon struck, so it was moved indoors while there was a chance. From today, it will be managed indoors. Indoors, water once a week.
※Indoors, a place where sunlight can come through the window is ideal.
※When black spots appear on the leaves, cut them off immediately or apply medicine, as it is contagious.