How to pot orchids? Illustrated step-by-step guide that anyone can follow
Many orchid growers buy their seedlings online, or they are repotting, so how to pot an orchid is naturally something to pay attention to. Nowadays more and more orchid growers do not like reading text and prefer illustrated guides, and it just so happens that one orchid grower demonstrated the process of cultivating orchids, which is very worth saving for flower growers.
Because of factors such as environment, temperature and humidity, there is no one-size-fits-all approach, and the potting mix must also be selected and blended according to various factors. To grow orchids well, cultivation comes first, and watering (water quality) is also an important part.
1. Take the orchid out of its pot (this step can be skipped for online purchases), cut off rotten roots, and separate the old seedlings to make use of them.
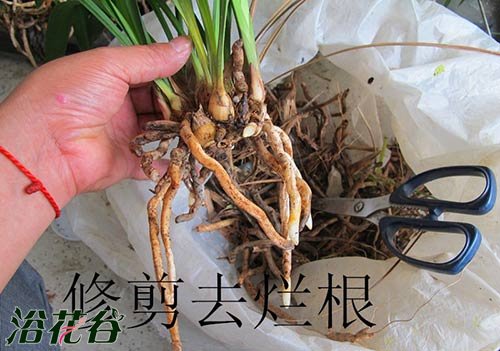
2. If conditions allow, treat the wounds on the orchid roots with a chemical agent, then sterilize and disinfect them, and let them dry in a cool, ventilated place.
3. Wait until the orchid roots become soft and white, then you can begin potting.
4. Growing media vary from grower to grower; you can blend them according to your local climate or your own habits. The author's medium is mainly pine bark, supplemented with xian soil, planting stone, peanut shells, etc.
5. Choose the pot size according to the size of the orchid's base, then put a layer at the bottom of the pot (the purpose is air and water permeability; foam is used for this).
6. Then just water it in to settle the roots.