1.5m Planted Aquarium Aquascape: Take In the Beauty of a World Natural Heritage Site
Introduction: The tank featured today is a 150cmx60cmx60cm ultra-clear glass aquarium, used to express the intended aquascape. After seeing photos of the natural landscape of Yakushima on the internet, the aquascaper wanted to bring that sense of nature into the home... and 150cm is big enough to assemble the wood in a way that expresses the desired lines and sense of strength.
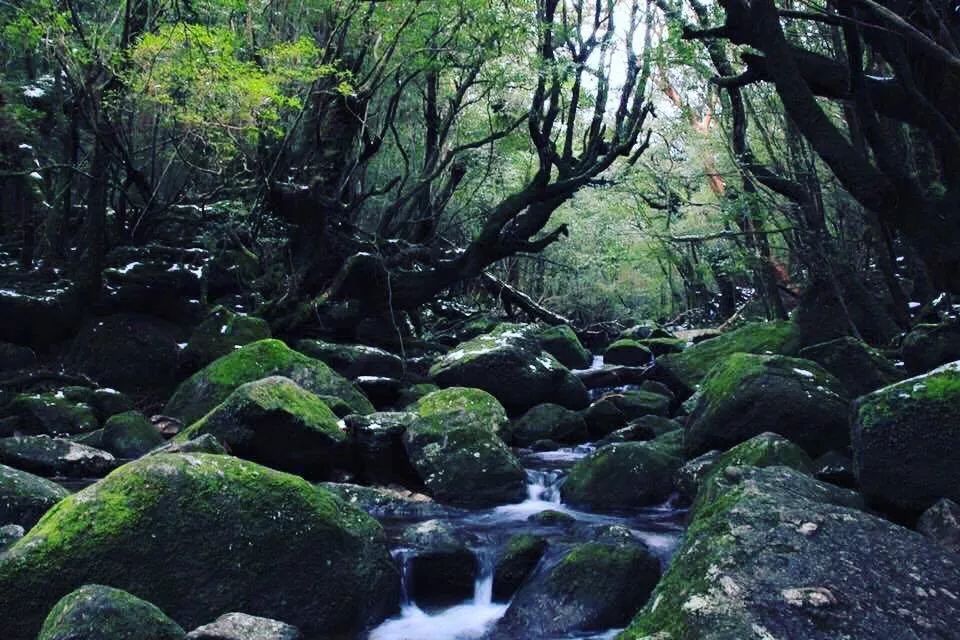
The tank featured today is a 150cmx60cmx60cm ultra-clear glass aquarium, used to express the intended aquascape. After seeing photos of the natural landscape of Yakushima on the internet, the aquascaper wanted to bring that sense of nature into the home... and 150cm is big enough to assemble the wood in a way that expresses the desired lines and sense of strength.
At the start, a thin layer of soil is spread on the bottom of the tank to prevent the glass from being cracked when the stones are placed. Then, after deciding on the intended placement of the large main trunk pieces, large stones are propped underneath so the wood as a whole will not collapse. Once the main trunk is set, just as when arranging a stone aquascape, you build up the overall structure following the pattern of main stone, secondary stone and accent stone, then make adjustments.
Once it has been adjusted to roughly the desired look, top up the background and any spots that need more soil up to the required line. Remember, the horizon must be level, otherwise the center of gravity will not be stable. And when adding soil, always observe the filling from the front. That way you will not keep adding more and more. During this period you can finalize your hardscape plan before proceeding to the step of adding water, so that after the water goes in, adjusting things does not cause a landslide or throw the overall composition off balance, which would be pointless.
Because a large amount of wood is placed, it will cause the problem of tannin discoloration. So usually, after the water is added, no aquatic plants are planted at first. For the first week, change 100 percent of the water almost every day; once the water is stable and the discoloration is no longer serious, add some nitrifying bacteria as appropriate to quickly cultivate the whole aquarium system. Then you can take a photo and upload it to MS Paint, and color in your hardscape however you like, and once you have decided on the coloring positions.
Then, based on your aquatic plants' colors and sizes, plan the positions you have colored in. When planting some mosses and aquatic plants, you can use aquatic plant instant glue to attach the plants, making aquascaping easier and simpler.
After the initial plant arrangement is done, observe how the plants are settling in and gradually trim and fine-tune. Then the small details of the forest can gradually be brought out. Look more at the tiny details in nature, and you will find that in nature light determines the direction in which plants grow. Adjust your details, but remember that sometimes, rather than placing too much, it is better to reduce appropriately. That way the work will not lose its theme.
Three months later, take the first photo of the finished scape. Perhaps some flaws cannot be identified at the moment, but when you look at your work from a year earlier after another year, you will discover what needs improving, or perhaps what could have been done better.
Aquatic plants and aquascaping can not only bring together people who share the same hobby, but also calm your mind and make you more patient. Go out into nature more, and get to know the beautiful appearance of this natural world. Love this planet, so that our descendants can also taste this spiritual feast that nature gives us.
There is also a surprise here
For more professional agricultural science and technology information, please scan the QR code to follow WeChat: NongXunNET

Please indicate the source when reprinting.