What are the cultivation methods and precautions for Anthurium?
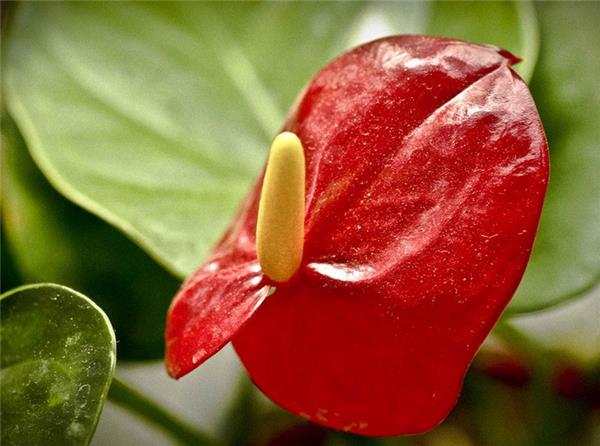
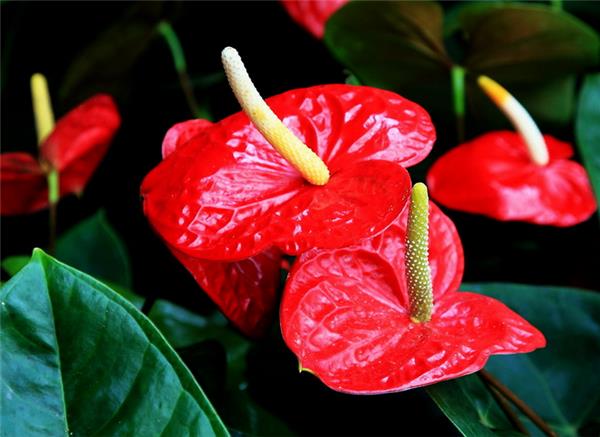
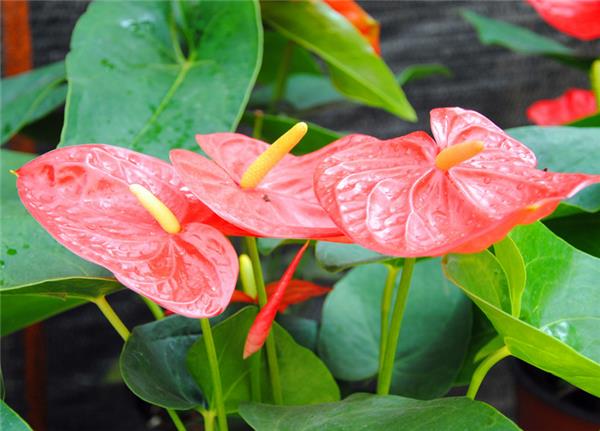
Anthurium flowers are unique, with a spadix inflorescence, bright and gorgeous colors, and rich color variations. The leaves are spathe-shaped, and common spathe colors include red, pink, and white. They have great ornamental value, so do you know how to grow Anthurium well?
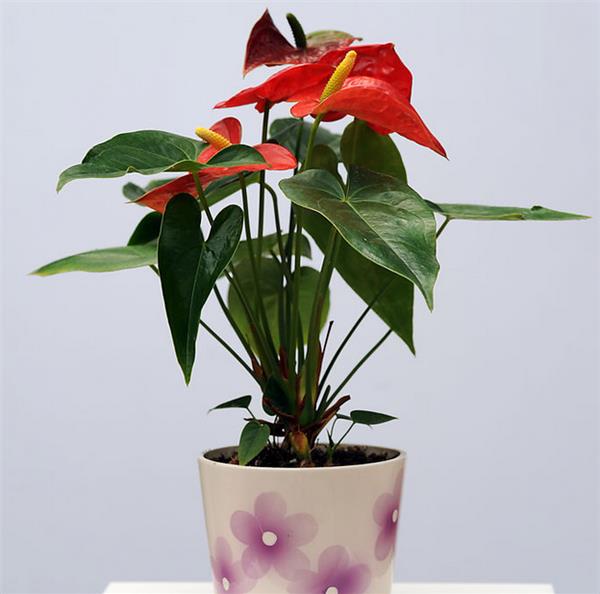
How to grow Anthurium well
I. Nutrients needed for Anthurium growth
The nutrients needed for Anthurium growth include carbohydrates, major elements, and trace elements.
1. Carbohydrates are the most important nutrients for Anthurium growth, and they come from photosynthesis. Carbon comes from carbon dioxide in the air, while hydrogen and oxygen are obtained from water.
2. Major elements are the elements that Anthurium needs in relatively large amounts during growth. They include 6 elements: nitrogen, phosphorus, potassium, sulfur, magnesium, and calcium. The roles of these elements complement one another. These 6 elements are mainly obtained from the substrate or added manually.
3. Trace elements are elements that Anthurium needs in very small amounts during growth but that are still essential, such as iron, manganese, copper, zinc, molybdenum, and boron. They come from the substrate or are added manually.
II. The relationship between light and Anthurium growth
Anthurium grows in a cycle of "leaf to flower to leaf to flower," and the inflorescence forms in the leaf axil of each leaf, which results in equal yields of flowers and leaves. A very important factor affecting yield is light. Too strong light inhibits plant growth and causes the leaves and the spathe of the flowers to discolor or burn, greatly affecting flower yield and quality. Conversely, when light intensity is too low, insufficient assimilates in the plant tend to cause smaller flowers, softer flower stems, and reduced yield. The suitable light intensity for Anthurium growth is 10000 to 22000 lux.
In a greenhouse, Anthurium lighting can be regulated with a movable shade net. On sunny days, shade out 75% of the light. The ideal light intensity in the greenhouse is about 20000 lux, and the maximum light intensity should not exceed 22000 lux for a long time. In the morning, in the evening, or on cloudy and rainy days, no shading is needed. Anthurium has different light requirements at different growth stages: for example, the vegetative growth stage requires relatively high light, so light can be appropriately increased to promote growth; during flowering, the light requirement is lower, and a movable shade net can be used to adjust light to 10000 lux to 15000 lux to prevent the spathe from discoloring and affecting ornamental value.
III. The effect of temperature on Anthurium growth
Anthurium growth is relatively sensitive to temperature. The suitable growth temperature is 14°C to 35°C, the optimum temperature is 19°C to 25°C, and a day-night temperature difference of 3°C to 6°C is appropriate, that is, a daytime temperature of 21°C to 25°C and a nighttime temperature of about 19°C are most suitable for Anthurium growth. Under such temperature conditions, the absorption and accumulation of nutrients by Anthurium are favored, which is extremely beneficial to Anthurium growth and flowering. If the temperature stays below about 13°C for a long time, although the plant will not die, it will be difficult for it to resume growth for a long time; when the temperature is above 35°C and light is relatively sufficient, leaf surfaces are prone to burning, and because damaged leaves will not recover, this will directly affect the overall quality of Anthurium.
In hot seasons, lower the indoor temperature by turning on wet curtains and ventilation equipment to avoid flower bud abortion or deformity caused by high temperatures. Note that leaf surfaces should not be misted in the evening, so as to ensure there are no water droplets on Anthurium leaf surfaces at night. Avoid high-temperature burning of leaves, which causes scorched leaves, deformed spathes, and fading in Anthurium. In cold winter, when the indoor day-night temperature is below 18°C, heating and warmth preservation are needed to prevent cold damage.
IV. The effect of humidity on Anthurium growth
Anthurium has relatively high requirements for air humidity. If humidity is too low, the plant will grow aged, and the leaves and flowers will be smaller; if humidity is too high, the plant will grow very fragile, and fungi can easily invade. In industrialized Anthurium production, the key is to maintain relatively high air humidity, and a certain level of humidity is beneficial to Anthurium growth. When the temperature is 20°C to 28°C, humidity should be 60% to 70%; when the temperature reaches above 28°C, humidity should be between 70% and 80%. Especially in hot seasons, the relative air humidity in the greenhouse can be increased through sprinkler systems and atomization systems to create a high-humidity growth environment. However, even if the greenhouse temperature is relatively high in winter, excessive moisture retention is not advisable, because overly wet leaves actually reduce the plant's cold resistance, making it prone to frost injury and unfavorable for safe overwintering.
V. How to water Anthurium
Natural rainwater is the best water source for Anthurium cultivation. If tap water is used in industrialized production, the water's pH value should be controlled between 5.2 and 6.1, the sodium ion and chloride ion content per liter of water should be lower than 1.7 millimoles, and the electrical conductivity value should be below 1.0. Potted Anthurium has different water requirements at different growth and development stages. In the seedling stage, because the root system is weak and distributed relatively shallowly in the substrate, it is not tolerant of drought, so water thoroughly in one go, keep the substrate moist frequently, promote early rooting and more new roots, and pay attention to the dryness and wetness of the substrate on the pot surface; in the medium and large seedling stages, the plant grows quickly and needs more water, so the water supply must be sufficient; during flowering, watering should be appropriately reduced, and phosphorus and potassium fertilizers should be added to promote flowering. During watering, it is essential to alternate between dry and wet conditions, and never water when the plant is suffering from severe water shortage, as this will affect its normal growth and development.
VI. How to prepare Anthurium substrate
Because Anthurium grows epiphytically or semi-epiphytically under natural conditions, and its aerial roots can absorb water from moist air, the cultivation substrate must be similar to the substrate it attaches to in natural growth, that is, it must have good water retention, drainage, and air permeability; otherwise, root rot is likely to occur. Anthurium's requirements for the cultivation substrate are as follows:
1. Good water retention.
2. Able to promptly drain excess water.
3. Not prone to rotting.
4. Able to remain loose and airy for a long time.
5. Does not contain or release toxic substances.
The commonly used substrate is imported peat. In addition to peat, more and more growers are now beginning to use coconut coir. Coconut coir that has passed through a mesh sieve can be used to replace peat; it has good capillary action and a relatively high air content. Using 40% coconut coir in cultivation will not cause any problems.
VII. How to fertilize Anthurium
The fertilization principle is "light fertilizer, frequent application." Fertilize with different compound liquid fertilizers according to different stages of Anthurium growth. Apply fertilizer A during the growth period, and during the flowering period apply a combination of fertilizer B and fertilizer A. Generally, depending on the dryness and wetness of the substrate in the pot, apply fertilizer water once every 2 to 3 days; in summer, apply fertilizer water once every 2 days, and when the temperature is high, water can be applied one extra time; in autumn, generally apply fertilizer water once every 5 to 7 days. Each fertilization must be carried out by specially assigned personnel, and the dilution concentration and application amount of the liquid fertilizer (stock solution) must be strictly controlled. After dilution, the EC value of the liquid fertilizer should be between 0.5 and 1.5, and the pH value should preferably be between 5.2 and 6.2. In addition, 2 hours after applying the liquid fertilizer, use a sprinkler system to spray water on the plant leaves to wash off fertilizer remaining on the leaves, so as to keep the leaf surfaces clean. The nutritional status of the plants should be checked by sampling regularly, so as to promptly improve their absorption of the fertilizer solution.
VIII. Precautions for repotting Anthurium
When repotting, the substrate should be loose. Repotting depends on the growth of the seedling's fleshy root system. If the root system has already grown full and thick and wraps around the medium surface along the inner wall of the flowerpot, then repotting is needed.
When repotting, first place a layer of medium at the bottom of the pot, with the thickness determined by the height of the medium and the depth of the flowerpot. Take the Anthurium seedling out of the small pot together with the medium, place it in the center of the flowerpot, cover with soil up to the junction of roots and stems, and then gently pat firm.
The repotting operation method is basically the same as planting, and after repotting, clean water should be watered thoroughly immediately.
IX. Prevention and control of Anthurium pests and diseases
To prevent and control Anthurium pests and diseases, first of all, cultivation techniques and management standards should be improved, and the principle of "prevention first, integrated management" must be adhered to. In the process of Anthurium cultivation, the following should be done:
1. Strengthen quarantine and disinfection for Anthurium. Before entering the cultivation site, Anthurium seedlings must be strictly quarantined to prevent disease sources from entering. Clean the environment and inspect frequently, forming a system; thoroughly disinfect greenhouse facilities and media; promptly remove and burn fallen leaves, diseased leaves, rotten roots, and diseased plants; staff must wash their hands with disinfectant soap or 75% alcohol.
2. Improve the environment and raise cultivation techniques. The occurrence and development of pests and diseases require certain environmental conditions. When Anthurium grows vigorously, its resistance is stronger, and pests and diseases are less likely to invade. Ensuring a clean, ventilated, and well-lit cultivation environment can promote vigorous Anthurium growth and improve its ability to resist pests and diseases.
3. Prevention first, regular spraying. Spray chemicals regularly to eliminate pathogens and insect pests before they cause damage. Treating at the early stage of disease or after disease has already occurred both affects Anthurium quality.
Pest and disease prevention and control must adhere to the above three aspects, which complement one another.
X. How to improve the ornamental value of Anthurium
1. Adjust direction. Regularly adjust the direction of the plant, generally once every half month, turning the side with newly sprouted buds and weaker growth toward the sunny side, so as to balance plant growth and improve the plant shape.
2. Remove suckers. For most Anthurium varieties, keeping one sucker per plant is sufficient. If there are too many suckers, the plant will bend at the stem and produce smaller flowers.
3. Adjust pot spacing. To obtain a good plant shape, reasonable pot spacing is necessary. The usual standard for pot spacing is that leaf surfaces touch each other but do not overlap. For varieties that are short and produce too many tillers, pot spacing should be appropriately smaller to reduce branching and encourage upward growth; for varieties with weak tillering ability, pot spacing should be appropriately larger, which can promote tillering and make the plant shape fuller over time.
4. Prune flower buds. If too many flower buds grow from the same root system, they should be appropriately pruned to reduce nutrient consumption. The targets for pruning are flower buds growing from the base of small leaves on side branches.
5. Prune old flowers. Old flowers that have already lost ornamental value consume a relatively large amount of nutrients, so they should be pruned in time to promote vegetative growth of the plant and enable it to produce new leaves and new flowers as soon as possible.
6. Straighten the plant. Straighten the leaves and flower stems in time. Try to keep the flowers concentrated in the central part of the plant, while spreading the leaves outward so that the plant shape appears fuller and more layered.
7. Grade plants. Place them on different growing benches for maintenance according to growth vigor.
8. Supplement substrate. Promptly supplement substrate for plants that are potted too shallowly and have exposed roots, so that the roots and substrate are fully in contact, allowing them to absorb nutrients and water, increasing the plant's ability to rejuvenate on its own, thereby extending flower life and increasing flower yield.
VI. How to prepare Anthurium substrate
Because Anthurium grows epiphytically or semi-epiphytically under natural conditions, and its aerial roots can absorb water from moist air, the cultivation substrate must be similar to the substrate it attaches to in natural growth, that is, it must have good water retention, drainage, and air permeability; otherwise, root rot is likely to occur. Anthurium's requirements for the cultivation substrate are as follows:
1. Good water retention.
2. Able to promptly drain excess water.
3. Not prone to rotting.
4. Able to remain loose and airy for a long time.
5. Does not contain or release toxic substances.
The commonly used substrate is imported peat. In addition to peat, more and more growers are now beginning to use coconut coir. Coconut coir that has passed through a mesh sieve can be used to replace peat; it has good capillary action and a relatively high air content. Using 40% coconut coir in cultivation will not cause any problems.
VII. How to fertilize Anthurium
The fertilization principle is "light fertilizer, frequent application." Fertilize with different compound liquid fertilizers according to different stages of Anthurium growth. Apply fertilizer A during the growth period, and during the flowering period apply a combination of fertilizer B and fertilizer A. Generally, depending on the dryness and wetness of the substrate in the pot, apply fertilizer water once every 2 to 3 days; in summer, apply fertilizer water once every 2 days, and when the temperature is high, water can be applied one extra time; in autumn, generally apply fertilizer water once every 5 to 7 days. Each fertilization must be carried out by specially assigned personnel, and the dilution concentration and application amount of the liquid fertilizer (stock solution) must be strictly controlled. After dilution, the EC value of the liquid fertilizer should be between 0.5 and 1.5, and the pH value should preferably be between 5.2 and 6.2. In addition, 2 hours after applying the liquid fertilizer, use a sprinkler system to spray water on the plant leaves to wash off fertilizer remaining on the leaves, so as to keep the leaf surfaces clean. The nutritional status of the plants should be checked by sampling regularly, so as to promptly improve their absorption of the fertilizer solution.
VIII. Precautions for repotting Anthurium
When repotting, the substrate should be loose. Repotting depends on the growth of the seedling's fleshy root system. If the root system has already grown full and thick and wraps around the medium surface along the inner wall of the flowerpot, then repotting is needed.
When repotting, first place a layer of medium at the bottom of the pot, with the thickness determined by the height of the medium and the depth of the flowerpot. Take the Anthurium seedling out of the small pot together with the medium, place it in the center of the flowerpot, cover with soil up to the junction of roots and stems, and then gently pat firm.
The repotting operation method is basically the same as planting, and after repotting, clean water should be watered thoroughly immediately.
IX. Prevention and control of Anthurium pests and diseases
To prevent and control Anthurium pests and diseases, first of all, cultivation techniques and management standards should be improved, and the principle of "prevention first, integrated management" must be adhered to. In the process of Anthurium cultivation, the following should be done:
1. Strengthen quarantine and disinfection for Anthurium. Before entering the cultivation site, Anthurium seedlings must be strictly quarantined to prevent disease sources from entering. Clean the environment and inspect frequently, forming a system; thoroughly disinfect greenhouse facilities and media; promptly remove and burn fallen leaves, diseased leaves, rotten roots, and diseased plants; staff must wash their hands with disinfectant soap or 75% alcohol.
2. Improve the environment and raise cultivation techniques. The occurrence and development of pests and diseases require certain environmental conditions. When Anthurium grows vigorously, its resistance is stronger, and pests and diseases are less likely to invade. Ensuring a clean, ventilated, and well-lit cultivation environment can promote vigorous Anthurium growth and improve its ability to resist pests and diseases.
3. Prevention first, regular spraying. Spray chemicals regularly to eliminate pathogens and insect pests before they cause damage. Treating at the early stage of disease or after disease has already occurred both affects Anthurium quality.
Pest and disease prevention and control must adhere to the above three aspects, which complement one another.
X. How to improve the ornamental value of Anthurium
1. Adjust direction. Regularly adjust the direction of the plant, generally once every half month, turning the side with newly sprouted buds and weaker growth toward the sunny side, so as to balance plant growth and improve the plant shape.
2. Remove suckers. For most Anthurium varieties, keeping one sucker per plant is sufficient. If there are too many suckers, the plant will bend at the stem and produce smaller flowers.
3. Adjust pot spacing. To obtain a good plant shape, reasonable pot spacing is necessary. The usual standard for pot spacing is that leaf surfaces touch each other but do not overlap. For varieties that are short and produce too many tillers, pot spacing should be appropriately smaller to reduce branching and encourage upward growth; for varieties with weak tillering ability, pot spacing should be appropriately larger, which can promote tillering and make the plant shape fuller over time.
4. Prune flower buds. If too many flower buds grow from the same root system, they should be appropriately pruned to reduce nutrient consumption. The targets for pruning are flower buds growing from the base of small leaves on side branches.
5. Prune old flowers. Old flowers that have already lost ornamental value consume a relatively large amount of nutrients, so they should be pruned in time to promote vegetative growth of the plant and enable it to produce new leaves and new flowers as soon as possible.
6. Straighten the plant. Straighten the leaves and flower stems in time. Try to keep the flowers concentrated in the central part of the plant, while spreading the leaves outward so that the plant shape appears fuller and more layered.
7. Grade plants. Place them on different growing benches for maintenance according to growth vigor.
8. Supplement substrate. Promptly supplement substrate for plants that are potted too shallowly and have exposed roots, so that the roots and substrate are fully in contact, allowing them to absorb nutrients and water, increasing the plant's ability to rejuvenate on its own, thereby extending flower life and increasing flower yield.