How to Grow a Norfolk Island Pine? Master These Cultivation Methods
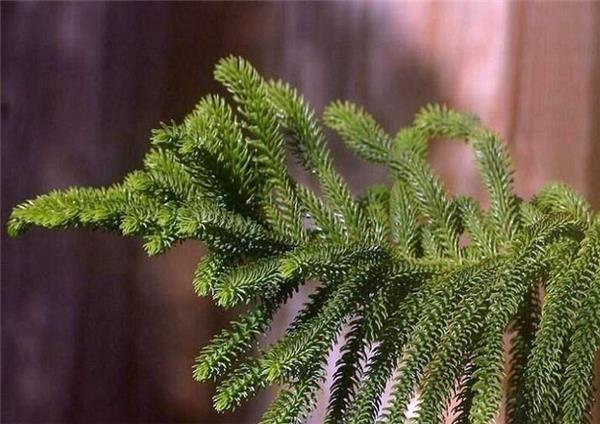
The Norfolk Island pine has elegant branches and leaves, lush foliage, and a graceful, vigorous yet delicate tree form. It is a beautiful foliage plant with high ornamental value, and many people use it in homes, living rooms, and other places. Below, let's learn about the cultivation methods of the Norfolk Island pine and see how to grow one.
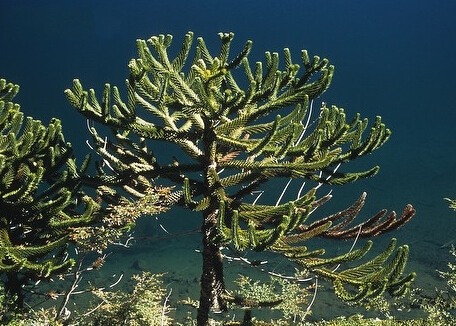
The Norfolk Island pine (Araucaria heterophylla) is an evergreen tree native to Norfolk Island, Australia, and is one of the world's famous ornamental trees. The Norfolk Island pine is a sun-loving species that prefers a warm, humid environment with soft, ample light; it is not cold-tolerant and dislikes drought. When growing a Norfolk Island pine, it needs plenty of sunlight in winter, and strong direct sunlight should be avoided in summer. The Norfolk Island pine grows best under conditions of 25°C-30°C and relative humidity above 70%. The Norfolk Island pine fears the dry gales of northern spring and the blazing sun of midsummer, and prefers a loose, fertile potting soil rich in humus with strong drainage and aeration.
To grow a Norfolk Island pine, it is best to use a mix of leaf mold, peat soil, and clean river sand in a ratio of 1:3:1 along with a small amount of decomposed organic fertilizer. Young Norfolk Island pines should be repotted once a year or every other year in spring; plants over 5 years old should be moved into larger pots or wooden tubs, with the soil and pot renewed every two to three years. When growing a Norfolk Island pine in a pot, it should not be planted too deep; it is best to have the upper rooting bud points just exposed above the soil surface.
In northern regions, move the plant outdoors to a wind-sheltered, sunny spot at the end of April or the beginning of May for care. In midsummer, provide appropriate light shading, and turn the pot in a timely manner during the growing season to prevent the Norfolk Island pine's form from growing lopsided and affecting its ornamental value. When growing a Norfolk Island pine, watering should be moderate at ordinary times, keeping the potting soil and surrounding environment moist at all times, and strictly guarding against drought and waterlogging. Both excessive dryness and excessive moisture can easily cause the lower leaves of the Norfolk Island pine to droop and soften.
During hot, dry, windy periods, water or mist the Norfolk Island pine's leaves and surrounding environment frequently to increase air humidity; dry air will cause the lower leaves of the Norfolk Island pine to droop and soften. In spring, summer, and autumn, apply a small amount of organic liquid fertilizer to the Norfolk Island pine regularly, and supplement nutrients at any time during the vigorous growth period. Starting from the sprouting of new buds in spring, apply 1-2 times per month of decomposed, diluted organic liquid fertilizer, which can keep the Norfolk Island pine's form fresh and its leaf color glossy.
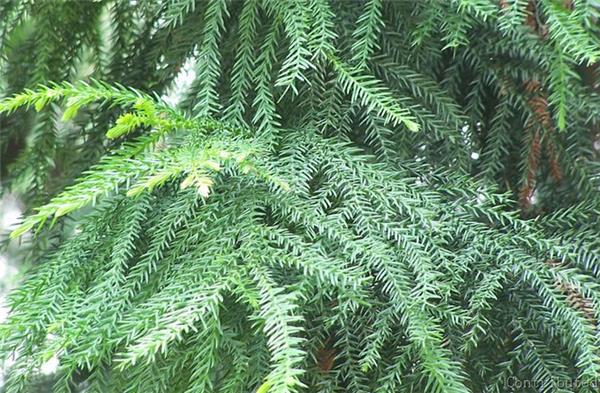
1. Propagation: The propagation methods of the Norfolk Island pine are generally seed sowing and cutting propagation. Before sowing Norfolk Island pine seeds, it is best to scarify the seed coat first to promote germination; at a suitable temperature, new roots can grow from the cut surface in 1-2 weeks. Cutting propagation of the Norfolk Island pine is relatively easy and is widely used. Cuttings are generally taken in spring and summer. For cutting propagation of the Norfolk Island pine, a main branch must be selected as the cutting; plants grown from side branches as cuttings are crooked and not upright. The cutting should be 10 to 15 cm long; after insertion, under conditions of 18°C to 25°C and relatively high air humidity, roots can form in about 4 months.
2. Cultivation: For potted Norfolk Island pines, the potting soil can be prepared from leaf mold and garden soil plus 1/4 river sand and a small amount of base fertilizer; the potting soil should be loose and well aerated. In the north, potted Norfolk Island pines can be moved outdoors to a sunny spot after the middle of May, with slight shading to avoid direct midday sunlight in summer. When growing a Norfolk Island pine, keep the potting soil and the surrounding environment of the Norfolk Island pine moist during the growing season, but water must not accumulate in the pot.
3. Light: The Norfolk Island pine prefers ample sunlight. In northern regions, generally in early May, move the Norfolk Island pine to a south-facing balcony or a sunny spot in the courtyard, and after summer begins, take care to shade it appropriately to avoid scorching sun. When growing a Norfolk Island pine in northern regions, it should be moved indoors at the end of September or the beginning of October, placed in a sunny spot, and watering should be controlled.
4. Temperature: The Norfolk Island pine can grow under a variety of different temperatures, but its cold tolerance is not strong; the optimal growth temperature is 7-24°C. If the temperature rises, the air humidity around the Norfolk Island pine should be increased.
5. Soil: For growing a Norfolk Island pine, the most suitable potting soil is a mix of leaf mold, garden soil, and river sand at 1/3 each, plus a small amount of base fertilizer.
6. Watering: The Norfolk Island pine likes a humid environment. In dry seasons and summer, take care to spray clean water on the Norfolk Island pine's leaves frequently, which can both increase air humidity and keep the Norfolk Island pine's leaf color fresh and bright. During the cultivation period of the Norfolk Island pine, watering should be appropriate; in summer, watering should be sufficient to promptly replenish the needs of leaf transpiration and avoid drought damage. However, when growing a Norfolk Island pine, watering should not be excessive either, so as to prevent water accumulating in the potting soil; at ordinary times, it is best to keep the potting soil consistently moist.
7. Fertilizing: The Norfolk Island pine grows relatively quickly, so during the vigorous growth season of the Norfolk Island pine, it needs frequent topdressing to supplement the nutrients required for the Norfolk Island pine's growth. Generally, starting from the sprouting of new buds in spring, apply 1-2 times per month of decomposed, diluted cake fertilizer water for the Norfolk Island pine to absorb and utilize, so that it can grow robustly.
8. Pruning: The Norfolk Island pine is prone to the phenomenon of the lower branches and leaves gradually turning yellow and falling off, causing the entire Norfolk Island pine plant to be top-heavy and affecting its appearance. When growing a Norfolk Island pine, careful management and necessary pruning should be carried out.
9. Pests and diseases: The diseases of the Norfolk Island pine include leaf spot, branch blight, and root nodule disease, etc. For leaf spot and branch blight, you can choose 70% thiophanate-methyl at 8 times dilution or 65% zineb wettable powder at 500-600 times dilution for spraying control; for canker disease, use 40% asomate at 100 times dilution or potassium permanganate at 1001 times dilution to smear and disinfect; for root nodule disease, soak with streptomycin at 1000 times dilution. The main pest is scale insect damage; when only a small amount occurs, rinse the leaves with clean water, and when more severe, use 40% omethoate emulsifiable concentrate at 500-100 times dilution for spraying and control.
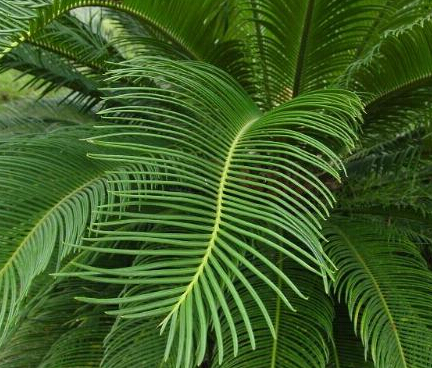
1. The Norfolk Island pine is not tolerant of severe cold. In northern regions, move it indoors at the end of September or the beginning of October (Cold Dew), place it in a sunny, well-ventilated spot, stop fertilizing and control watering. The suitable growth temperature for the Norfolk Island pine is 10-25°C, and the overwintering temperature must not be lower than 5°C.
2. In the second year of a Norfolk Island pine cutting seedling, or when a seed-grown seedling grows to about 50 cm, to prevent the stem from bending, insert a support beside the seedling to prop it up.
3. During the process of growing a Norfolk Island pine, if the Norfolk Island pine's needles fall off or turn yellow and dry in winter, it is very likely caused by too high a temperature, air that is too dry, or light that is too dim; the Norfolk Island pine should be moved to a well-ventilated place with better light for cultivation.
4. Move the Norfolk Island pine back indoors in late September, place it in a sunny spot, and turn the pot once every half month so that the plant does not grow crooked due to seeking light.
5. The Norfolk Island pine should not be placed in a dimly lit room for too long; generally after 2-3 weeks it should be moved to a sunny spot. In winter, watering should be controlled for the Norfolk Island pine, alternating between dry and wet, and the overwintering temperature should be kept above 10 degrees.
Propagation Methods for the Norfolk Island Pine
Sowing, cutting, and air layering are commonly used: For seed propagation, the seeds are hard and absorb water slowly. Before sowing, scarify the seed coat first without damaging the kernel, which can promote germination; slow germination makes the seeds prone to rot. In subtropical regions, sow in March, using drilling, covering with 1.5-2 cm of soil, then cover with straw curtains to preserve moisture; germination can occur after 30-40 days. During the seedling stage, shade is needed, and after 2 years they can be divided and planted separately. For cutting propagation, May-June is best; select a 1-year-old side branch from the main axis or a vigorous water sprout as the cutting, cut it to 10-12 cm long, remove the lower needles, flatten the base cut, and insert it into the cutting bed. The insertion depth should not exceed 4 m, keep it shaded for care, cover with plastic film to retain moisture, maintain around 25°C, and roots will form in 3-4 months. For air layering, it is often done in early May; select a 2-year-old side branch, use a knife to make a ring cut on its base about 1-1.5 cm wide, wait for the wound to dry slightly, then apply 3000 mg/L of naphthalene acetic acid, wrap it with moss or wet peat, wrap the outside with plastic film and tie it tightly above and below; in about 3-4 months it will heal and take root, and after roots grow, cut it off for cultivation.
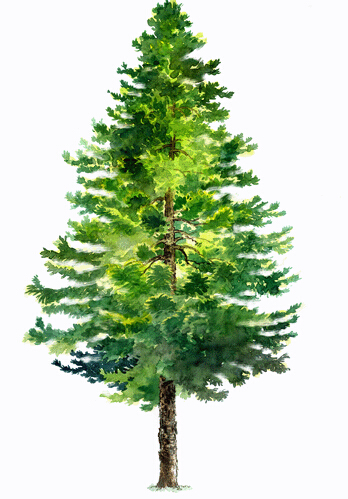
The potting soil can be prepared by mixing 3 parts garden soil, 2 parts leaf mold, and 1 part coarse sand. Repot and change the soil in early spring, once every 2-3 years; when repotting, properly prune the root system and add new potting soil and an appropriate amount of base fertilizer. During the growing season, water frequently and spray the leaves 2-3 times a day to keep the soil moist and the air humidity relatively high. In summer, soil that is too dry and in winter, too much water will both cause the lower leaves to droop and soften. During the peak growth season, apply liquid fertilizer 3-4 times each month, and use alkaline fertilizers as little as possible. In summer, provide appropriate shading to prevent strong sunlight exposure. After being placed indoors for about a week, it should be moved outdoors for care, otherwise the plant will become weak and its ornamental value will be affected. In late autumn, move it into a moderate-temperature greenhouse to overwinter, with the temperature requirement above 10°C, maintaining a stable environment.
1. What to Do If the Norfolk Island Pine's Leaves Turn Yellow: Unsuitable Temperature
The Norfolk Island pine has certain temperature requirements during care; the most suitable growth temperature is 25-30°C. Temperatures that are too high or too low are both unfavorable to the growth of the Norfolk Island pine. When the temperature is below 5 degrees, the Norfolk Island pine's leaves will turn yellow, with a small amount of leaf drop; when the temperature is high but the air humidity is low, the Norfolk Island pine will also show a large number of yellow leaves. Therefore, when caring for a Norfolk Island pine, pay attention to temperature; when the temperature is low, move it indoors to keep it warm, and when the temperature is high, take care to keep the air humid.
2. What to Do If the Norfolk Island Pine's Leaves Turn Yellow: Humidity Too Low
The Norfolk Island pine also has requirements for the air humidity in which it grows, and it grows best under conditions of relative humidity below 80%. Air humidity that is too low or wind that is too strong causes acute dehydration and yellowing of the Norfolk Island pine's leaves. This requires placing the Norfolk Island pine in a wind-sheltered spot, or frequently spraying and sprinkling water to increase air humidity.
3. What to Do If the Norfolk Island Pine's Leaves Turn Yellow: Too Little Light
When a potted Norfolk Island pine is placed in the home, pay attention to the light issue; it can have ample sunlight, and when cared for and managed in a place with good light, the Norfolk Island pine grows well. If kept in a room with weaker light for a long time, the Norfolk Island pine will show leaf yellowing accompanied by leaf drop; this requires moving the Norfolk Island pine in a timely manner to a place with better light, otherwise the Norfolk Island pine's condition will worsen further.
4. What to Do If the Norfolk Island Pine's Leaves Turn Yellow: Too Much Watering
Too much watering is one of the common causes of yellowing leaves in the Norfolk Island pine. The watering principle for the Norfolk Island pine is to water when dry and stop when wet; never water too much or too frequently, and do not water if the potting soil is not dry, otherwise the Norfolk Island pine's roots will rot from lack of oxygen, making it difficult to absorb water and nutrients, and the Norfolk Island pine will show symptoms of discomfort, causing the leaves to begin turning yellow. Therefore, the watering of the Norfolk Island pine should be carried out according to its habits.
5. What to Do If the Norfolk Island Pine's Leaves Turn Yellow: Pest and Disease Infection
The Norfolk Island pine is relatively simple to care for and generally does not suffer from pests and diseases, but attention should still be paid to protection; when infected by pests and diseases, the Norfolk Island pine's leaves will also turn yellow and fall off. Generally, carbendazim, chlorothalonil, and other chemicals can be sprayed to prevent the Norfolk Island pine's leaves from turning yellow.
Precautions for Growing a Norfolk Island Pine
1. The Norfolk Island pine is not tolerant of severe cold. In northern regions, move it indoors at the end of September or the beginning of October (Cold Dew), place it in a sunny, well-ventilated spot, stop fertilizing and control watering. The suitable growth temperature for the Norfolk Island pine is 10-25°C, and the overwintering temperature must not be lower than 5°C.
2. In the second year of a Norfolk Island pine cutting seedling, or when a seed-grown seedling grows to about 50 cm, to prevent the stem from bending, insert a support beside the seedling to prop it up.
3. During the process of growing a Norfolk Island pine, if the Norfolk Island pine's needles fall off or turn yellow and dry in winter, it is very likely caused by too high a temperature, air that is too dry, or light that is too dim; the Norfolk Island pine should be moved to a well-ventilated place with better light for cultivation.
4. Move the Norfolk Island pine back indoors in late September, place it in a sunny spot, and turn the pot once every half month so that the plant does not grow crooked due to seeking light.
5. The Norfolk Island pine should not be placed in a dimly lit room for too long; generally after 2-3 weeks it should be moved to a sunny spot. In winter, watering should be controlled for the Norfolk Island pine, alternating between dry and wet, and the overwintering temperature should be kept above 10 degrees.
Propagation Methods for the Norfolk Island Pine
Sowing, cutting, and air layering are commonly used: For seed propagation, the seeds are hard and absorb water slowly. Before sowing, scarify the seed coat first without damaging the kernel, which can promote germination; slow germination makes the seeds prone to rot. In subtropical regions, sow in March, using drilling, covering with 1.5-2 cm of soil, then cover with straw curtains to preserve moisture; germination can occur after 30-40 days. During the seedling stage, shade is needed, and after 2 years they can be divided and planted separately. For cutting propagation, May-June is best; select a 1-year-old side branch from the main axis or a vigorous water sprout as the cutting, cut it to 10-12 cm long, remove the lower needles, flatten the base cut, and insert it into the cutting bed. The insertion depth should not exceed 4 m, keep it shaded for care, cover with plastic film to retain moisture, maintain around 25°C, and roots will form in 3-4 months. For air layering, it is often done in early May; select a 2-year-old side branch, use a knife to make a ring cut on its base about 1-1.5 cm wide, wait for the wound to dry slightly, then apply 3000 mg/L of naphthalene acetic acid, wrap it with moss or wet peat, wrap the outside with plastic film and tie it tightly above and below; in about 3-4 months it will heal and take root, and after roots grow, cut it off for cultivation.
The potting soil can be prepared by mixing 3 parts garden soil, 2 parts leaf mold, and 1 part coarse sand. Repot and change the soil in early spring, once every 2-3 years; when repotting, properly prune the root system and add new potting soil and an appropriate amount of base fertilizer. During the growing season, water frequently and spray the leaves 2-3 times a day to keep the soil moist and the air humidity relatively high. In summer, soil that is too dry and in winter, too much water will both cause the lower leaves to droop and soften. During the peak growth season, apply liquid fertilizer 3-4 times each month, and use alkaline fertilizers as little as possible. In summer, provide appropriate shading to prevent strong sunlight exposure. After being placed indoors for about a week, it should be moved outdoors for care, otherwise the plant will become weak and its ornamental value will be affected. In late autumn, move it into a moderate-temperature greenhouse to overwinter, with the temperature requirement above 10°C, maintaining a stable environment.
1. What to Do If the Norfolk Island Pine's Leaves Turn Yellow: Unsuitable Temperature
The Norfolk Island pine has certain temperature requirements during care; the most suitable growth temperature is 25-30°C. Temperatures that are too high or too low are both unfavorable to the growth of the Norfolk Island pine. When the temperature is below 5 degrees, the Norfolk Island pine's leaves will turn yellow, with a small amount of leaf drop; when the temperature is high but the air humidity is low, the Norfolk Island pine will also show a large number of yellow leaves. Therefore, when caring for a Norfolk Island pine, pay attention to temperature; when the temperature is low, move it indoors to keep it warm, and when the temperature is high, take care to keep the air humid.
2. What to Do If the Norfolk Island Pine's Leaves Turn Yellow: Humidity Too Low
The Norfolk Island pine also has requirements for the air humidity in which it grows, and it grows best under conditions of relative humidity below 80%. Air humidity that is too low or wind that is too strong causes acute dehydration and yellowing of the Norfolk Island pine's leaves. This requires placing the Norfolk Island pine in a wind-sheltered spot, or frequently spraying and sprinkling water to increase air humidity.
3. What to Do If the Norfolk Island Pine's Leaves Turn Yellow: Too Little Light
When a potted Norfolk Island pine is placed in the home, pay attention to the light issue; it can have ample sunlight, and when cared for and managed in a place with good light, the Norfolk Island pine grows well. If kept in a room with weaker light for a long time, the Norfolk Island pine will show leaf yellowing accompanied by leaf drop; this requires moving the Norfolk Island pine in a timely manner to a place with better light, otherwise the Norfolk Island pine's condition will worsen further.
4. What to Do If the Norfolk Island Pine's Leaves Turn Yellow: Too Much Watering
Too much watering is one of the common causes of yellowing leaves in the Norfolk Island pine. The watering principle for the Norfolk Island pine is to water when dry and stop when wet; never water too much or too frequently, and do not water if the potting soil is not dry, otherwise the Norfolk Island pine's roots will rot from lack of oxygen, making it difficult to absorb water and nutrients, and the Norfolk Island pine will show symptoms of discomfort, causing the leaves to begin turning yellow. Therefore, the watering of the Norfolk Island pine should be carried out according to its habits.
5. What to Do If the Norfolk Island Pine's Leaves Turn Yellow: Pest and Disease Infection
The Norfolk Island pine is relatively simple to care for and generally does not suffer from pests and diseases, but attention should still be paid to protection; when infected by pests and diseases, the Norfolk Island pine's leaves will also turn yellow and fall off. Generally, carbendazim, chlorothalonil, and other chemicals can be sprayed to prevent the Norfolk Island pine's leaves from turning yellow.