A Complete Guide to Apricot Tree Grafting Methods and Techniques
I. Grafting Time
1. Spring grafting can generally be done during the period from thawing in early spring until the rootstock sprouts, but different grafting methods should be chosen according to the state of the rootstock's bark separation: before the rootstock bark separates, methods such as cleft grafting, cut grafting, side grafting, whip-and-tongue grafting, and budding with wood can be used. After the rootstock bark separates, bark grafting and T-shaped budding can also be used.
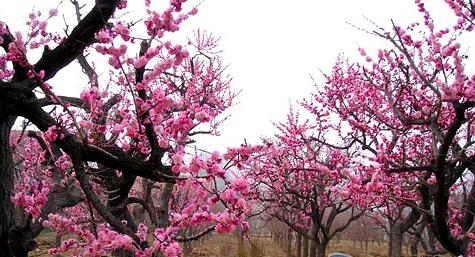
2. Summer grafting, also known as green-branch grafting, often uses cleft grafting, cut grafting, and budding, generally carried out from mid-June to the end of August, but the survival rate is highest from mid-June to mid-July.
3. Autumn grafting is generally carried out from mid-September to early October, and is mostly used in the warm-winter areas south of the Yangtze River; the graft union is sealed with wax to minimize water loss and increase the survival rate. In the north, because of the cold and dry conditions, the grafted buds are prone to frost damage and death, so autumn grafting is generally not used.
II. Commonly Used Grafting Methods
1. Branch grafting. Branch grafting includes cleft grafting, cut grafting, side grafting, whip-and-tongue grafting, and bark-peeling whip-and-tongue grafting.
(1) Cleft grafting
Cleft grafting is simple to perform and can be used in spring, summer, and autumn.
Cutting the scion: at 0.50 cm below the bottom bud of the scion, make one cut on each side with a sharp knife, forming a wedge-shaped cut surface, with the bud side slightly thicker, about 3-4 cm long, and the cut surface smooth and flat.
Cutting the rootstock: choose the grafting site, cut or saw off the rootstock, smooth the cut surface, and on the smoother-barked side make a deep downward cut through the pith of the rootstock, with the cut slightly longer than the scion's cut surface.
Inserting the scion: place the left thumb against the cut and grip the rootstock tightly, hold the scion with the right hand and slowly insert it into the rootstock cut; the thumb should gradually slide downward along with the scion so that the cambium of the scion and rootstock fit closely together. To speed up healing, the scion's cut surface need not be fully inserted; about 0.30 cm of the cut surface can be left exposed outside the rootstock, which is what is commonly called "white above, open below, success comes when the cambium is aligned."
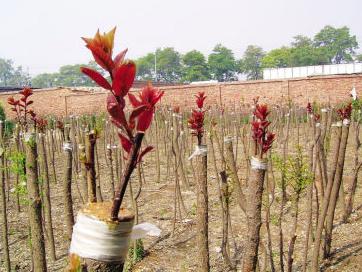
Tying: choose a thin plastic film strip about the same width as the rootstock cut, first wrap it twice around the graft union to tie it tightly, then seal the upper opening. After completely sealing the insertion point, continue wrapping downward, loop overlapping loop, all the way past the cut seam. The advantage of this method is that it prevents bleeding sap from overflowing and allows the lower end of the scion to soak in the bleeding sap, which helps the scion survive; at the same time, after the scion survives, as the rootstock thickens, the plastic film slowly stretches, so there is no need to loosen the binding and no "wasp waist" phenomenon will occur.
(2) Cut grafting
Cutting the scion: the scion for cut grafting is cut with two cuts. One cut is the long cut surface, and one is the short cut surface. For the long cut surface, one method is to use a sharp knife at 0.50 cm on the back side of the bottom bud of the scion to cut a 3 cm long surface; another method is to first insert the knife at a 300 angle inward and downward to 1/3-2/5 of the scion's thickness, then cut vertically and evenly with the blade, also 3 cm long. The short cut surface is made below the bottom bud of the scion, cutting a short surface 0.80-1 cm long.
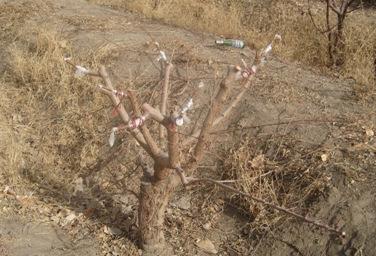
Cutting the rootstock and inserting the scion: choose a suitable grafting site on the rootstock and cut off the trunk, smooth the cut, choose the smoother-barked side, and cut vertically downward from the upper cut, with a length roughly equal to the length of the scion's cut surface; insert the scion into the cut, with the long cut surface pressed tightly against the rootstock's xylem and the short cut surface facing outward. Make sure the cambium on both sides of the long cut surface is aligned and pressed tightly against the cambium on both sides of the rootstock cut.
(3) Side grafting. Side grafting, also called "waist grafting," is a branch grafting method in which the rootstock branch is not cut off; it is mostly used for grafting pollinating male branches onto large ginkgo trees or filling gaps in the crown. First, cut a long cut surface 2-2.50 cm long at the lower end of the scion, with the short part reaching 2/3 of the scion's thickness, then cut a short surface on the back side that is 0.50 cm shorter than the long cut surface. Choose the grafting site on the rootstock and make a straight oblique cut reaching 1/3 of the xylem, with a length equal to the cut surface. When inserting, align and fit one side of the cambium closely. Then bind with plastic strips and cut off the rootstock after survival.
(4) Double tongue grafting. This is mostly used for rootstocks about 1 cm in diameter and when the scion and rootstock are roughly the same thickness. In this method, the scion and rootstock are joined in a crosswise interlocking manner, increasing the cambium contact surface; the joint is tight and firm, resistant to wind shaking, and the survival rate is extremely high. It is currently a relatively commonly used grafting method in production.
Cutting the scion: first cut a slope about 3 cm long on the back side of the bottom bud of the scion, then at the lower end of the slope, from the lower 1/3 point upward, split a cut about 1 cm long to form a tongue shape.
Cutting the rootstock: cut the rootstock at a suitable site, then cut a 3 cm long slope on one side as well, and then from the top of the slope downward at about the upper 1/3 point, split a cut about 1 cm long to form a tongue shape. Make the tongue positions of the two slopes of the rootstock and scion correspond and interlock with each other.
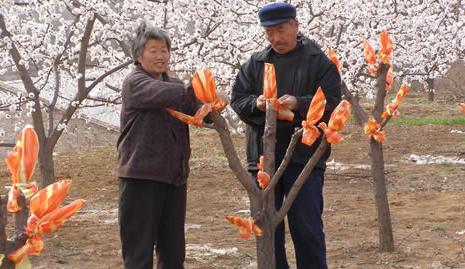
Inserting the scion: insert the scion split downward into the rootstock split so that the tongues of the rootstock and scion cross, align the cambium, bite tightly together, and then bind.
(5) Bark-peeling grafting. This method is not limited by thickness and can be used for both large and small rootstocks. The application period is from the beginning of sap flow in spring until one week after the rootstock sprouts. Because the application period is relatively long, it is often adopted.
Cutting the scion: at 0.50 cm on the back side below the bottom bud, cut downward a slope 3-4 cm long; on the other side at the lower end, cut a slope 0.50 cm long; at the same time, make one light cut on each side of the short slope to form a pointed tip, then make one light cut on each side of the long slope as well, cutting only through the bark layer to expose the cambium.
2. Budding. Budding mainly includes common methods such as chip budding, T-shaped budding, and square budding.
(1) Square budding. The budwood used for grafting is mostly 3-4a wood. Make one horizontal and one vertical cut at 1 cm above and below the bud and about 0.50 cm on each side, deep enough to reach the xylem, carefully remove the bud plate with a knife (without wood), and try to keep it moist to prevent water loss. Select a suitable site on the rootstock and, according to the size of the scion bud plate, remove the rootstock bud plate in the same way, then place the scion bud plate onto the rootstock bud eye. When placing the bud, be sure to align the concave part of the bud plate with the rootstock bud axis, then tie tightly.
(2) T-shaped budding. This method is generally used after the rootstock bark separates in spring or in autumn in September. First, at 1 cm below the bud, cut upward vertically once, deep enough to reach the xylem, then make one horizontal cut at 1 cm above the top of the graft bud and remove the graft bud with a little wood. Then choose a suitable site on the rootstock, make a "T" shape by first cutting horizontally once and then vertically once, deep enough to reach the xylem; use the knife to gently pry open the bark from the cut seam, insert the bud, align the upper cambium, tie tightly with a plastic bag, and expose the bud eye.
(3) Chip budding. This method is similar to square budding, except that its bud plate carries wood. Make one horizontal cut at 1 cm below the base of the graft bud, reaching 1/3 of the xylem, then make one vertical downward cut at 1 cm above the graft bud, remove the graft bud, carrying as much wood as possible. Choose a suitable site on the rootstock, cut an opening equal in size to the graft bud, place the graft bud into the rootstock cut, align the cambium, tie tightly with a plastic bag, and expose the bud eye.
The above is the apricot tree grafting introduced to everyone by the editor.
Inserting the scion: insert the scion split downward into the rootstock split so that the tongues of the rootstock and scion cross, align the cambium, bite tightly together, and then bind.
(5) Bark-peeling grafting. This method is not limited by thickness and can be used for both large and small rootstocks. The application period is from the beginning of sap flow in spring until one week after the rootstock sprouts. Because the application period is relatively long, it is often adopted.
Cutting the scion: at 0.50 cm on the back side below the bottom bud, cut downward a slope 3-4 cm long; on the other side at the lower end, cut a slope 0.50 cm long; at the same time, make one light cut on each side of the short slope to form a pointed tip, then make one light cut on each side of the long slope as well, cutting only through the bark layer to expose the cambium.
2. Budding. Budding mainly includes common methods such as chip budding, T-shaped budding, and square budding.
(1) Square budding. The budwood used for grafting is mostly 3-4a wood. Make one horizontal and one vertical cut at 1 cm above and below the bud and about 0.50 cm on each side, deep enough to reach the xylem, carefully remove the bud plate with a knife (without wood), and try to keep it moist to prevent water loss. Select a suitable site on the rootstock and, according to the size of the scion bud plate, remove the rootstock bud plate in the same way, then place the scion bud plate onto the rootstock bud eye. When placing the bud, be sure to align the concave part of the bud plate with the rootstock bud axis, then tie tightly.
(2) T-shaped budding. This method is generally used after the rootstock bark separates in spring or in autumn in September. First, at 1 cm below the bud, cut upward vertically once, deep enough to reach the xylem, then make one horizontal cut at 1 cm above the top of the graft bud and remove the graft bud with a little wood. Then choose a suitable site on the rootstock, make a "T" shape by first cutting horizontally once and then vertically once, deep enough to reach the xylem; use the knife to gently pry open the bark from the cut seam, insert the bud, align the upper cambium, tie tightly with a plastic bag, and expose the bud eye.
(3) Chip budding. This method is similar to square budding, except that its bud plate carries wood. Make one horizontal cut at 1 cm below the base of the graft bud, reaching 1/3 of the xylem, then make one vertical downward cut at 1 cm above the graft bud, remove the graft bud, carrying as much wood as possible. Choose a suitable site on the rootstock, cut an opening equal in size to the graft bud, place the graft bud into the rootstock cut, align the cambium, tie tightly with a plastic bag, and expose the bud eye.
The above is the apricot tree grafting introduced to everyone by the editor.