How do you graft Osmanthus? A detailed explanation of practical techniques
Osmanthus grafting propagation is a propagation method in which a part of the Osmanthus plant to be propagated is grafted onto the stem or root of another plant, so that the two combine into one and form a new independent plant. The plant body produced through grafting propagation is called a "grafted seedling," and the branch or bud used for grafting is called the "scion." What makes a grafted seedling different from other vegetative propagation seedlings is that it uses the root system of another plant, and the rooted plant part that bears the scion is called the "rootstock." Using a branch or stem as the scion is called "stem grafting," and using a bud as the scion is called "bud grafting."
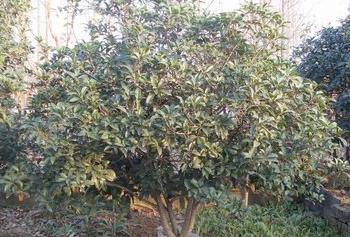
A general rootstock must be a tree that has already flowered, so your neighbor's is fine, not bad. This is because grafting is originally about grafting whichever variety is a bit better. Choose a section of branch about the size of a chopstick tip, with a bud on it, cut it to 4 cm long, and it becomes the scion; it must have a bud on it. Then you can graft onto the rootstock. You can choose the main branch or a side branch, though grafting on a tree 3 to 4 m tall is a bit difficult. Is there no horticultural company near you? You can just ask someone to help get it done. Choose a side branch for grafting: on the tree, choose a few branches twice as large as the scion and cut them off with scissors, leaving about 5 to 6 cm; note that the cut surface must be flat, and it is best to use a saw. Then use a sharp knife to shave the rootstock, that 4 cm long one (cut from your neighbor's tree, and the cut surface must also be flat). That scion can be said to have four sides: one side has a bud, one side is the branch, and the other two sides are empty. Use the knife to shave those two empty sides, shaving off 3 cm from one side; note that the cut must also be flat, with no fuzzy stuff. Shave off 0.6-0.8 cm from the other side (this side must be shaved especially flat, because it has to combine with the rootstock). Then use a sharp knife to cut two openings on the rootstock; you can choose opposite ones, and among the four directions you can choose any two sides. For example, from a cylindrical piece, shave off bark more than twice the size of the scion; do not shave the bark off, leave it on the tree (the parts shaved off are: bark, wood, cambium, shaved off in one pass, and the opening must also be flat). Then put the scion into it; note that the bark of the scion must be aligned with the bark of the rootstock. When aligning, you can see it: put the side with 3 cm shaved off facing inward, aligned with the rootstock. A good alignment is when you cannot see the white part you shaved (the scion you shaved, can't you see the white wound? If you cannot see it, then it is aligned well. This is viewed from the side; viewed from above it is: see whether the rootstock and scion look connected, that is, whether the bark, cambium, and wood look roughly the same). Then tie it up with packing tape, then wrap it with a plastic bag, leaving a space the size of an apple, then wrap the plastic bag again, and it is done. During this period, be careful not to move the scion; when the parts inside begin to combine, do not move it. When its bud grows and touches the plastic bag, then poke a small hole in the plastic bag and let it grow out. When it has grown to more than 10 cm long, remove the bag; do not remove the packing tape below.
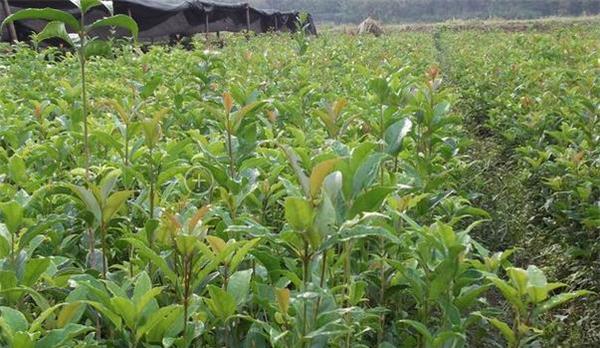
That is OK. Once grafted, first cut all branches back by 3 to 4 cm, not all of them, just most of them, especially the upper ones, because moisture must be kept even. Remove all new buds sprouting below the rootstock.
About 20 days after Osmanthus grafting, it can survive and sprout. For plants that do not survive, if the grafting period has not passed, they should be regrafted in time; if the suitable grafting period has passed, then 1-2 new shoots on the rootstock can be selected and kept, ready for regrafting the next spring. After the grafted seedling survives, the soil should be gently scraped open, and 1 vigorous new shoot should be selected and kept for cultivation, removing excess new shoots. For rootstock suckers growing from the rootstock, after the graft survives, they should all be removed as early as possible. This is because rootstock suckers and scion new shoots compete for water and nutrients, directly affecting the normal growth of the grafted seedling. If the rootstock sucker shoots grow longer than the scion new shoots, the scion often "sprouts back," and the graft cannot survive. When the new shoots of the grafted seedling have grown 15-20 cm long, supports should be set up to secure them, to prevent wind breakage or wind tilting that would cause the future tree shape to be improper. Earthing up around the base of the grafted seedling can prevent the graft union from splitting. During the entire growth period of the grafted seedling, pay attention to cultivating and weeding and to drought resistance and drainage. When the grafted seedling has grown to more than 10 cm tall, apply 1 application of dilute livestock manure water to promote seedling growth; afterward, apply fertilizer once every 1 month. A one-year-old grafted seedling can reach 30-40 cm tall in the same year, and at most more than 70 cm. It can be transplanted in the spring of the following year, and after reaching the required specifications, it can be released from the nursery for planting and use.
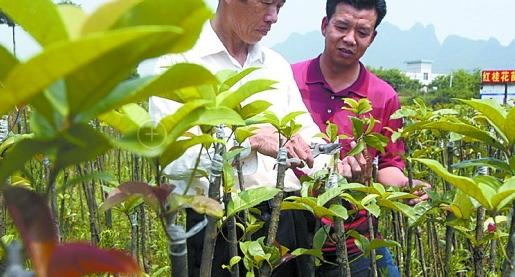
Finally, it must be emphasized that the post-grafting management of grafted seedlings should be determined according to the different types of rootstock.
(1) Large-leaf privet as rootstock: its disadvantage is that the grafted part is not firm and is easy to break from the graft union. Improvement methods: ① the graft point should be low, which can relatively increase strength; ② the interface should be long, so the rootstock will heal better; high grafting and approach grafting should pay even more attention to this; ③ when potting or repotting, plant deeply, as this can induce Osmanthus to root on its own and increase attachment ability; ④ untie late. For seedlings that survive after grafting, the binding material is best removed before being brought indoors or after sprouting the next year; before that, it can be loosened to consolidate survival.
(2) Small-leaf privet as rootstock: when small-leaf privet is used to graft Osmanthus, the problem of a thick top and thin bottom, "small feet," easily appears. To eliminate the "small feet" problem, prevention must be the starting point: ① the graft point should be low, best close to the root, which can both increase the strength of the graft point and induce Osmanthus to root on its own; ② when planting in pots, bury the graft point about 2 cm below the pot surface to conceal the part where the "small feet" problem may appear; when repotting in the future, even more attention must be paid to this; ③ if the "small feet" problem appears on Osmanthus seedlings grafted by air layering or approach grafting, the graft point is certainly relatively high. The only way to eliminate it is to move the plant into a deep pot and then carry out air layering, that is, after girdling or partially girdling above the graft point, cover with soil for cultivation, and after Osmanthus has rooted on its own, replant it.
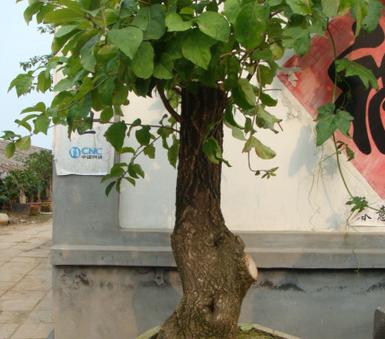
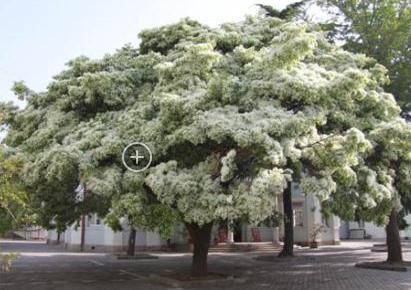
(3) Fringetree as rootstock: when fringetree is used as rootstock to graft Osmanthus, the problem of a thin top and thick bottom, "big feet," often occurs, making it difficult for the Osmanthus crown to take shape. Improvement methods: ① strengthen fertilizer and water management during the growth period, prompting Osmanthus to produce robust branches and speeding up growth; ② for those overly dense branches, crossing branches, diseased and pest-damaged branches, and branches affecting ornamental value, timely and moderate pruning must be carried out, to help form an ideal crown in the future.
The above is the Osmanthus grafting introduced to everyone by the editor.
(1) Large-leaf privet as rootstock: its disadvantage is that the grafted part is not firm and is easy to break from the graft union. Improvement methods: ① the graft point should be low, which can relatively increase strength; ② the interface should be long, so the rootstock will heal better; high grafting and approach grafting should pay even more attention to this; ③ when potting or repotting, plant deeply, as this can induce Osmanthus to root on its own and increase attachment ability; ④ untie late. For seedlings that survive after grafting, the binding material is best removed before being brought indoors or after sprouting the next year; before that, it can be loosened to consolidate survival.
(2) Small-leaf privet as rootstock: when small-leaf privet is used to graft Osmanthus, the problem of a thick top and thin bottom, "small feet," easily appears. To eliminate the "small feet" problem, prevention must be the starting point: ① the graft point should be low, best close to the root, which can both increase the strength of the graft point and induce Osmanthus to root on its own; ② when planting in pots, bury the graft point about 2 cm below the pot surface to conceal the part where the "small feet" problem may appear; when repotting in the future, even more attention must be paid to this; ③ if the "small feet" problem appears on Osmanthus seedlings grafted by air layering or approach grafting, the graft point is certainly relatively high. The only way to eliminate it is to move the plant into a deep pot and then carry out air layering, that is, after girdling or partially girdling above the graft point, cover with soil for cultivation, and after Osmanthus has rooted on its own, replant it.
(3) Fringetree as rootstock: when fringetree is used as rootstock to graft Osmanthus, the problem of a thin top and thick bottom, "big feet," often occurs, making it difficult for the Osmanthus crown to take shape. Improvement methods: ① strengthen fertilizer and water management during the growth period, prompting Osmanthus to produce robust branches and speeding up growth; ② for those overly dense branches, crossing branches, diseased and pest-damaged branches, and branches affecting ornamental value, timely and moderate pruning must be carried out, to help form an ideal crown in the future.
The above is the Osmanthus grafting introduced to everyone by the editor.