A detailed guide to hyacinth planting methods, an introduction to bulb cultivation methods
The hyacinth is a perennial herb in the lily family. Its bulb is spherical, and the flower stalk emerges from the bulb, forming a raceme that opens gradually from bottom to top and gives off waves of fragrance, earning it the name "Western narcissus." It originates from southern Europe and Asia Minor, and is now cultivated most extensively in the Netherlands and sold all over the world. How much do you know about hyacinth planting methods? Here we give you a detailed introduction to the relevant knowledge.
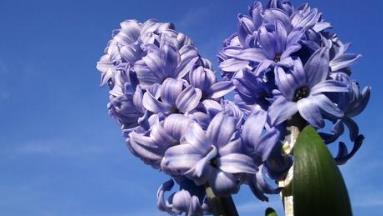
An introduction to hyacinth planting methods
Hyacinth bulbs: many gardening friends who see them for the first time tend to think they are little onions, haha. The skin color, shape and appearance of different hyacinth varieties can vary greatly. Some are very round and neat, while others have cracked skins, and all of this is normal.
The hyacinth bulb has a layer of skin on the outside that offers it a certain amount of protection, and you do not need to peel it off when planting. Of course there are exceptions, because it has traveled across the ocean from far away, drifting at sea for basically over a month, so hyacinths generally show some mold to some degree. Mold is usually related to the variety; some varieties may have very few mold spots, while others are almost all moldy. If there are many mold spots, you can peel off the outer skin as appropriate, wash the bulb clean with water, soak and disinfect it in a carbendazim solution, and then plant it. Mold on the skin has no effect on normal growth or flowering.
Bulb planting supply kit, including Fafard planting peat, carbendazim for disinfecting bulbs, bone meal with high phosphorus content to promote flower bud differentiation, and Aibeishi slow-release functional fertilizer whose fertilizing effect lasts through the entire bulb growing period; gloves to prevent allergies - some people are allergic to hyacinths, with symptoms such as itching and red patches, so it is recommended to wear gloves when handling them. If an allergic reaction occurs, please seek medical attention immediately.
At the base of the bulb, the root plate area has many dried fibrous roots that need to be cleaned off before planting so as to expose the root plate and allow new roots to grow. In particular, it must be noted that any knife or similar tool is strictly forbidden for cutting or trimming; if the root plate is destroyed or damaged, new roots cannot grow, which will affect the growth and sprouting of the bulb. It is recommended to clean off all these dried old roots by hand, and remember to wear gloves.
This is what the root plate area looks like after being cleaned. You can clearly see a ring of flesh-colored tissue around it, which is where new roots grow, and this must never be trimmed with a knife.
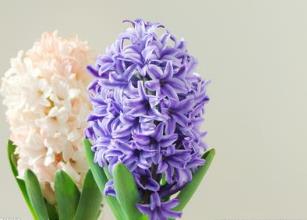
Preparing the flower pot: first place a layer of bottom netting in the pot to prevent soil from leaking out and, more importantly, to keep various pests from crawling up through the bottom into the pot.
Add a layer of medium-sized pumice on top. Its purpose is to improve drainage and aeration and prevent problems such as root rot.
Preparing the planting soil: add an appropriate amount of Aibeishi slow-release functional fertilizer to Fafard No. 1 planting mix and stir well.
Then add bone meal and stir well. Bone meal is high in phosphorus, does not burn roots, and helps promote flower bud differentiation in the bulb.
This is what it looks like after planting. Please note that the soil coverage depth should be such that the bulb is just slightly exposed above the soil surface, about 1-2 cm.
After planting, water thoroughly; it must be completely soaked through.
Many people say that hyacinths need to be shaded after initial planting to promote root growth, but this is actually not entirely correct. Soil-grown hyacinths do not need any shading treatment; on the contrary, we recommend more sun and attention to ventilation to prevent the bulb from becoming moldier. For water-grown ones, in theory shading can promote root growth, but based on our many years of practical comparative trials, there is not much difference, so it is not very meaningful.
The hyacinth is an autumn-planted variety and needs to go through low winter temperatures for flower bud initiation before it can bloom normally. So after planting it now, basically nothing will happen for a month. What you need to do now is wait patiently.
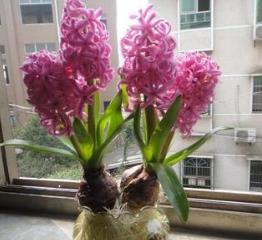
The following are some key points for water-growing hyacinths:
The preliminary handling of the bulb is the same as for soil culture, mainly dealing with the old roots at the root plate and disinfecting the bulb, so we will not repeat that here.
Before rooting, the water level is quite critical and must not be too high, otherwise the bulb easily becomes moldy. As shown in the picture below, the water level is slightly too high, and at the red circle a film of water forms between the bulb and the bottle, which easily causes mold to grow there.
Lower the water level a little so that basically only the root plate is submerged, as shown in the picture below; this ensures normal root growth. It is worth mentioning that too low a water level is also bad, as it causes uneven rooting; for example, only half of the root plate may grow roots while the other half does not.
Water culture tools: a special bottle for water-growing hyacinths, expanded clay pebbles (for decoration), water culture nutrient solution
An overall picture of the water culture setup after starting. Roots usually appear within a few days; once the roots have grown a little, you can lower the water level slightly so that the root plate no longer directly touches the water.
During the first month or so, because the temperature is still slightly high, basically only roots grow and there will be no sign of sprouting. What you need to do at this point is wait patiently.
Generally you can change the water once every 3-5 days, and add some water culture nutrient solution at the same time; just lift the bulb slightly and pour the water out. Especially after roots have grown, you need to be even more careful when handling it to avoid breaking the roots, because its roots cannot regenerate. Of course, even if you accidentally break 1-2 roots, it is not a big deal, so do not be too nervous.
Another thing to mention is that because the roots break easily and cannot regenerate, once water culture has begun it generally cannot be switched to soil culture midway.
By now you can more or less start buying hyacinths. The advantage of buying hyacinths now is that none have sprouted yet. If you want to grow hyacinths, you can experience a sense of accomplishment. Buying ones that others have already sprouted, or that even already show flower stalks, is really not interesting to grow. And the biggest advantage is that at this time they generally have not yet been divided into pots or rooted, and are all newly arrived hyacinths, so there is a lot of room for choice and you can pick and choose; also at this time the colors are the most accurate: this basket is blue, that basket is purple, there is absolutely no mistake. Once they have rooted it gets confusing, and you can only look at the color of the flower stalk and buds. Usually by the time you can see a bit of color, they are not far from blooming, and growing them this way is too boring.
Chinese New Year is early this year, so the soil-cultured ones can be planted this week and next week, with a little fertilizer added. Water-cultured ones grow faster, so you can wait a few more days. I used to always water-grow hyacinths, but water-grown ones rarely bloom year after year because fertilizer and nutrients cannot keep up, so now I have switched to soil culture. For soil culture, it seems Y-chan previously had an old post saying to crush multivitamins and put them on the soil and let the water carry the nutrients down, so I will try that. For water culture, keep the water about 0.5 cm from the bottom of the bulb, keep it in the dark to root, and then do whatever needs doing afterward.
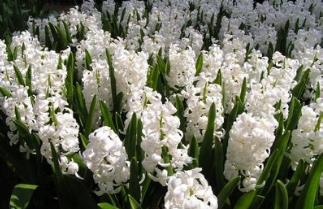
How do you select bulbs?
I took comparison photos of the bulbs I saved from last year and the ones I just newly bought. If you saw my post from this May on how to store bulbs, you should still remember the bulbs I saved.
When selecting new bulbs, choose ones with bright, vivid color, plump bodies, and firm, large size. From the 6 above, you can tell at a glance which are from last year and which are from this year.
I have 2 pink, 2 purple, 1 blue, and 1 orange. The orange one is the one with light purple skin; white and yellow are white bulbs. Since I do not like these 2 kinds, I do not have such hyacinths. Those who are interested can go to the flower and bird market and take a look themselves and they will know.
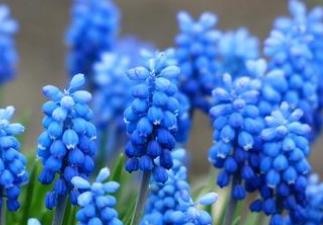
How to grow hyacinth bulbs
First, let me mention something many people overlook.
Some people are allergic to hyacinth sap (itching), so during planting it is best to wear gloves. After planting, please wash your hands.
The most critical factors in growing hyacinths are temperature and humidity. Better slightly dry than too wet.
Temperature: in the initial stage after planting the bulb, the temperature should be slightly higher. Around 15°C is best. Most regions are already in deep winter, so please place it indoors in a bright spot.
Soil culture:
First,
The soil and bulbs need to be disinfected. Wash the bulbs with water mixed with carbendazim or similar, and soak the soil. After soaking the soil, it needs to dry, then add a rooting-promoting nutrient solution such as Cuiyun B1. If you have a microwave at home, you can put the soil in the microwave on high for one minute, then take it out and let it cool before use.
Second,
The soil needs good aeration; ordinary potting soil is also fine. Remember, this soil must be disinfected and already thoroughly soaked with rooting solution, B1 and other nutrient solutions. Then place the bulb on the soil without covering it with soil. Then scatter decorative stones, or small stones, to hold the bulb at about one quarter of its height, that is, about 1 cm-2 cm above the root area of the bulb.
Third,
Newly planted bulbs do not need watering by soaking; wait until the soil just after planting has evaporated 50-80% of its moisture, then water by the soaking method. The water for the soaking method needs rooting nutrient solution such as B1. (Soaking method: that is, place a small bowl or saucer under the flower pot, put water in the bowl or saucer, and do not water directly from the top of the pot.)
Key points for soil culture: do not water too much, but you can spray moisture into the surrounding air to increase air humidity. During the soaking method, there is no need to spray water into the air.
Water culture:
First,
The bulb still needs to be disinfected. Use a V-shaped container or a shallow dish like the kind used for growing narcissus. Other containers can also be chosen; I will explain the method at the end.
Second,
After mixing a rooting nutrient solution with water, such as rooting agent or Cuiyun B1 solution, for a V-shaped container you only need to place the bulb in it. (The nutrient solution only needs to reach the bottom of the bulb.) If the container is transparent, please cover it with black cloth or dark cloth. After shading, place it indoors in a bright spot; do not put it somewhere with overly strong sunlight, or too cold or too dark, otherwise sprouting will be very weak.
For a shallow dish, place decorative stones in it to hold the bulb, and the water still only needs to reach the root area of the bulb.
Other containers, such as a bowl, or a flower pot without a drainage hole that does not leak water. Fill it completely with decorative stones, place the bulb on top, and the water still only needs to reach the root area, and must not be too high. Otherwise it easily causes rot.
Key points for water culture: transparent containers need to be shaded. First place it in a place with ordinary light, then after sprouting, move it to a place with more light. Do not suddenly move it from ordinary light to a place with very abundant light. Only increase light slowly, with the progression interval being 3 days-1 week, moving it to the next place with more light.
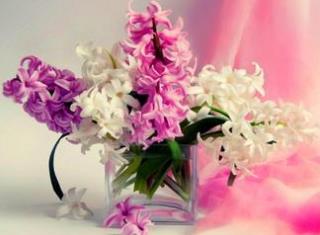
How to make hyacinth bulbs bloom successively
1. Disinfect the bulbs: soak the bulbs in 1000 times diluted thiophanate-methyl for 20 minutes, then plant them in an already prepared container, covering with 4 cm to 5 cm of soil on top. After planting, place them in an environment of about 9°C, and rooting will begin in about 15 days.
2. Place the rooted bulbs under conditions of 15°C to 18°C to promote flowering; after 50 days to 60 days they can bloom.
3. Regulate the flowering period by understanding the characteristics of the varieties, that is, the growth periods of early, mid, and late varieties, and count backward from the flowering date, which is the starting date of the flower promotion period.
4. Store the bulbs well after they have bloomed, place them in a relatively cool environment to keep them in good growing condition, and cut off the flower stems. Note to apply decomposed fertilizer in time to make the bulbs plump. Throughout the growing season, pay attention to pest and disease control.
5. In late autumn, as the weather gradually turns cold, put the pot outside to let it sprout again. For bulbs that have already sprouted, just repeat step 2, and they will bloom again when needed.
6. For bulbs that have not undergone low-temperature treatment, after potting, place them in a naturally cool environment for low-temperature treatment; after the bulbs sprout, promote flowering.
During the first month or so, because the temperature is still slightly high, basically only roots grow and there will be no sign of sprouting. What you need to do at this point is wait patiently.
Generally you can change the water once every 3-5 days, and add some water culture nutrient solution at the same time; just lift the bulb slightly and pour the water out. Especially after roots have grown, you need to be even more careful when handling it to avoid breaking the roots, because its roots cannot regenerate. Of course, even if you accidentally break 1-2 roots, it is not a big deal, so do not be too nervous.
Another thing to mention is that because the roots break easily and cannot regenerate, once water culture has begun it generally cannot be switched to soil culture midway.
By now you can more or less start buying hyacinths. The advantage of buying hyacinths now is that none have sprouted yet. If you want to grow hyacinths, you can experience a sense of accomplishment. Buying ones that others have already sprouted, or that even already show flower stalks, is really not interesting to grow. And the biggest advantage is that at this time they generally have not yet been divided into pots or rooted, and are all newly arrived hyacinths, so there is a lot of room for choice and you can pick and choose; also at this time the colors are the most accurate: this basket is blue, that basket is purple, there is absolutely no mistake. Once they have rooted it gets confusing, and you can only look at the color of the flower stalk and buds. Usually by the time you can see a bit of color, they are not far from blooming, and growing them this way is too boring.
Chinese New Year is early this year, so the soil-cultured ones can be planted this week and next week, with a little fertilizer added. Water-cultured ones grow faster, so you can wait a few more days. I used to always water-grow hyacinths, but water-grown ones rarely bloom year after year because fertilizer and nutrients cannot keep up, so now I have switched to soil culture. For soil culture, it seems Y-chan previously had an old post saying to crush multivitamins and put them on the soil and let the water carry the nutrients down, so I will try that. For water culture, keep the water about 0.5 cm from the bottom of the bulb, keep it in the dark to root, and then do whatever needs doing afterward.
How do you select bulbs?
I took comparison photos of the bulbs I saved from last year and the ones I just newly bought. If you saw my post from this May on how to store bulbs, you should still remember the bulbs I saved.
When selecting new bulbs, choose ones with bright, vivid color, plump bodies, and firm, large size. From the 6 above, you can tell at a glance which are from last year and which are from this year.
I have 2 pink, 2 purple, 1 blue, and 1 orange. The orange one is the one with light purple skin; white and yellow are white bulbs. Since I do not like these 2 kinds, I do not have such hyacinths. Those who are interested can go to the flower and bird market and take a look themselves and they will know.
How to grow hyacinth bulbs
First, let me mention something many people overlook.
Some people are allergic to hyacinth sap (itching), so during planting it is best to wear gloves. After planting, please wash your hands.
The most critical factors in growing hyacinths are temperature and humidity. Better slightly dry than too wet.
Temperature: in the initial stage after planting the bulb, the temperature should be slightly higher. Around 15°C is best. Most regions are already in deep winter, so please place it indoors in a bright spot.
Soil culture:
First,
The soil and bulbs need to be disinfected. Wash the bulbs with water mixed with carbendazim or similar, and soak the soil. After soaking the soil, it needs to dry, then add a rooting-promoting nutrient solution such as Cuiyun B1. If you have a microwave at home, you can put the soil in the microwave on high for one minute, then take it out and let it cool before use.
Second,
The soil needs good aeration; ordinary potting soil is also fine. Remember, this soil must be disinfected and already thoroughly soaked with rooting solution, B1 and other nutrient solutions. Then place the bulb on the soil without covering it with soil. Then scatter decorative stones, or small stones, to hold the bulb at about one quarter of its height, that is, about 1 cm-2 cm above the root area of the bulb.
Third,
Newly planted bulbs do not need watering by soaking; wait until the soil just after planting has evaporated 50-80% of its moisture, then water by the soaking method. The water for the soaking method needs rooting nutrient solution such as B1. (Soaking method: that is, place a small bowl or saucer under the flower pot, put water in the bowl or saucer, and do not water directly from the top of the pot.)
Key points for soil culture: do not water too much, but you can spray moisture into the surrounding air to increase air humidity. During the soaking method, there is no need to spray water into the air.
Water culture:
First,
The bulb still needs to be disinfected. Use a V-shaped container or a shallow dish like the kind used for growing narcissus. Other containers can also be chosen; I will explain the method at the end.
Second,
After mixing a rooting nutrient solution with water, such as rooting agent or Cuiyun B1 solution, for a V-shaped container you only need to place the bulb in it. (The nutrient solution only needs to reach the bottom of the bulb.) If the container is transparent, please cover it with black cloth or dark cloth. After shading, place it indoors in a bright spot; do not put it somewhere with overly strong sunlight, or too cold or too dark, otherwise sprouting will be very weak.
For a shallow dish, place decorative stones in it to hold the bulb, and the water still only needs to reach the root area of the bulb.
Other containers, such as a bowl, or a flower pot without a drainage hole that does not leak water. Fill it completely with decorative stones, place the bulb on top, and the water still only needs to reach the root area, and must not be too high. Otherwise it easily causes rot.
Key points for water culture: transparent containers need to be shaded. First place it in a place with ordinary light, then after sprouting, move it to a place with more light. Do not suddenly move it from ordinary light to a place with very abundant light. Only increase light slowly, with the progression interval being 3 days-1 week, moving it to the next place with more light.
How to make hyacinth bulbs bloom successively
1. Disinfect the bulbs: soak the bulbs in 1000 times diluted thiophanate-methyl for 20 minutes, then plant them in an already prepared container, covering with 4 cm to 5 cm of soil on top. After planting, place them in an environment of about 9°C, and rooting will begin in about 15 days.
2. Place the rooted bulbs under conditions of 15°C to 18°C to promote flowering; after 50 days to 60 days they can bloom.
3. Regulate the flowering period by understanding the characteristics of the varieties, that is, the growth periods of early, mid, and late varieties, and count backward from the flowering date, which is the starting date of the flower promotion period.
4. Store the bulbs well after they have bloomed, place them in a relatively cool environment to keep them in good growing condition, and cut off the flower stems. Note to apply decomposed fertilizer in time to make the bulbs plump. Throughout the growing season, pay attention to pest and disease control.
5. In late autumn, as the weather gradually turns cold, put the pot outside to let it sprout again. For bulbs that have already sprouted, just repeat step 2, and they will bloom again when needed.
6. For bulbs that have not undergone low-temperature treatment, after potting, place them in a naturally cool environment for low-temperature treatment; after the bulbs sprout, promote flowering.