The Complete Guide to Gardenia Cultivation Methods: A Detailed Explanation of Care Techniques
Among flowers, the gardenia is undoubtedly one of the more familiar ones, and people love growing it at home. However, many people are not very familiar with gardenia cultivation methods, which leads to many problems during the growing process, such as yellowing leaves and failure to bloom. Today we will take a detailed look at the complete guide to gardenia cultivation methods.
Gardenia Cultivation Methods
First, grow in acidic soil. Gardenias need diffused light, so they prefer acidic soil. If the soil is alkaline, the gardenia will not be able to absorb iron properly, which greatly affects chlorophyll formation and further causes the branches to wither and even die. Therefore, the soil must be loose, fertile, acidic soil, and materials with this effect can also be added to it.
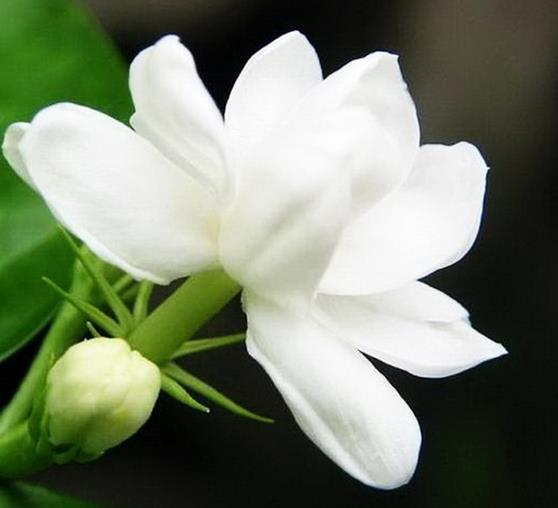
Third, air humidity. Gardenias like moisture, so the air must not be too dry. According to expert statistics, if the air humidity is below 70%, it will affect the normal opening of the flowers, but if it is too humid, it will cause root and stem rot and yellowing leaves. So in addition to normal watering, water should also be sprayed frequently nearby. Another issue to pay close attention to is that water must not be given in excess, otherwise growth will also be affected. So how should gardenias be watered?
a. When you see the soil has dried, tap the flower pot with your hand. If there is a hollow sound, it needs watering. Stop when water begins to leak from the bottom of the pot. The water used for watering is best mixed with some egg or soybean milk, as this is more beneficial to growth.
Fourth, key points for fertilizing. Gardenias like fertilizer, but too much fertilizer must not be added at one time. Be sure to apply light fertilizer frequently, and never cut corners for convenience, otherwise it will cause thick branches, large leaves, and deep green color, and the plant will lose its own ornamental effect.
Fifth, temperature requirements. The growing temperature for gardenias must not be too low, because they like warmth. Generally speaking, the ideal temperature during the growing season is 18 to 22 degrees, and 5 to 10 degrees in winter. If it falls below minus 10 degrees, the plant will suffer frost damage, and northern regions should pay special attention to this.
Sixth, proper pruning. Gardenias grow very easily into a dense mass of branches and leaves, creating a stuffy and chaotic feeling. This causes nutrients to be dispersed and reduces their ornamental value, so they need to be pruned. When pruning, it is best to keep 3 main branches, and remove new shoots sprouting from root suckers at any time. After the flowers fade, the branches should be cut back promptly, so that new shoots will sprout below the cut. When the new shoots grow three nodes, pinch them back to prevent blind growth.
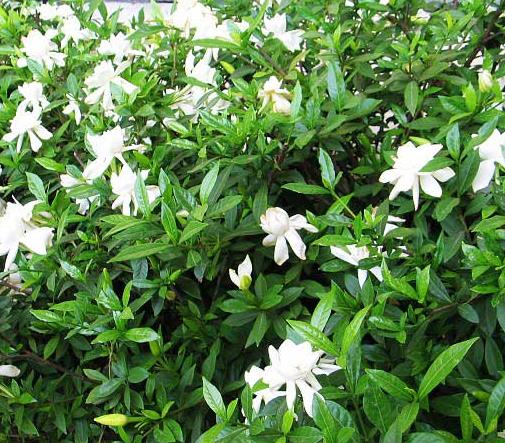
a. Iron deficiency, this is the most common one. Iron deficiency affects chlorophyll formation, causing the leaves to lose their green color. At this time, ferrous sulfate water and low-concentration black alum water can be used, three times a month.
b. Magnesium deficiency. Magnesium deficiency causes the veins of the lower old leaves of the gardenia to turn yellow. At this time, a low-concentration magnesium sulfate solution should be sprayed.
c. Soil too wet or too dry, refer to point three for this.
d. Exposure to blazing sun, refer to point two for this.
Eighth, propagation methods. Gardenias generally have two propagation methods: cuttings and layering.
a. Cuttings. During the plum rain season, use young branches 15 cm long, insert them into a seedling bed, and they will root in 10-12 days.
b. In April, select two-year-old branches, 20-25 cm long, press and bury them in soil, keep moist, and they will root in about 30 days. Separate them from the mother plant in summer and transplant them separately the following spring.
Propagation Methods of Gardenia Cultivation
1. Cutting propagation
In the north, cuttings can be taken in a greenhouse from October to November; in the south, cuttings can be taken at any time from April to the beginning of autumn, but the survival rate is highest between summer and autumn. Select healthy 2-year-old branches as cuttings, 10-12 cm long, remove the lower leaves, cut the lower end into a 45-degree slanted surface, tie every 20-30 cuttings into small bundles, soak the slanted cut ends in 0.05% rooting powder solution or 0.05% naphthalene acetic acid solution for 15 seconds, take them out and let the solution dry, then insert them into sand, with row spacing of 20-25 cm and plant spacing of 7-8 cm, inserting the slanted end of the cutting into the soil to 2/3 of its length, firm the soil and water, and set up a low shade shed for shading.
Under conditions of 80% relative humidity and a temperature of 20-24°C, roots can form in about 15 days. If soaked in 20*10 to the -6th power to 50*10 to the -6th power indolebutyric acid for 24 hours, the effect is even better. When the rooted seedlings begin to grow, transplant them or pot them individually, and they can bloom after 2 years. In the north, water propagation can also be used, that is, soak the base of the cuttings in clean water, change the water once a day, and place the water container in semi-shade; new roots can grow in about 20 days. Cultivation, weeding, and topdressing should be strengthened (see seed propagation). After 1-2 years of cultivation, when the seedlings are 40-50 cm tall, they can be transplanted. This propagation method can not only obtain a large number of seedlings, but also advance flowering and fruiting, and maintain the good traits of the mother plant.
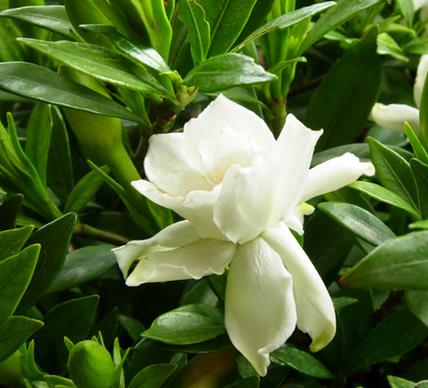
In April, select robust branches 25-30 cm long from a 3-year-old mother plant for layering. If there is a three-forked branch, three seedlings can be obtained at once from the fork. Generally, roots form after 20-30 days, and they can be separated from the mother plant in June, then planted separately or potted individually the following spring.
3. Seed propagation
This is mostly done in spring. Seeds germinate slowly, sprouting about 1 year after sowing, and blooming after 3-4 years. In the north, potted plants are not easy to produce seeds.
1) Seed selection: Choose plump, deep red mature fruits, dry them in the sun or in the shade with the shell still on to use as seeds. Before sowing, cut open the fruit skin of the seeds with scissors, dig out the seeds, rub them apart in hot water, remove floating seeds or impurities, then scoop out the sunken plump seeds, spread them on a bamboo mat, and place them in a ventilated place to dry off excess moisture, and then they can be sown.
2) Site selection and land preparation: Choose sandy loam with deep, loose, fertile soil, plow 1-1.5 chi, make beds with a bed surface width of 4-5 chi and a bed height of 6 cun, apply 20-30 loads of human feces and urine per mu, and after the soil dries, shallowly harrow the clods and level the bed surface. On the bed surface, open sowing furrows at a row spacing of 6-7 cun, with a furrow depth of about 1 cun, ready for sowing.
3) Sowing and seedling raising: Spring sowing or autumn sowing can be used. For spring sowing, sow around the time of Yushui; for autumn sowing, sow around the time of Qiufen. When sowing, mix the seeds with wood ash and evenly sow them in the sowing furrows, then cover and level the furrows with fine soil or burnt soil, cover with grass and sprinkle water, and keep the soil moist regularly to facilitate seedling emergence. Use 4-6 jin of seeds per mu.
Seedling stage management: After sowing, water frequently to keep the bed surface moist, and seedlings can emerge in about 20 days. After emergence, remove the covering grass on the bed surface, and strengthen management thereafter. When the seedlings grow 2-3 true leaves, thin them out, removing overcrowded and weak seedlings. When the seedlings grow 5 true leaves, keep seedlings at a spacing of 5-8 cm, and cultivate and weed frequently to keep the seedling area free of weeds. At the same time, topdressing should be applied appropriately. For autumn-sown seedling areas, carry it out 2-3 times in the first year, and once each in spring, summer, and autumn of the second year; for spring-sown seedling areas, carry it out once each in spring, summer, autumn, and winter. Combined with cultivation and weeding, apply 1000-1500 kg of human and livestock manure water per mu each time. For autumn sowing, cultivate until the late autumn or early winter of the second year, and when the seedlings are more than 30 cm tall, they can be planted out. For spring-sown seedling areas, by the spring of the second year when the seedlings reach 30 cm tall, they can be planted out. If they do not reach 30 cm, continue cultivating until late autumn or early winter for transplanting. This method can obtain a large number of seedlings.
4) Division propagation. Around the root zone of gardenias, many sucker shoots often grow. Every year in early spring or late autumn to early winter, select robustly growing plants, dig away the surface soil around them, and cut and separate the sucker shoots from where they connect to the mother root with a knife, then use them as planting stock for cultivation.
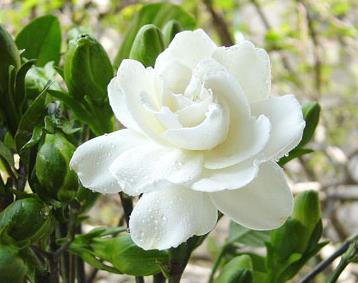
Take annual branches 10-12 cm long, keeping 2-4 leaves. Cut the tip of the branch into a horse-ear shape, soak it in 0.1% potassium permanganate solution for 4-6 hours, then take it out and insert it into clean water, with the submerged length being 1/3 of the total length of the cutting. Use a brown bottle as the container and change the water once every 1-2 days. Alternatively, drill small holes in a wooden board or foam board, insert the cuttings into the holes, and then let them float on the water surface, with 2/3 of the cutting length needing to remain above the floating body and 1/3 inserted into the water.
After new roots grow, move them from a darker place to a bright place. When the roots grow to 1.5-2 cm and a single plant has 6-7 roots, they can be transplanted into pots or planted in the ground.
Care and Management of Gardenia Cultivation Methods
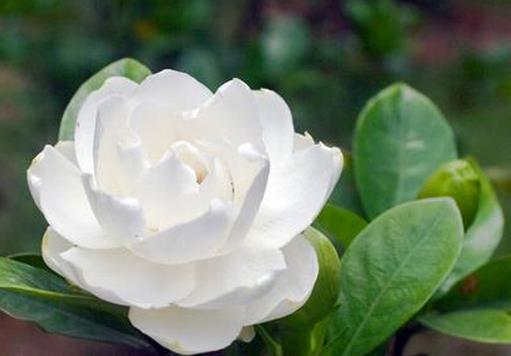
Gardenia is a woody plant, evergreen all year round, blooming around the Dragon Boat Festival every year. The flowers are pure white, densely packed, and full of fragrance. It is an excellent plant for urban beautification, highway landscaping, and courtyard bonsai appreciation. Gardenia cultivation takes a short time, requires little investment, and yields high returns. Cuttings are taken in the first year, transplanted in the second year, and sold in the third year. The market price per plant is around 2 yuan, and large ones can sell for more than 3 yuan. The annual income per mu exceeds ten thousand yuan, making it a good way to become wealthy.
1. Gardenias are suitable for growing in acidic soil. They like moisture and fear dryness, and can grow at humidity levels of 40-70%. If potted plants are not watered for 7-10 days, they will die from drought. They like fertilizer, and water containing ferrous sulfate, alum fertilizer water, or decomposed fertilizer can be applied regularly. They resist high temperatures and can grow even at 40°C. They endure severe cold and will not freeze to death even at around 10°C.
2. Gardenia cultivation methods. Gardenias are flowering plants that do not produce fruit, have no seeds, and can only be cultivated by cuttings.
1. Cutting time. In the first half of the year, in April; in the second half, in August-September. These two periods are the best seasons for taking gardenia cuttings and also the best time for gardenia propagation. Temperatures are generally between 15-35°C, the climate is mild, and it is suitable for cutting growth. Generally, cuttings can root and sprout in 30-40 days.
① Site selection. Choose land that is relatively convenient for watering, ensuring a water source for irrigation.
② Land preparation. Choose land with fertile soil, loose soil, and good aeration. Generally, plow the land deeply before frost, as overwintering frost can improve the soil. Before taking cuttings, scatter some wood ash and sand, then plow the land deeply about 30 cm, then water, and cuttings can be taken.
2. Layering propagation
In April, select robust branches 25-30 cm long from a 3-year-old mother plant for layering. If there is a three-forked branch, three seedlings can be obtained at once from the fork. Generally, roots form after 20-30 days, and they can be separated from the mother plant in June, then planted separately or potted individually the following spring.
3. Seed propagation
This is mostly done in spring. Seeds germinate slowly, sprouting about 1 year after sowing, and blooming after 3-4 years. In the north, potted plants are not easy to produce seeds.
1) Seed selection: Choose plump, deep red mature fruits, dry them in the sun or in the shade with the shell still on to use as seeds. Before sowing, cut open the fruit skin of the seeds with scissors, dig out the seeds, rub them apart in hot water, remove floating seeds or impurities, then scoop out the sunken plump seeds, spread them on a bamboo mat, and place them in a ventilated place to dry off excess moisture, and then they can be sown.
2) Site selection and land preparation: Choose sandy loam with deep, loose, fertile soil, plow 1-1.5 chi, make beds with a bed surface width of 4-5 chi and a bed height of 6 cun, apply 20-30 loads of human feces and urine per mu, and after the soil dries, shallowly harrow the clods and level the bed surface. On the bed surface, open sowing furrows at a row spacing of 6-7 cun, with a furrow depth of about 1 cun, ready for sowing.
3) Sowing and seedling raising: Spring sowing or autumn sowing can be used. For spring sowing, sow around the time of Yushui; for autumn sowing, sow around the time of Qiufen. When sowing, mix the seeds with wood ash and evenly sow them in the sowing furrows, then cover and level the furrows with fine soil or burnt soil, cover with grass and sprinkle water, and keep the soil moist regularly to facilitate seedling emergence. Use 4-6 jin of seeds per mu.
Seedling stage management: After sowing, water frequently to keep the bed surface moist, and seedlings can emerge in about 20 days. After emergence, remove the covering grass on the bed surface, and strengthen management thereafter. When the seedlings grow 2-3 true leaves, thin them out, removing overcrowded and weak seedlings. When the seedlings grow 5 true leaves, keep seedlings at a spacing of 5-8 cm, and cultivate and weed frequently to keep the seedling area free of weeds. At the same time, topdressing should be applied appropriately. For autumn-sown seedling areas, carry it out 2-3 times in the first year, and once each in spring, summer, and autumn of the second year; for spring-sown seedling areas, carry it out once each in spring, summer, autumn, and winter. Combined with cultivation and weeding, apply 1000-1500 kg of human and livestock manure water per mu each time. For autumn sowing, cultivate until the late autumn or early winter of the second year, and when the seedlings are more than 30 cm tall, they can be planted out. For spring-sown seedling areas, by the spring of the second year when the seedlings reach 30 cm tall, they can be planted out. If they do not reach 30 cm, continue cultivating until late autumn or early winter for transplanting. This method can obtain a large number of seedlings.
4) Division propagation. Around the root zone of gardenias, many sucker shoots often grow. Every year in early spring or late autumn to early winter, select robustly growing plants, dig away the surface soil around them, and cut and separate the sucker shoots from where they connect to the mother root with a knife, then use them as planting stock for cultivation.
Take annual branches 10-12 cm long, keeping 2-4 leaves. Cut the tip of the branch into a horse-ear shape, soak it in 0.1% potassium permanganate solution for 4-6 hours, then take it out and insert it into clean water, with the submerged length being 1/3 of the total length of the cutting. Use a brown bottle as the container and change the water once every 1-2 days. Alternatively, drill small holes in a wooden board or foam board, insert the cuttings into the holes, and then let them float on the water surface, with 2/3 of the cutting length needing to remain above the floating body and 1/3 inserted into the water.
After new roots grow, move them from a darker place to a bright place. When the roots grow to 1.5-2 cm and a single plant has 6-7 roots, they can be transplanted into pots or planted in the ground.
Care and Management of Gardenia Cultivation Methods
Gardenia is a woody plant, evergreen all year round, blooming around the Dragon Boat Festival every year. The flowers are pure white, densely packed, and full of fragrance. It is an excellent plant for urban beautification, highway landscaping, and courtyard bonsai appreciation. Gardenia cultivation takes a short time, requires little investment, and yields high returns. Cuttings are taken in the first year, transplanted in the second year, and sold in the third year. The market price per plant is around 2 yuan, and large ones can sell for more than 3 yuan. The annual income per mu exceeds ten thousand yuan, making it a good way to become wealthy.
1. Gardenias are suitable for growing in acidic soil. They like moisture and fear dryness, and can grow at humidity levels of 40-70%. If potted plants are not watered for 7-10 days, they will die from drought. They like fertilizer, and water containing ferrous sulfate, alum fertilizer water, or decomposed fertilizer can be applied regularly. They resist high temperatures and can grow even at 40°C. They endure severe cold and will not freeze to death even at around 10°C.
2. Gardenia cultivation methods. Gardenias are flowering plants that do not produce fruit, have no seeds, and can only be cultivated by cuttings.
1. Cutting time. In the first half of the year, in April; in the second half, in August-September. These two periods are the best seasons for taking gardenia cuttings and also the best time for gardenia propagation. Temperatures are generally between 15-35°C, the climate is mild, and it is suitable for cutting growth. Generally, cuttings can root and sprout in 30-40 days.
① Site selection. Choose land that is relatively convenient for watering, ensuring a water source for irrigation.
② Land preparation. Choose land with fertile soil, loose soil, and good aeration. Generally, plow the land deeply before frost, as overwintering frost can improve the soil. Before taking cuttings, scatter some wood ash and sand, then plow the land deeply about 30 cm, then water, and cuttings can be taken.