How to Grow Phalaenopsis Orchids: Detailed Guide to Cultivation Methods and Precautions
Phalaenopsis (moth orchid) is a plant that dislikes having constantly wet roots. So what cultivation techniques and precautions should you keep in mind if you grow phalaenopsis at home? Let's take a look together!
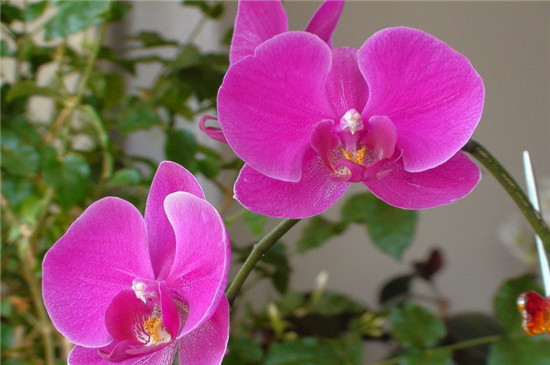
Cultivation Methods for Phalaenopsis Orchids
1. Repotting Methods for Phalaenopsis Orchids
The growing medium for phalaenopsis must drain well and also have a certain water-retaining capacity. Commonly used media include sphagnum moss, fern roots, bark, charcoal, and expanded clay pebbles. Repotting should be done during the summer growing season. The method is to first tip the plant out, remove the old growing medium, and cut off aged and rotted aerial roots. Then place a layer of charcoal pieces at the bottom of a new pot, set the plant in, fill in fresh medium, firm it down, and water thoroughly.
Repotting time should depend on the growing medium. Sphagnum moss medium will rot within 1-2 years, and when it rots it secretes an extremely acidic substance that harms the aerial roots. If it is not replaced in time, it will cause root rot. Therefore, when using sphagnum moss or bark as the medium, repot once every 1-2 years of cultivation; when growing in coconut husk, repot once every 2-3 years; when growing in expanded clay pebbles or charcoal, repot once every 3-5 years. However, fertilize frequently and lightly to make up for the nutrients these media contain little or none of.
2. Watering Methods for Phalaenopsis Orchids
If phalaenopsis is exposed to rain or watered too much, it is extremely prone to rot. Therefore, watering is the key to ensuring its normal growth. When watering, never let water splash onto the leaves, because splashed water easily causes leaf rot, especially seriously in winter. During the spring and summer growing period, water once a day and mist 2-3 times; in autumn and winter, as temperatures drop, the amount of water should also gradually decrease, watering once every 2-5 days and stopping misting, keeping the potting medium only slightly moist.
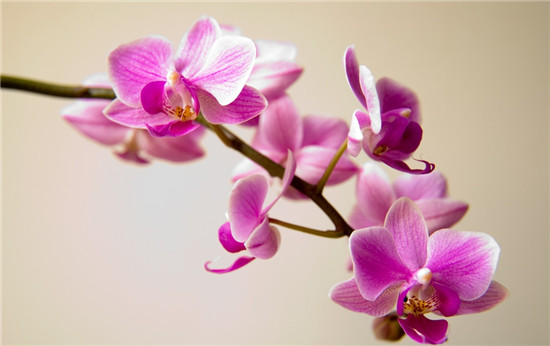
3. Fertilizing Methods for Phalaenopsis Orchids
Since organic fertilizers produce an off-odor after application and affect household hygiene, fertilizing is generally based on chemical fertilizers. Commonly used chemical fertilizers include monopotassium phosphate, diammonium phosphate, and special orchid fertilizer, applied at a concentration of 0.1%-0.2%, with a supplementary application every 5-7 days during the peak growing season; every 20-30 days during the slow-growing season; and stopping fertilization in winter when the temperature drops below 15°C. During cultivation, the type and ratio of fertilizer also differ at different growth stages. For the ratio of nitrogen, phosphorus, and potassium fertilizers, during the vegetative growth stage of small and medium seedlings it is 1:1:1; for large seedlings and flowering plants it is 1:1.5:4.
4. Shading Methods for Phalaenopsis Orchids
Summer is the period of vigorous growth for phalaenopsis, and shading must be provided to prevent the leaves from being scorched. Generally, shade 50%-60%; autumn sunlight is also relatively strong, so until September shading of 50% is still needed, and only after October can the shading material be removed.
5. Pest and Disease Control for Phalaenopsis Orchids
Diseases of phalaenopsis are mostly caused by factors such as poor ventilation. Common diseases include soft rot, brown spot, anthracnose, and viral diseases, which can be prevented and controlled by spraying a 500-fold dilution of drugs such as thiophanate-methyl, chlorothalonil, carbendazim, and lime sulfur mixture. In addition, improving ventilation conditions, preventing high temperatures in summer, and protecting against cold in winter are also effective measures to prevent soft rot.
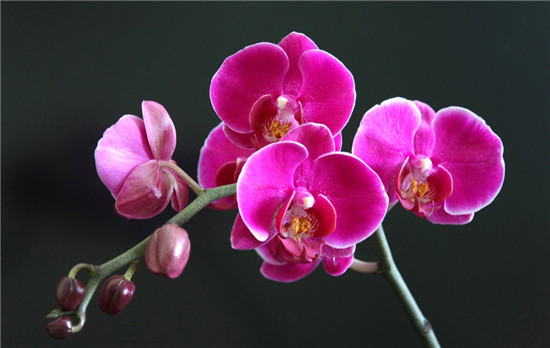
Precautions for Growing Phalaenopsis Orchids at Home
1. To avoid causing root rot in phalaenopsis, be sure to water appropriately. Never water too much. Before watering, it is best to check whether the growing medium is dry. Only then will you avoid root rot.
2. Temperature affects the blooming of phalaenopsis. Most phalaenopsis bloom in early spring. Many people like to place phalaenopsis in the living room. The nighttime temperature is relatively low and hard to control well. Compared with professional orchid growing rooms, the temperature and humidity of a living room are not very ideal, which will indirectly affect the orchid's growth. So failure to bloom is sometimes caused by this reason.
3. When growing phalaenopsis at home, especially control the amount of fertilizer to avoid over-fertilizing. Fertilize the orchid plant in small amounts and multiple times.
4. Be sure to choose an airy, multi-holed pot for planting. Some people say that growing in a large pot is better. That is wrong. Since orchids use materials such as sphagnum moss as the base layer, if the sphagnum moss does not dry out it will cause poor aeration and lead to poor growth of the orchid plant.
What to Do After Phalaenopsis Flowers Fade
If it is one you grow at home, it generally begins to grow flower stalks and buds around December of the previous year (in a room with heating), and generally opens gradually in late February to early March, with the flowering period lasting until around late May. If you want to see the flowers again, keep the flower stalk and care for it normally, and soon side stalks will grow from the flower stalk, buds will form, and they will open.
Whether purchased or home-grown, if after the first blooming you do not want it to continue flowering (this conserves the plant's energy), promptly cut off the flower stalk, still carry out a check of the roots and growing medium, then care for it normally, and by the end of the year new stalks will naturally sprout and buds will appear frequently.
Many people think phalaenopsis is hard to care for because they feel it needs a warm, high-humidity environment, and in fact this is true. Having such an environment is naturally a blessing for phalaenopsis. But phalaenopsis is very tough, and even without such an environment, it is also easy to grow in the north.
Usually pay attention to observing the root growth. Vigorous roots are the basic element that sustains plant growth. Roots that are green, robust, and firm, with red root tips, indicate vigorous vitality; if you find roots that have "escaped" the pot, it indicates a problem with the growing medium or care, and adjustment is needed; if the roots turn black and rot, it indicates too much water; if some roots show symptoms of drying up, it indicates excessive lack of water. Under normal conditions the leaves are bright, glossy, thick and firm, indicating good growth, and new shoots will keep growing out.
The above is all the content I have summarized for you on what the cultivation methods and precautions for phalaenopsis are. I hope this article can help everyone. Please also continue to follow us.
Whether purchased or home-grown, if after the first blooming you do not want it to continue flowering (this conserves the plant's energy), promptly cut off the flower stalk, still carry out a check of the roots and growing medium, then care for it normally, and by the end of the year new stalks will naturally sprout and buds will appear frequently.
Many people think phalaenopsis is hard to care for because they feel it needs a warm, high-humidity environment, and in fact this is true. Having such an environment is naturally a blessing for phalaenopsis. But phalaenopsis is very tough, and even without such an environment, it is also easy to grow in the north.
Usually pay attention to observing the root growth. Vigorous roots are the basic element that sustains plant growth. Roots that are green, robust, and firm, with red root tips, indicate vigorous vitality; if you find roots that have "escaped" the pot, it indicates a problem with the growing medium or care, and adjustment is needed; if the roots turn black and rot, it indicates too much water; if some roots show symptoms of drying up, it indicates excessive lack of water. Under normal conditions the leaves are bright, glossy, thick and firm, indicating good growth, and new shoots will keep growing out.
The above is all the content I have summarized for you on what the cultivation methods and precautions for phalaenopsis are. I hope this article can help everyone. Please also continue to follow us.