How to Grow Centipede Fern Without It Turning Yellow? A Detailed Care Guide
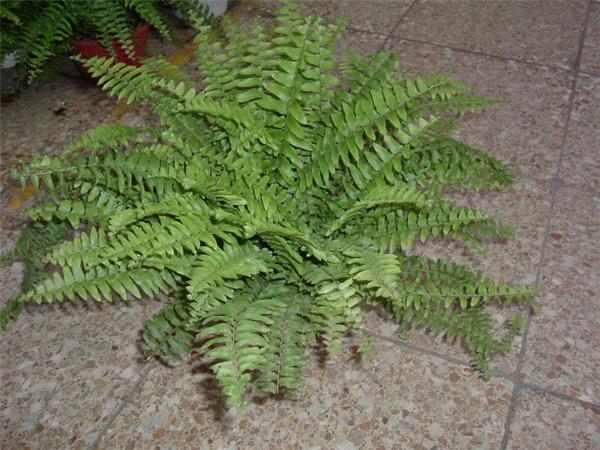
The centipede fern is one of the plants with the most alternative names, such as bizi cao, kidney fern, round fern, phoenix egg, centipede fern, and shi huang pi, which makes it something of a champion in the plant world. After cultivation through artificial techniques, the centipede fern is no longer just a wild plant; because it both beautifies the environment and has medicinal properties, it has now evolved into a fairly popular indoor ornamental plant.
Let's first look at how to plant the centipede fern.
I. Planting Methods for the Centipede Fern
1. Spore propagation
When the sori on the underside of the leaflets first appear, make a strip-shaped paper bag according to the size of the compound leaf, slip it over the compound leaf, and tie the base tightly; after the spores mature, they will fall into the paper bag on their own. When collecting, cut the bagged compound leaf off from the base, gently shake it with the leaf tip pointing down to gather the spores at the bottom of the bag, take out the compound leaf, and then gather the spores from each bag together. Soil preparation should be done early before sowing. Rub brown peat into powder and sift it fine, put it in a steamer and steam it for more than 1 hour to sterilize it, then take it out and, while still hot, put it into a cleanly washed "seedling shallow" tray, scrape it level and press it firm, soak the soil thoroughly by the bottom-watering method, then sow the spores thinly on the soil surface as you would fine seeds, do not cover with soil, immediately cover with white paper and glass, and keep at a room temperature of 20°C-24°C.
2. Division propagation
After overwintering, old plants begin to send up curled fist-shaped young primary leaves from the underground tubers once spring warms up, and division propagation should be done before the new leaves emerge. Stop watering two days before removing the plant from the pot; after removing it, cut it into several sections between the leaf clusters with a kitchen knife, and each root clump should carry 5-6 compound leaves, then pot them separately. Each old plant in a "blank pot" can be divided into 4 pots; after potting, water once thoroughly, keep them in shade, spray water every day to increase air humidity, and as long as the potting soil is only slightly moist, do not water first, to prevent the cut surfaces on the tubers from rotting. Once the curled fist-shaped young leaves have unfolded, cut off the old leaves, then resume normal watering.
II. Growing and Caring for the Centipede Fern
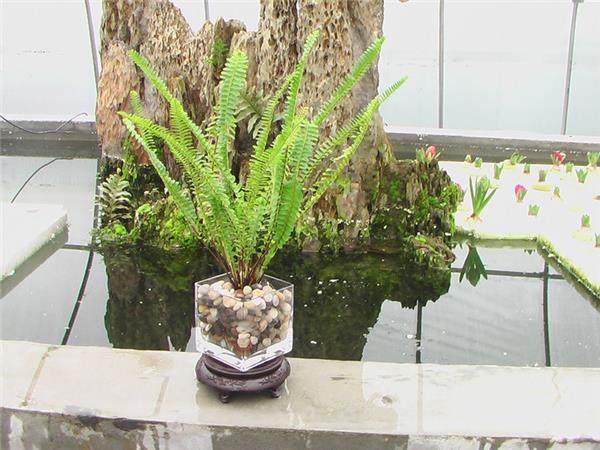
Soil: The centipede fern's root system is rather shallow and somewhat epiphytic, so the growing medium should be loose, fertile, and well-drained. The potting soil is generally a mix of leaf mold or peat soil with a small amount of garden soil, and fine sand and vermiculite may also be added to increase permeability. When grown as a hanging basket, equal parts leaf mold and vermiculite can be mixed as the growing medium; it is lighter in weight and suitable for hanging. For household pot culture, to keep the soil moist, some sphagnum moss, peat moss, etc. can be mixed into the growing medium, which is very beneficial to the growth of the kidney fern. In addition, for pot culture, a substrate is often made from 1 part leaf mold or peat soil, 1 part river sand soil, and 1 part vermiculite or perlite; 2 parts leaf mold and 1 part river sand soil can also be mixed and used. At the same time, adding a small amount of calcium nutrients such as bone meal and eggshell powder to the growing medium is also beneficial to the growth of the kidney fern.
Sunlight: The kidney fern likes bright, diffuse light. In spring, summer, and autumn it can all be kept indoors by a north-facing window, but attention must be paid to ventilation. When kept outdoors, it should be placed in light shade to avoid direct sunlight. If the light is too strong, the leaves very easily scorch and turn yellow; if the kidney fern is too shaded, the fronds easily fall off.
Temperature: The kidney fern is not tolerant of severe cold, so winter warmth should be ensured; keeping the temperature above 5°C will prevent frost damage; above 8°C it can still grow slowly, but it should not be placed near a heat source, otherwise the high temperature often causes excessive growth that affects the overall plant shape. In winter cultivation, special care should be taken to prevent nighttime frost and cold winds. The kidney fern also fears intense heat; in summer, when temperatures are high and transpiration is intense, work to prevent heat and lower the temperature must be done well, good ventilation should be maintained, and water should be sprayed on the plant continuously, which can also make the leaf color more tender green. In summer, with sufficient watering and spraying, the kidney fern can still grow normally at temperatures of 30°C-35°C.
Watering: In summer, in addition to keeping the potting soil moist at all times, clear water must also be sprayed on the kidney fern's leaf surface 2-3 times a day to increase air humidity, so as to keep the leaves emerald green. When the air is dry, the kidney fern's fronds easily curl at the edges and scorch, reducing their ornamental value. But watering should not be excessive either; if water accumulates in the potting soil, it easily causes the kidney fern's leaves to turn yellow and fall off.
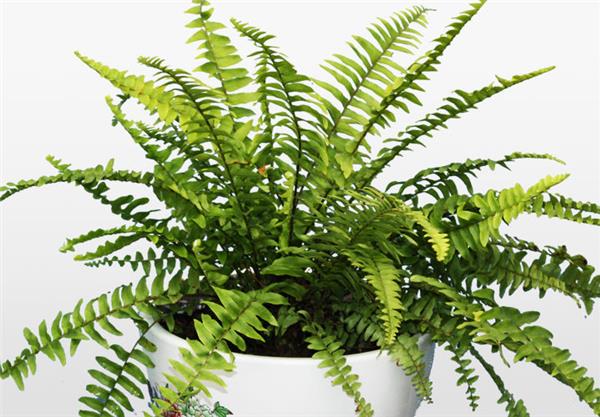
Fertilizing: The kidney fern does not bloom or set seed, consumes little nutrients, and has relatively low fertilizer requirements. Fertilizing the kidney fern is mainly with nitrogen fertilizer; during the vigorous growth periods in spring and autumn, apply once every half a month to 1 month a dilute cake fertilizer solution, or a nitrogen-based organic liquid fertilizer or inorganic compound liquid fertilizer. A moderate amount of fertilizer can keep the leaf color lastingly emerald green and fill the plant with vigorous vitality and strong life force.
Pests and diseases: The kidney fern has relatively few pests and diseases in cultivation, but sometimes, due to poor management, it can also run into some trouble. For example, in overly damp places there will be slug damage; when ventilation is poor, scale insects may occur; in addition, there is sometimes nematode damage, causing brown round spots on the leaves and affecting their ornamental value. As long as we manage carefully and properly in cultivation and pay attention to providing suitable conditions of temperature, humidity, light, and soil according to the kidney fern's growth habits, these problems can generally be effectively avoided and overcome.
Repotting: The centipede fern's underground stolons have a strong ability to send up shoots, and after 1 year of growth the divided seedlings will fill the entire pot, so the soil should be changed by repotting once every early spring; mix peat, leaf mold, and surface sand, one part each, and pot it up; for hall display it can be moved into a "three-hoop" pot, and for household display at most into a "blank pot". When repotting, if not dividing the plant, part of the surrounding fibrous roots should be cut off, and the old leaves cut off at the same time, so that the plant is completely renewed.
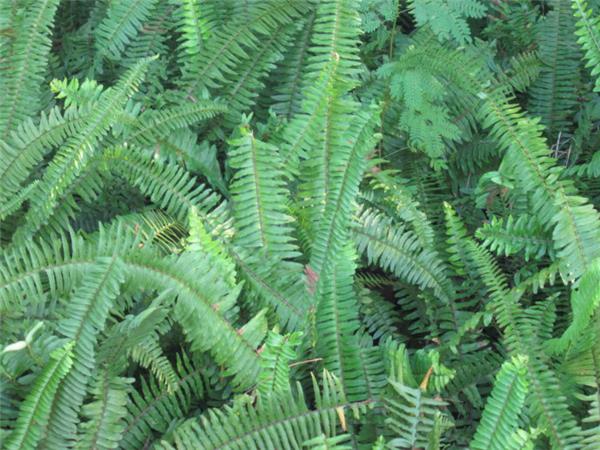
In addition, there are also individual cases of growing the centipede fern in water; at that time you only need to pay attention to changing the pot water and nutrient solution. So, after the introduction above, has everyone learned how to grow the centipede fern at home? Although its name does not sound nice, as an indoor ornamental plant its leaf shape is still highly ornamental, and everyone can try growing one.
When ventilation is poor, scale insects may occur; in addition, there is sometimes nematode damage, causing brown round spots on the leaves and affecting their ornamental value. As long as we manage carefully and properly in cultivation and pay attention to providing suitable conditions of temperature, humidity, light, and soil according to the kidney fern's growth habits, these problems can generally be effectively avoided and overcome.Repotting: The centipede fern's underground stolons have a strong ability to send up shoots, and after 1 year of growth the divided seedlings will fill the entire pot, so the soil should be changed by repotting once every early spring; mix peat, leaf mold, and surface sand, one part each, and pot it up; for hall display it can be moved into a "three-hoop" pot, and for household display at most into a "blank pot". When repotting, if not dividing the plant, part of the surrounding fibrous roots should be cut off, and the old leaves cut off at the same time, so that the plant is completely renewed.
In addition, there are also individual cases of growing the centipede fern in water; at that time you only need to pay attention to changing the pot water and nutrient solution. So, after the introduction above, has everyone learned how to grow the centipede fern at home? Although its name does not sound nice, as an indoor ornamental plant its leaf shape is still highly ornamental, and everyone can try growing one.