What to Do When a ZZ Plant Drops Its Leaves? A Detailed Guide to ZZ Plant Care
What should you do when a ZZ plant's leaves turn yellow and drop? Friends who grow ZZ plants will have some understanding of its growth habits. The ZZ plant likes warm, hot and slightly dry conditions, so some friends worry about how to best care for a ZZ plant in winter. Today we will tell you about some points to pay attention to.
What to Do When a ZZ Plant's Leaves Turn Yellow and Drop
Overwatering
The ZZ plant likes warm and hot conditions and is fairly drought-tolerant, but it dislikes waterlogged soil. Overwatering often causes the ZZ plant's roots to rot, which in turn causes its leaves to turn yellow. Take the ZZ plant out of the pot and check whether the roots are rotten. If they are already rotten, replant it in sterilized potting soil, or bury the base of the ZZ plant in clean sand, keep it in partial shade and control watering, only misting the branches, leaves and surrounding area frequently. Only after the ZZ plant has grown new roots can normal care be resumed. If the roots are not rotten, place the ZZ plant in a partially shaded spot. Because it has few leaves, the soil does not dry easily after watering, so watering should be controlled and the leaves misted frequently, allowing the ZZ plant to slowly return to normal growth.
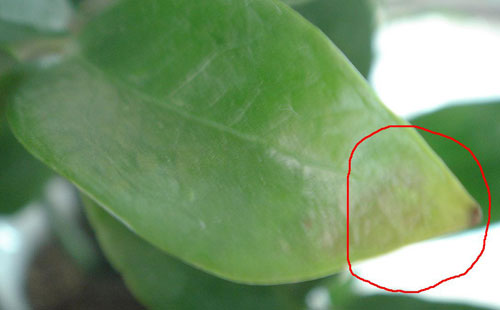
Air Too Dry
The ZZ plant likes a humid environment, and the suitable air humidity is around 85%. Air that is too dry will also cause the ZZ plant's leaves to turn yellow. Place the ZZ plant on a tray of wet sand, and regularly mist the leaves to wash away the fine dust clinging to them, while also paying attention to providing shade. In winter, be sure to mist the leaves and the surrounding environment so that the relative air humidity can reach above 50%. In addition, in winter pay special attention that the potting soil must not be overly wet; slightly dry is better. Otherwise, under low-temperature conditions, overly wet potting soil is even more likely to cause the plant's roots to rot, or even kill the whole plant.
Insufficient Soil Acidity
Insufficient soil acidity will also make the ZZ plant's leaves turn yellow. The ZZ plant's growing medium is usually a mix of peat, coarse sand or rinsed coal cinder with a small amount of garden soil, with its pH adjusted to between 6 and 6.5, in a slightly acidic state. Because the ZZ plant has a large tuber, a well-developed root system and relatively long pinnate compound leaves, it is best to plant it in a fairly deep blue-and-white porcelain pot or a purple clay pot, but the bottom should be lined with plenty of stones, brick granules or bark pieces, at a height of about 1/4 of the pot's depth, to help create a root environment with good air permeability and drainage.
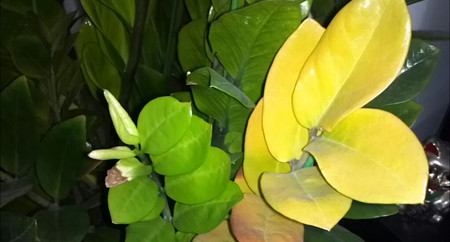
Improper Fertilizing
The ZZ plant fairly likes fertilizer, but the degree must be well controlled when fertilizing; too much or too little fertilizer will cause the ZZ plant's leaves to turn yellow. During the growing season, water the ZZ plant once a month with 2 to 3 applications of a mixed solution of 0.2% urea plus 0.1% monopotassium phosphate. After mid-Autumn, to help the ZZ plant get through the winter safely, stop applying nitrogen fertilizer and apply 0.3% monopotassium phosphate solution 2 to 3 times in a row, to promote the hardening and filling out of the ZZ plant's young leaf rachises and newly emerged leaves. Once the temperature drops below 15°C, all forms of topdressing should be stopped, to avoid fertilizer damage to the roots under low-temperature conditions.
Pest Infestation
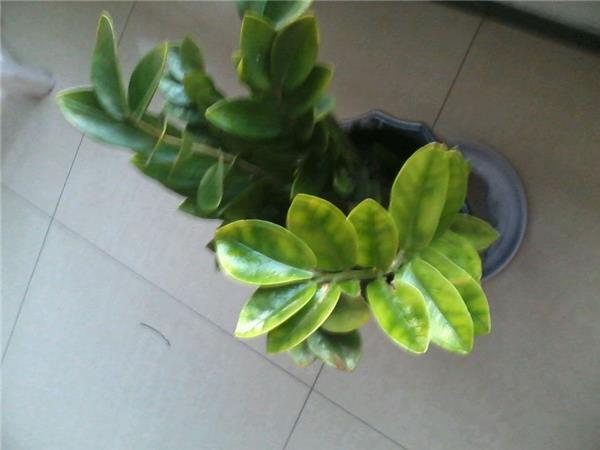
Pests are also one of the causes of the ZZ plant's leaves turning yellow. In environments with poor ventilation and inadequate light, the ZZ plant's leaves are prone to damage from the sucking of scale insects. For a small number grown at home, you can use clear tape to stick away the insect bodies, or use a damp cloth to wipe away the live insects. For commercial cultivation, during the peak hatching period of the nymphs, spray a 1000-fold dilution of 20% buprofezin wettable powder, which gives good insecticidal results.
How to best care for a ZZ plant in winter; the points to note are as follows:
1. Temperature
In winter it is best to maintain a greenhouse temperature above 10°C. If the room temperature is below 5°C, the plant is prone to cold damage, which then seriously threatens its survival. In late autumn and early winter, when the temperature drops below 8°C, it should be moved in time to a well-lit indoor spot, and throughout the overwintering period the temperature should be kept between 8°C and 10°C, which is relatively safe and reliable.
2. Light
For potted plants moved into the greenhouse in winter, supplemental lighting should be provided. Keep the potting soil on the dry side, and the plant can remain disease-free all year. In addition, the newly emerged pinnate compound leaves do not show obvious phototropism, and the plant keeps a good shape.
3. Water
In winter, pay special attention that the potting soil must not be overly wet; slightly dry is better. Otherwise, under low-temperature conditions, overly wet potting soil is even more likely to cause the plant's roots to rot, or even kill the whole plant.
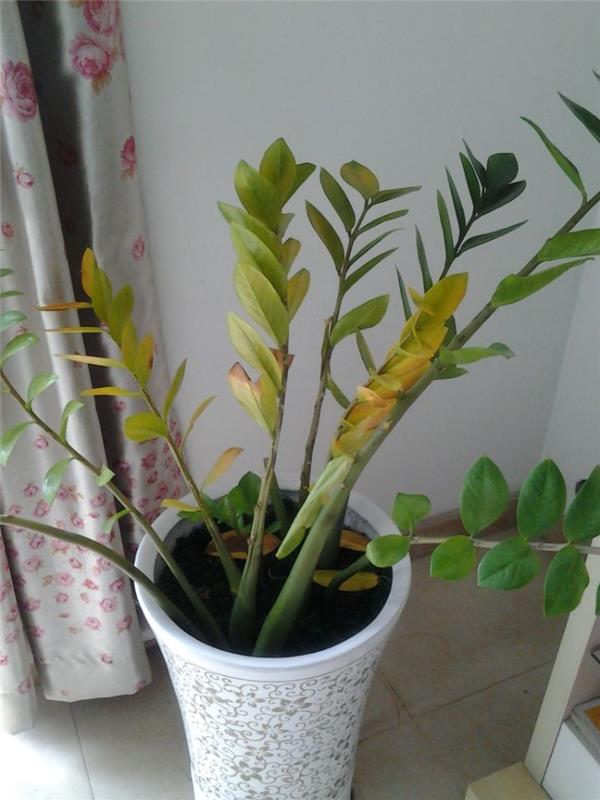
4. Fertilizer
Once the temperature drops below 15°C, all forms of topdressing should be stopped, to avoid fertilizer damage to the roots under low-temperature conditions.
5. Preventing Cold Damage
When the winter temperature drops below 5°C, combined with wet potting soil, the plant's tender pinnate leaves are prone to lodging from cold damage, and in severe cases this causes the tuber to rot, making it very difficult for the plant to recover its vitality.
Control method: Whether for commercial cultivation or home growing, the greenhouse temperature during the overwintering period should be kept no lower than 10°C, and the potting soil should be kept slightly dry. For a small number of potted plants, on especially cold days you can cover them with double layers of plastic bags at night, then remove the bags after the temperature rises the next day.
ZZ Plant Cuttings
Cuttings can use a single small leaf, a section of leaf rachis with 2 leaves attached, or a separate section of leaf rachis. In terms of rooting results, cuttings made from a leaf rachis with leaves attached root faster, have a higher sprouting rate, and more easily form larger tubers. Insert a single leaf into a mixed medium of river sand and vermiculite; after 10 to 14 days, a small rooted bulbous stem forms at the leaf base, and after 2 to 3 months of cultivation it can grow into a small plant, but under normal circumstances the seedling success rate is not high. If a leaf rachis or a leaf rachis with leaves is used as the cutting, the medium can be ordinary fine sand, or a medium prepared by mixing peat soil, perlite and river sand in a ratio of 3:1:1. The cutting should be inserted to a depth of 1/3 to 1/2 of the cutting's length, leaving only the leaves outside the medium. After watering thoroughly, place it in a shaded spot and maintain an ambient temperature of 25°C to 27°C. Depending on how dry or wet the medium is, mist the leaf surface 1 to 2 times a day, keeping the medium slightly moist; never let it become overly wet, otherwise the cutting will rot and the propagation will fail. When the cutting has formed a certain root system, the middle of the root gradually swells to form a small bulbous tuber, and the tuber gradually enlarges. Some of the more tender cutting leaves, after being potted, will wither and die due to high temperatures or poor water management, but the tuber can survive; old mature leaves and cuttings with the entire leaf stalk can also stay green and vigorous. A small number of tubers can sprout and grow new leaves in the same year, but their growth is weak and slow; the following year the tuber will grow stout new shoots and grow normally.
5. Preventing Cold Damage
When the winter temperature drops below 5°C, combined with wet potting soil, the plant's tender pinnate leaves are prone to lodging from cold damage, and in severe cases this causes the tuber to rot, making it very difficult for the plant to recover its vitality.
Control method: Whether for commercial cultivation or home growing, the greenhouse temperature during the overwintering period should be kept no lower than 10°C, and the potting soil should be kept slightly dry. For a small number of potted plants, on especially cold days you can cover them with double layers of plastic bags at night, then remove the bags after the temperature rises the next day.
ZZ Plant Cuttings
Cuttings can use a single small leaf, a section of leaf rachis with 2 leaves attached, or a separate section of leaf rachis. In terms of rooting results, cuttings made from a leaf rachis with leaves attached root faster, have a higher sprouting rate, and more easily form larger tubers. Insert a single leaf into a mixed medium of river sand and vermiculite; after 10 to 14 days, a small rooted bulbous stem forms at the leaf base, and after 2 to 3 months of cultivation it can grow into a small plant, but under normal circumstances the seedling success rate is not high. If a leaf rachis or a leaf rachis with leaves is used as the cutting, the medium can be ordinary fine sand, or a medium prepared by mixing peat soil, perlite and river sand in a ratio of 3:1:1. The cutting should be inserted to a depth of 1/3 to 1/2 of the cutting's length, leaving only the leaves outside the medium. After watering thoroughly, place it in a shaded spot and maintain an ambient temperature of 25°C to 27°C. Depending on how dry or wet the medium is, mist the leaf surface 1 to 2 times a day, keeping the medium slightly moist; never let it become overly wet, otherwise the cutting will rot and the propagation will fail. When the cutting has formed a certain root system, the middle of the root gradually swells to form a small bulbous tuber, and the tuber gradually enlarges. Some of the more tender cutting leaves, after being potted, will wither and die due to high temperatures or poor water management, but the tuber can survive; old mature leaves and cuttings with the entire leaf stalk can also stay green and vigorous. A small number of tubers can sprout and grow new leaves in the same year, but their growth is weak and slow; the following year the tuber will grow stout new shoots and grow normally.