Detailed Explanation of Oleander Cultivation Techniques: Master the Key Points of Planting and Care
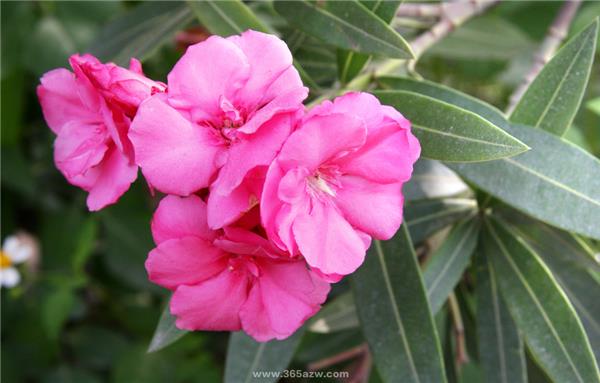
Cultivation Techniques
Propagation Methods
Cuttings are the main method, though division and layering can also be used. Cuttings can be taken in both spring and summer. Soak the base of the cuttings in clean water for about 10 days, keeping the water fresh; this allows the cuttings to root earlier after planting and results in a high survival rate.
The specific method: take 1- to 2-year-old branches cut in spring, cut them into 15-20 cm stem segments, bundle about 20 of them into a bunch, and soak them in clean water with the submerged depth at 1/3 of the stem segment. Change the water at the same temperature once every 1-2 days, keeping the temperature at 20-25 °C. Once adventitious roots appear at the submerged part, they are ready for cuttings. When inserting the cuttings, make holes in the cutting medium with a bamboo chopstick to avoid damaging the adventitious roots. Since the old stem base of oleander has strong sprouting ability and often produces large numbers of tender shoots, these branches can be fully used for summer softwood cuttings. Select semi-lignified cuttings, keep the top 3 small leaves, and insert them into the substrate; pay attention to timely shading and water management, and the survival rate will also be high. For layering propagation, first notch or ring-bark the part to be buried, then bury it in soil; after about 2 months it can be cut from the parent plant, and transplanted with soil the following year.
Selection and Treatment of the Seedbed
For the seedbed, choose a plot that is sheltered from wind and facing the sun, does not accumulate water, has few soil diseases, pests, and weeds, has sufficient fertility, and is easy to manage. Generally, the seedbed should run east-west. Regardless of the method used for cutting propagation, the soil must be carefully prepared. Generally, the plowing depth should reach 25-30 cm, the bed width should be 1 m, the length should be appropriate, and the path width should be 50 cm. If the soil is heavy clay, sand can be mixed in appropriately, and attention should be paid to soil disinfection.
Selection and Treatment of Cuttings
1. Selecting Shoots
The mother plant used for collecting cuttings should have conditions such as excellent quality, vigorous growth, and no pests or diseases. On the same plant, cuttings should generally be selected from the sunny middle and upper parts of the current year's branches, with shorter internodes, thick and sturdy branches and leaves, and plump buds. On the same branch, hardwood cuttings generally use the middle and lower parts; the cut should be smooth, with the upper end cut flat and the lower end cut at a slant. When cutting branches, select thick sturdy branches with a diameter of 1-1.5 cm; the cutting length should be 15-20 cm; the cutting must carry two or three buds; the upper cut should be about 1.5 cm from the bud; and the lower leaves should be removed. When pruning branches, separate the red- and white-flowered varieties.
2. Treatment of Cuttings
Separate the cuttings by flower color and variety, and collect, cut, and insert them promptly. To improve the survival rate of cuttings, during cutting, neatly bundle dozens of cuttings into bundles, soak them for 2-8 hours with ABT Rooting Powder No. 1 at 100 ppm, or soak them for 1-8 hours with Rooting Powder No. 6 at 30-100 ppm. Under normal circumstances, 1 gram of rooting powder can treat 3000 cuttings.
3. Cutting Method and Density
Before cutting, disinfect the soil and water the cutting bed thoroughly. Insert the treated cuttings at a spacing of 5 x 5 cm. Pay attention to the upper and lower ends of the cuttings; they must not be inserted upside down. The cut end of the cutting must be in close contact with the soil, and care should be taken to avoid scraping the cortex of the lower cut end. For this reason, first make holes in the cutting bed with an iron rod or similar tool, then insert the cuttings, but the depth of the holes should be slightly shallower than the length of the cuttings so that the cuttings can be inserted into the soil. The cutting depth should generally leave one or two buds exposed above ground. After cutting, make marks and records.
4. Post-Cutting Management
For most flowering shrubs, the temperature required for cuttings to root is 20°C-25°C and the relative humidity is 80%-85%. Generally, roots form 15-20 days after cutting. After cutting, be sure to spray enough water so that the soil and cuttings are in close contact. To prevent the midday temperature from becoming too high, shading is best. According to soil moisture conditions, spray water once in the morning and once in the evening each day, but the amount of water sprayed must not be too much, otherwise it will affect callus formation and rooting of the cuttings. To prevent disease, spray a fungicide solution about once every 10 days. Transplant in the spring of the following year.
Cultivation Management
Oleander has strong adaptability and is relatively easy to cultivate and manage; whether planted in the ground or in containers, it is relatively undemanding. In ground-planted locations, transplanting should be done in spring, and heavy pruning should be carried out at transplanting. Protect it in winter. The branches and leaves are easily damaged by scale insects, so attention should be paid to control.
Potted oleander, in addition to requiring good drainage, also needs sufficient fertility. In spring, shaping and pruning are needed when growth begins. For leggy and weak branches in the plant, they can be cut off from the base. For branches that are too dense in the inner canopy, part of them should also be thinned. At the same time, apply a callus and anti-corrosion membrane to the pruning cuts to protect the wounds, so that the branches are evenly distributed and the tree shape remains full. After 1-2 years, repot once, and repotting should be done after pruning. Summer is the period of vigorous growth and flowering for oleander, and it has a high water demand. In addition to watering once in the morning and once in the evening every day, if the potting soil is seen to be too dry, add another spraying to prevent tender branches from wilting and to avoid affecting flower longevity. After September, reduce watering to inhibit continued growth of the plant, promote maturation of branch tissues, and increase nutrient accumulation to help it overwinter safely. The overwintering temperature should be maintained at 8-10 °C; when the temperature is below 0°C, oleander will shed its leaves. Oleander is a fertilizer-loving plant. For potted plants, in addition to applying sufficient base fertilizer, apply fertilizer once a month during the growing period.
Cultivation Management
In oleander management, three points must be done well:
It must be pruned in a timely manner.
The top branching of oleander has the characteristic of dividing one into three. It can be pruned and shaped as needed. If a three-forked, nine-topped shape is desired, part of the top of the three forks can be cut off, and nine tops will then branch out. If a nine-top, eighteen-branch shape is desired, leave six branches and cut from the top leaf axils, and eighteen branches will grow. Pruning time should be after each flowering. In the north, the flowering period of oleander is from April to October. Spent flowers should be removed promptly to ensure concentrated nutrients. Generally, pruning is done four times: first after Grain Rain in spring; second during July and August; third during October; and fourth in winter pruning. If flowering is desired indoors, move it to a bright place indoors at about 15°C. Prune immediately after flowering; otherwise, there will be fewer and smaller flowers, or even no flowers. Through pruning, the branches are evenly distributed, the flowers are large and colorful, and the tree shape is beautiful.
The roots must be thinned in a timely manner.
Oleander's fibrous roots grow quickly. For a three-year-old oleander planted in a pot with a diameter of 20 cm, the roots can fill the pot by July of that year, forming a ball that hinders the penetration of water and fertilizer and affects growth. If the roots are not thinned in time, conditions such as wilting, leaf drop, and death may occur. The best time for root thinning is from early August to late September. At this time the roots are dormant, making it a good opportunity for root thinning. Root-thinning method: use a sharp trowel to cut away the surrounding yellow fibrous roots; then use a three-pronged hook to loosen along the main root. Remove about half or one third of the yellow fibrous roots, then replant in the pot. After root thinning, place it in shade and water thoroughly, keeping the potting soil moist. Keep it shaded for about 14 days, then move it to a sunny place. For ground-planted oleander, in mid-September, the yellow fibrous roots should also be cut around the main trunk. After cutting the roots, water and apply dilute liquid fertilizer.
Fertilizer and water must be applied in a timely manner.
Oleander is a flower that loves fertilizer and water and prefers neutral or slightly acidic soil.
Fertilization: About 20% organic soil and miscellaneous manure should be maintained in the potting soil. If chicken manure is used, 15% is sufficient. Fertilization time: once before Qingming, once after the Autumn Equinox.
Method: Dig a ring-shaped trench around the edge of the pot, apply fertilizer, and then cover with soil. After fertilizing at Qingming, apply topdressing once every ten days or so with water-fermented soybean cake water; after fertilizing at the Autumn Equinox, apply topdressing once every ten days or so with soybean cake water or peanut cake water, or tenfold chicken manure liquid. If the above fertilizers are unavailable, use human urine fermented for more than seven days, diluted with water five to seven times, pour it along the edge of the pot, then water thoroughly. For fertilizers containing a lot of nitrogen, the principle is dilute, light, little, and frequent, strictly preventing root burn. Proper watering is the key to managing oleander well. Improper watering in winter and summer can cause leaf drop, flower drop, and even death. In spring, water once a day; in summer, water once in the morning and once in the evening each day, keeping the potting soil moisture at about 50%. The leaves should be sprayed with water frequently. If it is too dry, leaves are prone to drop and the plant may wilt. In winter, water less, but the potting soil moisture should be kept at about 40%. The leaves should frequently be washed with clean water to remove dust. If you want it to bloom in winter, keep the room temperature above 15°C; if you do not want it to bloom in winter, lower the room temperature to 7-9°C and place it in a bright place indoors without direct sunlight. In the north, ground-planted oleander outdoors needs to be wrapped with straw mats to prevent freezing and cold damage, and the cold protection should be removed around Qingming. Although oleander is easy to manage, one must not be careless.
Root-thinning method: use a sharp trowel to cut away the surrounding yellow fibrous roots; then use a three-pronged hook to loosen along the main root. Remove about half or one third of the yellow fibrous roots, then replant in the pot. After root thinning, place it in shade and water thoroughly, keeping the potting soil moist. Keep it shaded for about 14 days, then move it to a sunny place. For ground-planted oleander, in mid-September, the yellow fibrous roots should also be cut around the main trunk. After cutting the roots, water and apply dilute liquid fertilizer.Fertilizer and water must be applied in a timely manner.
Oleander is a flower that loves fertilizer and water and prefers neutral or slightly acidic soil.
Fertilization: About 20% organic soil and miscellaneous manure should be maintained in the potting soil. If chicken manure is used, 15% is sufficient. Fertilization time: once before Qingming, once after the Autumn Equinox.
Method: Dig a ring-shaped trench around the edge of the pot, apply fertilizer, and then cover with soil. After fertilizing at Qingming, apply topdressing once every ten days or so with water-fermented soybean cake water; after fertilizing at the Autumn Equinox, apply topdressing once every ten days or so with soybean cake water or peanut cake water, or tenfold chicken manure liquid. If the above fertilizers are unavailable, use human urine fermented for more than seven days, diluted with water five to seven times, pour it along the edge of the pot, then water thoroughly. For fertilizers containing a lot of nitrogen, the principle is dilute, light, little, and frequent, strictly preventing root burn. Proper watering is the key to managing oleander well. Improper watering in winter and summer can cause leaf drop, flower drop, and even death. In spring, water once a day; in summer, water once in the morning and once in the evening each day, keeping the potting soil moisture at about 50%. The leaves should be sprayed with water frequently. If it is too dry, leaves are prone to drop and the plant may wilt. In winter, water less, but the potting soil moisture should be kept at about 40%. The leaves should frequently be washed with clean water to remove dust. If you want it to bloom in winter, keep the room temperature above 15°C; if you do not want it to bloom in winter, lower the room temperature to 7-9°C and place it in a bright place indoors without direct sunlight. In the north, ground-planted oleander outdoors needs to be wrapped with straw mats to prevent freezing and cold damage, and the cold protection should be removed around Qingming. Although oleander is easy to manage, one must not be careless.