How to care for Alocasia (Dumb Cane)? Understanding its growth habits and tending it with care is key
With elegant foliage, the Alocasia is lush green and its dewdrops seem about to fall, making it endearing. As a result, many friends grow Alocasia as an indoor green plant. But how do you grow Alocasia? Is it hard to keep alive? In fact, growing green plants must start with their growth habits.
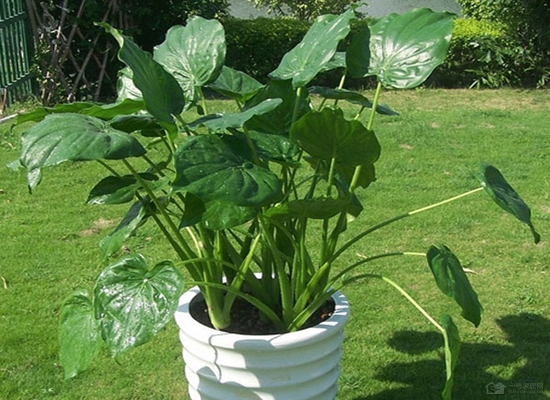
Alocasia is actually not easy to grow. As long as you pay attention to a few key points, you should be able to handle how to grow Alocasia with ease.
1. Soil
Although Alocasia does not have very high soil requirements, growing it in garden soil makes it grow slowly, thin and weak, and it looks malnourished; Alocasia grown in pure sand does well at the seedling stage, but the later results are poor, and the Alocasia stays rather short; Alocasia grown in nutrient soil has sturdy plants, large leaves, and grows very well. Therefore, it is best to choose a better soil, such as a self-mixed soil that is relatively fertile and has good drainage.
2. Choosing a flower pot
Generally speaking, growing Alocasia in a small pot restricts the roots and inhibits its growth. Therefore, if you want the Alocasia to grow larger, you must choose a larger pot. According to experience, the larger the pot, the stronger and better the Alocasia grows.
3. Light and watering
Alocasia likes a semi-shaded environment, so it should not be exposed to direct sunlight. As for how to water Alocasia, for those grown in small pots, water when the potting soil is dry, and make sure the water can drain out from the bottom of the pot. For large, deep pots, when the surface of the potting soil is dry, you can dig into the surface soil to check its color; if the soil below is moist or damp, then there is no need to water.
4. Pests and diseases
The most common pests and diseases of Alocasia are red spider mites and aphids. The symptoms are yellowing leaves, white spots on the surface, a thin and weak plant, and webbing on the leaves. The treatment method is: wipe the leaves clean with diluted soapy water, cleaning both the back and the front, then rinse with clear water. For large pots, you can use a spray to clean them, once every two or three days, persisting for a week, and the effect will be fairly obvious.
5. Propagation
(1) Division, sowing, and other methods can be used. In summer and autumn, the tubers of Alocasia will sprout small Alocasia with leaves, and division can be done along with repotting and soil changing. After the fruit ripens in autumn, harvest the orange-red seeds and sow them immediately after collection, or dry and store them, then sow after the following spring.
(2) Stem cutting of Alocasia is for old perennial plants. Along with rejuvenating the plant, cut the stem about 5 cm from the base of the plant above the soil surface for stem cutting propagation. Stem cutting of Alocasia is suitable in all three seasons: spring, summer, and autumn. During cutting, keep the substrate (6 parts sand : 4 parts garden soil) moist, and at the same time increase air humidity. In about 7-10 days, many sturdy roots will grow. During the cultivation of old plants, because of the shady and damp environment or spraying water on the leaf surface every morning and evening in summer and autumn, a few new plants will occasionally sprout on the old stems (especially on the stem base left after stem cutting), and many aerial roots will attach. You can break them off from where the offsets meet the mother plant and pot them for planting.
Alocasia likes warmth and moisture, and it is said that growth stops below 18 degrees. Therefore, ensuring that Alocasia safely overwinters is an important task. Thus, during winter, especially in northern regions, Alocasia should be moved indoors for growing.