How to grow Clivia? 9 key points to note when planting
Clivia (Clivia miniata) not only has green leaves but also beautiful flowers, and with the favor that traditional culture shows it, growing Clivia indoors has become even more common. So, how do you grow Clivia? Clivia is not as easygoing as pothos or spider plants and needs careful attention. As long as you cultivate it with care, Clivia can reward you with gorgeous flowers.
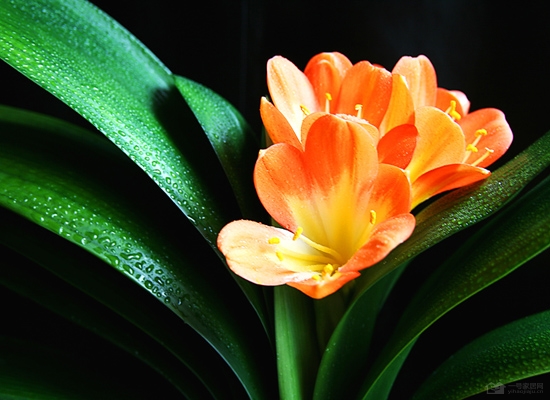
Clivia is an evergreen perennial herbaceous plant native to the mountain forests of South Africa, where the natural environment is like spring all year round, and every part of the Clivia plant has adapted to this neither-cold-nor-hot natural environment.
1. Soil
Fertile, loose neutral or slightly acidic humus soil is the most suitable hotbed for Clivia. Soil choice is the number one key factor for Clivia, and it is also one of the reasons many people fail to grow it well.
Growing soil formula: 55% leaf mold (preferably oak leaves), 15% river sand, 15% pine needles, 10% charcoal, 5% hemp seeds.
a. Sift the soil and then disinfect it.
b. Fry the hemp seeds until fragrant and mix them evenly with the soil.
c. Add a layer of charcoal at the bottom of the pot to increase air permeability at the bottom and prevent water accumulation. (This portion of charcoal is not counted in the formula.)
d. Add a small handful of hemp seeds at the bottom of the pot as base fertilizer. (This portion of hemp seeds is not counted in the formula.)
PS: Beginners can also directly buy special Clivia soil for planting.
2. Light
Clivia likes semi-shade, and when growing Clivia indoors you need to manually adjust the effect of light on it. Clivia leaves are phototropic; if it is kept in one place indoors for a long time, the leaves will definitely turn toward the direction of the sun. Therefore, in order for Clivia to grow attractively and have ornamental value, you should change the direction of the sun-facing side of the leaves every week, so that Clivia can grow with a well-arranged, layered look.
Clivia must be placed in a north-south direction; if it is not in a north-south direction, the leaves will grow crooked. At this point you can pull two leaves even and clip them together. Normally, the leaves will be corrected within 15-20 days.
3. Temperature
The most suitable temperature is 15-25 degrees.
4. Watering
Clivia has fleshy roots and is afraid of waterlogging. Therefore, watering should not be excessive; just water along with fertilizing and keep the pot soil moist. The soil should not be too dry or too wet. Each watering must soak through, and after flower buds appear, water a bit more. This can be done about every 20 days. When room temperature is low, watering should be controlled to prevent the pot soil from becoming too wet, but the pot soil should not be allowed to become too dry either.
5. Fertilizing
Clivia is generally fertilized in winter. Phosphorus fertilizer and potassium fertilizer are more beneficial for growing Clivia; when topdressing, apply less nitrogen fertilizer. Be sure to control the amount of fertilizer, otherwise it can easily cause scorch-like symptoms at the leaf tips of Clivia. Especially in winter, if spots appear on the leaves and the root system turns yellow, it is due to too much fertilizer.
Household methods for phosphorus and potassium fertilizer: you can choose eggshell powder and thoroughly decomposed fishy water; bran ash and tobacco ash can be used as potassium fertilizer when fertilizing Clivia. Three months before flowering, apply liquid fertilizer mainly based on phosphorus and potassium fertilizer to promote flower stalk emergence and blooming.
6. Keeping warm
The suitable growth temperature for Clivia in winter is 15-20°C, and it is best not to go below 10°C. After the flower stalk emerges, the temperature should be kept at around 18°C, and the day-night temperature difference is best around 10°C; otherwise, the flower stalk will bloom before reaching the proper height, which easily forms "clipped arrows." When the outdoor temperature at night is below 10°C, Clivia must be moved indoors. When the indoor temperature is below 10°C, in addition to covering the surface of the pot soil with a 1 cm thick layer of charcoal powder for warmth, the flower pot should also be placed in a sunny, warm spot indoors. When the indoor temperature is especially low, you can cover the flower pot with plastic film to raise the temperature, but the temperature under the cover must not exceed 25°C. If it exceeds that, ventilate and cool it down promptly.
7. Extending the flowering period
The flowering period of Clivia is mostly from December to March of the following year. The method to extend the flowering period is to place it in a dark place when the flowers are about to open, appropriately control watering, and keep the temperature at 8-12°C. In this way, the flowering period can be extended by 10-20 days.
8. Protecting the leaves
Short, broad, thick, green, shiny, and upright leaves are the characteristics of healthy Clivia. In addition to providing reasonable fertilizer and water, the leaf surface must be kept clean to improve photosynthetic efficiency. First, wash the leaves regularly, spraying and rinsing with clean water at the same temperature as the room or wiping away dust on the leaves; second, spray fungicide in time to prevent leaf spot disease, leaf blight, and stem rot, ensuring the leaves stay green.
9. Repotting time
The time and frequency of repotting and changing soil for Clivia depend on the size of the seedling and the season. Adult Clivia needs a soil change once a year. The best time to change the soil is in spring and autumn, because Clivia grows vigorously then and changing the soil will not affect the plant's growth.
It seems there is quite a lot of knowledge involved in growing Clivia. You cannot just water it and ignore everything else; it also needs attention to the direction the leaves are placed, otherwise it is difficult to achieve a perfect result.