How to Grow Bowl Lotus? A Complete Guide to Planting Methods and Precautions
Bowl lotus belongs to the lotus family and is stunning when in bloom. Today I will introduce the planting methods and precautions for bowl lotus, which friends who want to grow it can use as a reference.
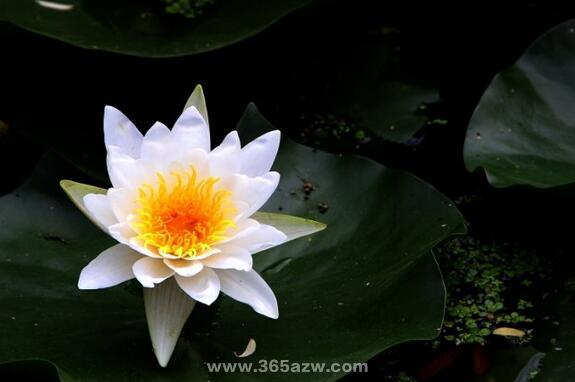
Introduction to bowl lotus:
Bowl lotus, also known as pot lotus, bowl lotus, and table lotus. It belongs to the water lily family. It is a perennial aquatic herbaceous flower of the lotus family. The underground stem is long and thick, with long nodes, and the leaves are shield-shaped and round. The flowering period is from June to September, with flowers borne singly at the top of the pedicel; the petals are numerous and embedded in the receptacle cavities, in colors such as red, pink, white, purple-yellow, and green, or with colored markings and edges. The nut is oval, and the seed is egg-shaped. The lotus seed has an anatropous ovule.
Bowl lotus planting methods and precautions:
Step one: scarify the seed shell.
The seed coat of the lotus seed has a special structure that is hard and thick. After the seed fully matures and dries and shrinks, water and air cannot easily penetrate it, respiration is very slow, and it enters a state of forced dormancy. Therefore, lotus seeds can be buried in soil for hundreds or even thousands of years without germinating or rotting; this is the reason for the longevity of lotus seeds. In order for the lotus seed to absorb water and oxygen after sowing, break the forced dormancy state, and enter germination and growth, the shell must be scarified before sprouting the seed.
The lotus has an anatropous ovule, and the embryo bud is attached at the top of the seed. When scarifying the shell, the basal end of the seed should be broken, that is, the end where the seed is attached to the receptacle, which is also the concave end of the lotus seed. You can use scissors or pliers to crack it. Before sowing, generally it is enough to rub through the seed coat (that is, the hard shell of the lotus seed) until the brown seed coat is visible; when cracking the shell, just make a 2-3 mm opening at the base, and do not crack too deeply, so as not to damage the embryo. After soaking for one day, when the embryo absorbs water and swells and the seed coat softens from absorbing water, you can peel off 1/3 of the seed coat by hand along the cracked area to expose the embryo and facilitate elongation of the embryo bud. It must be noted that the scarified area must not be too large or too numerous. If the entire hard shell of the lotus seed is removed, the embryo bud loses protection and is very likely to rot and die.
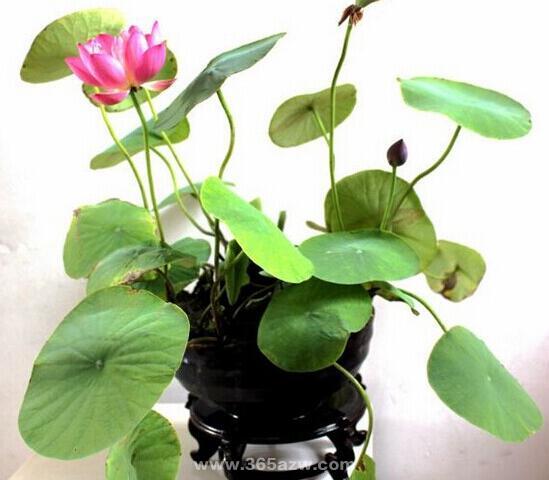
Step two: soak the seeds to promote germination.
Soak the already scarified seeds in warm water at about 50 degrees. The water used for soaking should be clean, free of grease and dirt, and water higher than 50 degrees should not be used, otherwise germination will be affected. The water temperature will drop naturally, and should finally be kept at about 30 degrees; it should not be higher than 40 degrees or lower than 20 degrees. If the water temperature is higher than 40 degrees, although the seeds germinate rapidly on the first day, later growth will be inhibited. If the water temperature is lower than 20 degrees, the seeds will germinate and grow too slowly. When soaking a small amount at home, you can put them in a thermos to keep warm. At a temperature of 30 degrees, generally soaking to promote germination for 3 days is enough for germination, and the embryo bud extends from the opening.
During this period, the water needs to be changed 1-3 times a day, and seeds that cannot germinate should be removed in time. Under normal circumstances, seeds that still do not germinate after 7 days will no longer germinate. Seeds without germination ability often float on the water surface, with yellowed embryo buds and moldy, foul-smelling cotyledons. (You can also directly soak the seeds in tap water, without using warm water or heating; germination can occur after about two days of soaking.)
Step three: begin water culture seedling raising of the seeds.
After the seeds sprout, water culture seedling raising should be carried out at about 25°C for 5-7 days. During water culture seedling raising, the root system of the lotus seedling has weak absorption, and growth mainly relies on nutrients provided by the seed embryo, so fertilization is generally not needed. During the water culture seedling raising process, the water layer should be kept about 10 cm deep, and sufficient light should be given; it is not suitable to change the water or turn the plants frequently, so as to avoid excessive elongation of the leaves due to frequent changes in their growth direction; the petioles should be kept in the water, and the leaves should lie freely and flat on the water surface. When the first leaf opens, the second leaf is about to open, and white roots have grown, it can be planted.
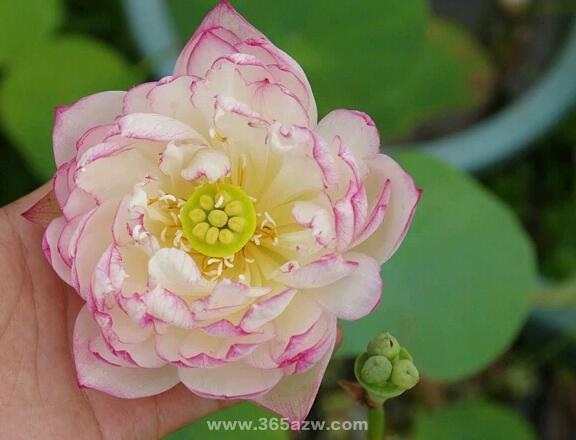
Step four: planting. When the buds grow to about 10CM, they can be transplanted.
According to the needs of bowl lotus planting, choose soil and put it into a flower pot, then add clean water, and mix the soil and fertilizer evenly. After the muddy water clears, plant the water-cultured seedling in the center of the flower pot, with the seed fully entering the mud as the standard, so that the leaves spread freely on the water surface. When transplanting, care should be taken not to break the petioles, so as not to affect growth. After planting, keep a water layer of 3-5 cm, but never submerge the leaves in water. Bowl lotus loves light, and the flower pot should be placed in a sunny place. Young seedlings are delicate, and some may scorch when exposed to sunlight, but generally they will germinate and survive. Do not water too much either, so as to raise the water temperature and promote growth. After growing 7-13 floating leaves, upright leaves can appear. Generally speaking, for multi-flower varieties, flower buds can begin to appear after growing 5-17 upright leaves. The timing of bud appearance varies by variety; some varieties even show buds and bloom before upright leaves grow.
Reasons why bowl lotus does not bloom
Sufficient sunlight: it is a light-loving plant. The flowering season varies from June to September, sometimes in midsummer, but I have also seen bowl lotus bloom in early autumn. Temperatures differ by region, so it also varies. One key point is that bowl lotus must receive sufficient sunlight, reaching more than five hours a day; otherwise, if kept indoors with little light, it is very difficult for it to bloom.
Sufficient temperature: if the temperature stays below 15 degrees, it is very difficult for it to bloom. Only when it is kept above 20 degrees can it grow and bloom normally. Everyone should have seen lotuses in those ponds, or lotuses in lakes; they all bloom and form seed pods when there is strong sun and relatively high temperatures. However, if a bowl lotus has not been exposed to the sun for a long time, do not suddenly take it out into direct sunlight. That can easily scorch the leaves.
Fertile soil: ordinary vegetable garden soil is also fine, and leaf mold and pond mud can also be used; these three can be used together. If you really cannot find pond mud, it can also be used. You can also add a little river sand (I have seen many friends use only sand and stones, which is not nutritious enough), but make sure the soil is relatively sticky, and soil that finally becomes mud is better. As for water, for newly sprouted bowl lotus, there should be less water, and then as it gradually grows, the amount of water should gradually increase. Fertilizer should be applied lightly and frequently; applying too much fertilizer at once can easily cause excessive vegetative growth, with only leaves growing and no flowers.
Sufficient space: for example, if the container used is too small. Although bowl lotus can be grown in a relatively large-diameter bowl, and with nutrient solution the nutrition can also keep up. This is suitable for bowl lotus with small leaves. For bowl lotus with large leaves, it is best to plant it in a pot with a diameter of more than 25cm and a depth of more than 20cm. In this way, its underground stem can smoothly extend and grow freely. If there are too many leaves, some can be removed to help it bloom.
Growing from seeds blooms more slowly, while growing from lotus root is faster. This is a summary of experience from many friends who have grown it. However, each has advantages and disadvantages. Growing from seeds requires patience; although the process is long, you can observe more subtle changes and enjoy the planting process. Growing from lotus root segments is faster, but there is much less fun. Personally, I still think growing from seeds is more fun and more interesting.
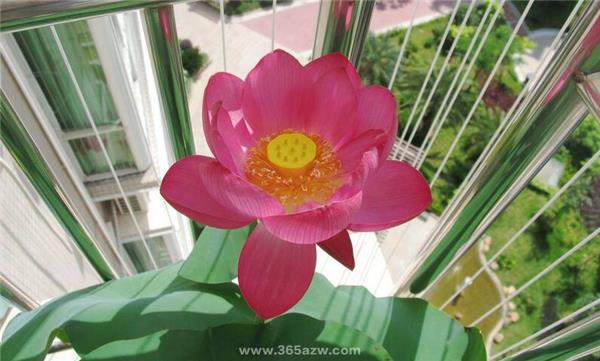
Variety reasons. Perhaps the seeds bought or used are fake and are not genuine bowl lotus, or the goods do not match the description, or the variety is not good enough, so no matter how hard you try, it will not bloom. Therefore, when buying, pay attention to distinguishing and choosing.
The above is an introduction to bowl lotus planting methods and precautions. I hope everyone will like today's article.
Otherwise, if kept indoors with little light, it is very difficult for it to bloom.Sufficient temperature: if the temperature stays below 15 degrees, it is very difficult for it to bloom. Only when it is kept above 20 degrees can it grow and bloom normally. Everyone should have seen lotuses in those ponds, or lotuses in lakes; they all bloom and form seed pods when there is strong sun and relatively high temperatures. However, if a bowl lotus has not been exposed to the sun for a long time, do not suddenly take it out into direct sunlight. That can easily scorch the leaves.
Fertile soil: ordinary vegetable garden soil is also fine, and leaf mold and pond mud can also be used; these three can be used together. If you really cannot find pond mud, it can also be used. You can also add a little river sand (I have seen many friends use only sand and stones, which is not nutritious enough), but make sure the soil is relatively sticky, and soil that finally becomes mud is better. As for water, for newly sprouted bowl lotus, there should be less water, and then as it gradually grows, the amount of water should gradually increase. Fertilizer should be applied lightly and frequently; applying too much fertilizer at once can easily cause excessive vegetative growth, with only leaves growing and no flowers.
Sufficient space: for example, if the container used is too small. Although bowl lotus can be grown in a relatively large-diameter bowl, and with nutrient solution the nutrition can also keep up. This is suitable for bowl lotus with small leaves. For bowl lotus with large leaves, it is best to plant it in a pot with a diameter of more than 25cm and a depth of more than 20cm. In this way, its underground stem can smoothly extend and grow freely. If there are too many leaves, some can be removed to help it bloom.
Growing from seeds blooms more slowly, while growing from lotus root is faster. This is a summary of experience from many friends who have grown it. However, each has advantages and disadvantages. Growing from seeds requires patience; although the process is long, you can observe more subtle changes and enjoy the planting process. Growing from lotus root segments is faster, but there is much less fun. Personally, I still think growing from seeds is more fun and more interesting.
Variety reasons. Perhaps the seeds bought or used are fake and are not genuine bowl lotus, or the goods do not match the description, or the variety is not good enough, so no matter how hard you try, it will not bloom. Therefore, when buying, pay attention to distinguishing and choosing.
The above is an introduction to bowl lotus planting methods and precautions. I hope everyone will like today's article.