How to water-propagate gardenia cuttings? A detailed guide to practical tips
Life always needs a few little tricks, and water-propagating gardenia cuttings also calls for summing up some clever techniques. So what is the water propagation method for gardenias that gardening enthusiasts have worked out? If you want to know, please let me explain the water propagation method for gardenias one by one! I hope this method can offer gardeners some useful reference.
1. Prepare one large Sprite bottle, transparent tape, and a foam board.
2. Use a knife to cut the large Sprite bottle into the shape shown in the picture, leaving a little uncut so it does not come apart.
3. Choose a young gardenia shoot from the current year's growth, cut the lower end into a slanted opening, and you can keep the leaves above. Then secure it onto the foam board as shown in the picture; the foam board should be cut to fit the size of the bottle.
4. Fill the bottle with a suitable amount of clean water, place the secured gardenia foam board inside the bottle, and let the lower end of the shoot soak in the water. You can add a little more water so you will not need to add more later. Then seal the bottle with transparent tape, only punching a toothpick-sized hole in the bottle cap.
5. Place the bottle in a spot where it can get sunlight; the higher the temperature and the more water droplets on the bottle wall, the easier it is to root. After that, you do not need to bother with it at all, you just have to wait for the surprise. In summer, roots start growing in about a week, which is really great.
This is 15 days of water propagation; the water-propagated gardenia roots have grown this much, so lovely.
After the roots have grown well, open the transparent tape, place it in a spot with weak sunlight for a one- or two-day transition, and then it can be temporarily planted.
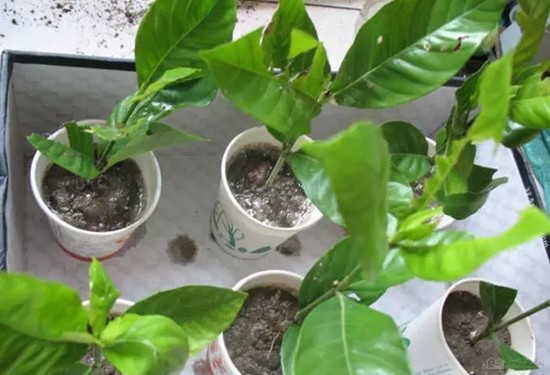
Below is the process of potting up. To avoid damaging the roots when potting up, I first pot the water-propagated gardenia into a disposable cup, which also makes it convenient for transplanting next time.
1. First punch holes all over the bottom of the disposable cup to allow air and drainage after planting.
2. Use tape to stick the holes just punched closed again (some people will surely ask, why punch holes in the first place? Please keep reading), and leave a tape tab so it is easy to tear off later.
3. Add water to 1/3 of the cup.
4. First add a small portion of the prepared fine soil into the water, so the roots will not sit at the bottom of the cup, then hold the seedling with your left hand and immerse it in the water, estimating that the roots just touch the soil you just added, while your right hand continues adding fine soil until it reaches the needed position. When adding soil, the lower part should be fine and the upper part can be a bit coarser, so the seedling will not lean, but do not press the soil with your hand, to avoid damaging the roots; you can gently tap the paper cup on the ground a few times to make the soil settle. Since the roots are in water when planting, adding soil will not damage the roots, so they will all survive.
5. At this point, tear off the tape you just stuck on, the purpose being to let the excess water flow out; too much water will cause root rot. If you do not punch holes at the beginning and punch them after planting, it will make the newly planted seedling shift again, which is not good for survival.
Now you only need to place the planted seedling in a shaded spot to recover for a week, without watering during that time. After the seedling has taken, choose a time when the soil is dry, cut the cup apart, and then move it into a larger pot, taking care not to break the root ball. This method of potting up small seedlings can ensure that water-propagated cuttings survive smoothly.
The method of water-propagating gardenia cuttings is very simple; as long as you put in a little care, you can transplant out a new pot of gardenia. The method has been shared with everyone, so you might as well give it a try!