Clivia can absorb dust and purify the air. Do you have one at home?
On the broad, thick leaves of the Clivia, there grow many stomata and fine hairs that can secrete a large amount of mucus. During gas exchange, it can absorb a large amount of indoor dust, dirt and harmful gases, making the indoor air clean. Therefore, the Clivia is also praised by people as an "absorption machine" and "dust collector," and the guardian of human health. So how should the Clivia be cared for?
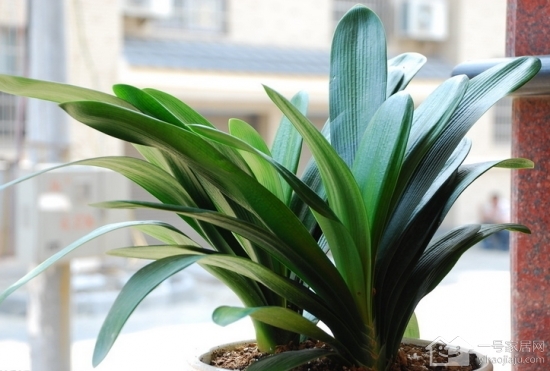
How to care for the Clivia
1. Soil
There are requirements for the soil. The Clivia is suitable for soil rich in humus. This kind of soil has good air permeability and good water permeability, and the soil is fertile and slightly acidic (PH6.5). In humus soil, mixing in about 20% sand grains is beneficial for root growth. When planting, use a pot that gradually increases in size as the plant grows. When cultivating a one-year-old seedling, a 3-inch pot is suitable. In the second year, change to a 5-inch pot, and afterward change to a pot one size larger every 1-2 years. Repotting can be done in spring and autumn.
2. Watering
Watering should be reasonable. The Clivia has well-developed fleshy roots that can store a relatively large amount of water and has a certain degree of drought tolerance. General experience holds that a soil moisture content of about 30% is suitable. The rule is to water again after the surface of the soil in the pot looks dry. In winter, water once every 3-5 days; in spring and autumn, water once every 1-2 days; in summer, appropriately increase the frequency of watering. Seedlings need little water, while the flowering period requires more water. When watering, do not pour water on the leaves to prevent the leaves from rotting. If dust is found on the leaves, gently wipe the leaf surface with a soft cloth, or brush it with a soft-bristled brush. Do not rinse and scrub with large amounts of water.
3. Light
The Clivia likes semi-shade. When growing the Clivia indoors, artificial adjustment is needed for the effect of light on it. The leaves of the Clivia are phototropic. If it is placed in one spot indoors for a long time, the leaves will definitely turn toward the direction of the sun. As far as its plant shape is concerned, it is then difficult to achieve the ornamental effect of forming a straight line when viewed from the side and looking like an open fan when viewed head-on. Usually, during the day, Mom would put the flower pot in a sunny place. In order for the Clivia to grow beautifully and have ornamental value, you must not be lazy. Every week, change the direction of the side of the leaves facing the sun, so that the Clivia can grow in a well-arranged way. Because the leaves of the Clivia are opposite each other, if the light is too one-sided for a long time, they will become uneven. Ha, Mom said that when the Clivia is in bud, she learned a trick from an old flower-growing friend: place the Clivia under sunlight at night to supplement light. Haha, such a flower fanatic!
4. Fertilizing
When the Clivia lacks nutrients, various conditions will appear, such as new leaves being narrow and very pale in color. In terms of nutrients, the needed nutrients should be added according to the season. The Clivia is generally fertilized in winter. Phosphorus fertilizer and potassium fertilizer are more beneficial for growing the Clivia. When topdressing, apply less nitrogen fertilizer. Be sure to control the amount of fertilizer, or it will easily cause symptoms like scorched tips on the Clivia leaves. Especially in winter, if spots appear on the leaves and the root system turns yellow, it is due to excessive fertilizing. Ha, here are 2 ways to teach you to obtain household phosphorus fertilizer and potassium fertilizer. You can choose eggshell powder and thoroughly decomposed fish waste water; these two are very good organic phosphorus fertilizers. Bran ash and tobacco ash can be used as potassium fertilizer when fertilizing the Clivia. Three months before flowering, apply liquid fertilizer mainly based on phosphorus and potassium fertilizer to promote it to send up a scape and bloom.
5. Repotting and changing soil
The time and frequency of repotting and changing soil for the Clivia depend on the size of the seedling and the season. For these mature Clivias, the soil should be changed once a year. The best time to change the soil is in spring and autumn, because at this time the Clivia grows vigorously and changing the soil will not affect the plant's growth. Take the Clivia out of the pot, cut off rotten roots and old roots with no absorption capacity, and remove the spent soil. Cover the drainage hole of the flower pot with a piece of broken pot, fill in 2-5 cm of nutrient soil, grab a handful of soil to fill the inside of the roots firmly, then place the plant in the pot and fill the pot with nutrient soil. When it reaches half the height of the pot, gently press down along the edge of the pot with your hand, so that the roots all stand in the pot and are not easily bent. The key point of changing the soil is to pack the roots firmly with soil. Otherwise, if there is no soil around the roots, water and nutrients cannot reach the roots, which easily causes root rot and stuck scapes. After changing to nutrient soil, water thoroughly.
6. Pest and disease control
The Clivia requires special attention to the prevention and control of two diseases: root rot and sunscald. If these situations occur, timely and effective prevention and control should be carried out, and the Clivia will become delicate and charming.
The above is the relevant introduction in this article. I believe that after reading it, you also have a simple understanding of this. If needed, you can continue to follow No. 1 Home Network to learn more information.