How to care for and fertilize azaleas? The correct method explained in one article
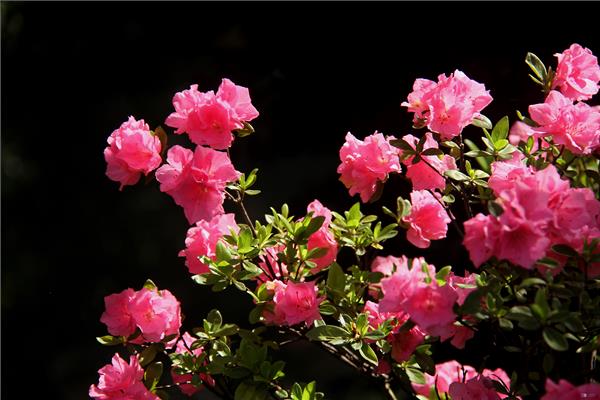
There are an extremely large number of azalea varieties, with bright flowers and lush branches and leaves, and very high ornamental value, making them a great choice for accenting a courtyard. Azaleas like fertilizer, so how should they be fertilized? Let's find out together!
I. Choosing flower pots for growing azaleas
1. Pot material requirements: clay pots, plastic pots, porcelain pots, ceramic pots, etc. can be used.
2. Pot size: the pot size for planting azalea seedlings is consistent with the crown diameter of the seedlings; the pot size for planting azaleas at the middle seedling stage is 3/4 of their crown diameter; the pot size for azaleas at the mature seedling stage is 1/2 of their crown diameter.
II. Preparing the potting soil for growing azaleas
Azaleas like acidic (pH 4.5-5.5), loose, well-drained soil. They should avoid alkaline soil containing lime, and avoid clayey soil. For home cultivation, the following formulas can be used: Belgian azalea: leaf mold : peat soil : sand = 5:2:3; spring-summer azalea: garden soil : peat soil : sand = 3:5:2. Add an appropriate amount of bone meal and mix evenly.
III. Temperature and light requirements for growing azaleas
Potted azaleas are generally potted in spring from March to April, and can also be potted in autumn. When potting, they need to be transplanted with soil, and after planting, water thoroughly and place in a shaded place.
For potted azaleas in the north, they are generally moved indoors in early to mid-October to overwinter, and after being brought indoors they are placed in a sunny spot. In the early period after being brought indoors, attention should be paid to opening windows frequently for ventilation. The winter room temperature should be around 10°C, and should not be too high; otherwise, the plant's physiological activity increases, consuming a large amount of nutrients, which affects flowering and growth the following year; at the same time, sufficient light should be provided. After mid to late April of the following year, they can be taken outside. At this time the sunlight is relatively soft, and appropriate shading should be provided around noon. After summer begins, they must be moved to a cool, ventilated place for care. Since azaleas are shade-loving flowers, they need to be cared for under a shade shed in spring, summer, and autumn. Especially when exposed to long-term direct sunlight in summer, it can easily cause the branches and leaves to turn yellow and wither, growth to stagnate, and the whole plant to die. In autumn, the daily light exposure time should be gradually increased, and by late autumn shading should be stopped.
IV. Watering methods for growing azaleas
During the growing period, keep the potting soil moist. During the flowering period from April to June, the water requirement is relatively large. In the high-temperature season from July to August, water should be sprayed on the ground and leaves to keep the air moist. After September, as the temperature gradually cools, the moisture in the potting soil should be gradually reduced. In winter, when the plant enters dormancy, watering should be reduced.
Since azaleas have a shallow root system, they are afraid of both drought and waterlogging. Improper watering can cause leaf drop in mild cases and death in severe cases. Therefore, watering is one of the key measures for growing azaleas well. Watering should be determined according to the plant's season and growth stage. In spring during bud formation and flowering, water consumption is relatively high, so watering should be timely; if the pot becomes dehydrated, the flowers will wither and the flowering period will be shortened. During this period, it is best to keep the potting soil moist. In summer, azalea branches and leaves grow vigorously, the temperature is high, and water evaporates quickly, so in addition to watering thoroughly once a day, water should also be replenished at any time. If there is even slight neglect and the potting soil becomes too dry, the leaves will turn yellow, the leaf centers will curl, and they may even dry up and die.
Since azaleas like moisture, in summer clean water should be used to spray the leaf surfaces and water should be sprinkled on the ground around the flower pot, so as to increase air humidity and lower the temperature; in autumn, flower buds have already formed, the temperature gradually drops, and the weather turns cooler, so at this time it is enough to keep the potting soil from drying out; in winter, the temperature is low, azaleas are in a dormant or semi-dormant state, and water consumption is low, so watering should be strictly controlled, as too much water can easily cause root rot. However, during this period, every 5-7 days, use clean water close to room temperature to spray and wash the branches and leaves once, so as to keep the plant fresh. When watering azaleas, attention should be paid to water quality. Rainwater is more suitable. If tap water is used, it must first be stored in a container for 1-2 days before use.
V. Fertilization methods for growing azaleas
Azalea roots are shallow and fine, with weak absorption capacity, so when fertilizing, the principle of "light fertilizer applied frequently" must be followed. If the fertilizer is too concentrated or undecomposed raw fertilizer is applied as a top dressing, it can easily cause root rot, scorched leaves, and even death. Especially for 1-2 year old small seedlings, even more attention should be paid to the amount of fertilizer, otherwise fertilizer damage can easily occur.
In February to March before spring azaleas bloom, a phosphorus-based liquid fertilizer should be applied as a top dressing once every 10-15 days to promote larger and more colorful flowers; in March to April, applying the same fertilizer to summer azaleas can make the flowers large, the color good, the petals thick, and the flowering period long. Fertilization should be stopped during the flowering period, otherwise it can easily cause flower drop and leaf growth, affecting the ornamental effect; after the flowers fade, apply a nitrogen-based fertilizer as a top dressing once about every 10 days to promote new branch growth. After late July, this is exactly the period of azalea flower bud differentiation, so a phosphorus-based liquid fertilizer should be applied once every 10-15 days to promote flower bud differentiation. During the winter dormant period, no fertilizer is needed, and top dressing should be stopped.
VI. Pruning methods for growing azaleas
Azaleas have strong sprouting ability, with many and dense branches, so after flowering, overly dense branches, thin and weak branches, dead branches, diseased branches, damaged branches, crossing branches, and leggy branches should be cut off to facilitate ventilation and light penetration. Do not shorten the branches that are retained. This is because azalea leaves mostly cluster at the branch tips. After flowering, a section of new branch grows and a cluster of new leaves grows out, the old leaves then fall off, and then the terminal buds begin flower bud differentiation, becoming next year's flowering branches. If this section of branch is cut off, it will affect the number of flowers the following year.
VII. Precautions for growing azaleas
1. Azaleas are a typical acidic-soil flower. To prevent yellowing, apply 0.2% ferrous sulfate once about every 20 days. If yellowing of the leaves is found, use 0.2% ferrous sulfate water to spray directly on the leaf surfaces, and the leaves can turn from yellow to green.
2. For home flower growing, if you want azaleas to bloom during the Spring Festival, you can use the method of breaking their dormancy period. That is, move spring azaleas that have already formed buds indoors to a sunny place in mid-December, keep the room temperature above 5°C, apply light fertilizer once every 10-15 days, water when the potting soil is dry, and frequently spray water on the leaf surfaces to increase humidity, so that they can bloom before the Spring Festival.
3. Azaleas grow relatively slowly, and generally can be repotted once every two years. Repotting should be done after the flowers fade. When repotting, new culture soil should be added. Generally, use a culture soil mixed with 8 parts leaf mold (peat soil), 1 part garden soil, and 1 part river sand, and add a small amount (about 50 grams per pot) of decomposed oil residue or chicken manure as base fertilizer.
4. During the growth period of azaleas, adventitious buds often easily sprout on the stems and branches, and they should be removed promptly to avoid disrupting the plant shape. After bud formation, if too many flower buds are found, the excess flower buds should be removed, leaving only one flower bud per flowering branch, so as to concentrate nutrients and promote large, brightly colored flowers. After azaleas bloom, the faded flowers do not fall off easily. To reduce nutrient consumption, the faded flowers should be removed promptly to encourage new buds to sprout.
5. Propagation methods for growing azaleas
Azaleas can be propagated by methods such as cuttings, grafting, and layering, with cuttings being the main method. For large-scale propagation, the full-light cutting seedling method can be used, with fast rooting and a high survival rate; for small-scale propagation, they can be inserted into flower pots. Take cuttings in early summer and early autumn, and after insertion provide shade and keep moist.
For the cutting substrate, mix 3 parts leaf mold, 1 part garden soil, and 6 parts river sand evenly, or use 5 parts leaf mold and 5 parts river sand (or pure sand). For the cuttings, choose one-year-old branches with short internodes, robust growth, no pests or diseases, and a lignified base. The cuttings should be 6-10 cm long. Before insertion, dip the base of the cutting into medical vitamin B12. Dip it briefly in the medicinal liquid, take it out and let it air dry for 2-3 minutes; this can advance rooting by about 10 days, and there will also be more roots and faster growth.
When taking cuttings, first use chopsticks or a thin wooden stick to poke a hole in the substrate, then insert the cutting, gently press it firm with your hand, and spray thoroughly with water so that the base of the cutting is closely combined with the soil. After insertion, cover the flower pot with a plastic bag, tie it tightly around the edges with fine string, and place it in a shaded place; spray water once each morning and evening, stop spraying water after one week, and simply keep the potting soil moist regularly; keep it shaded within one month, and gradually receive scattered light after sprouting; keep the temperature at 18°C-25°C. For general varieties, roots can form 40-60 days after cutting.
When growing flowers at home, in order to make them bloom earlier, the high-branch layering method can also be used for propagation. That is, in March, select robust 2-3 year old branches and perform girdling, cover them with a plastic bag, put leaf mold inside the bag, keep it moist regularly, and keep the temperature at around 20°C-25°C. After about 5-6 months, roots can form, and they can bloom in spring of the second year.
The above is the relevant introduction in this article. I believe that after reading it, you also have a simple understanding of this. If needed, you can continue to follow No. 1 Home Network to learn more information.
If too many flower buds are found, the excess flower buds should be removed, leaving only one flower bud per flowering branch, so as to concentrate nutrients and promote large, brightly colored flowers. After azaleas bloom, the faded flowers do not fall off easily. To reduce nutrient consumption, the faded flowers should be removed promptly to encourage new buds to sprout.
5. Propagation methods for growing azaleas
Azaleas can be propagated by methods such as cuttings, grafting, and layering, with cuttings being the main method. For large-scale propagation, the full-light cutting seedling method can be used, with fast rooting and a high survival rate; for small-scale propagation, they can be inserted into flower pots. Take cuttings in early summer and early autumn, and after insertion provide shade and keep moist.
For the cutting substrate, mix 3 parts leaf mold, 1 part garden soil, and 6 parts river sand evenly, or use 5 parts leaf mold and 5 parts river sand (or pure sand). For the cuttings, choose one-year-old branches with short internodes, robust growth, no pests or diseases, and a lignified base. The cuttings should be 6-10 cm long. Before insertion, dip the base of the cutting into medical vitamin B12. Dip it briefly in the medicinal liquid, take it out and let it air dry for 2-3 minutes; this can advance rooting by about 10 days, and there will also be more roots and faster growth.
When taking cuttings, first use chopsticks or a thin wooden stick to poke a hole in the substrate, then insert the cutting, gently press it firm with your hand, and spray thoroughly with water so that the base of the cutting is closely combined with the soil. After insertion, cover the flower pot with a plastic bag, tie it tightly around the edges with fine string, and place it in a shaded place; spray water once each morning and evening, stop spraying water after one week, and simply keep the potting soil moist regularly; keep it shaded within one month, and gradually receive scattered light after sprouting; keep the temperature at 18°C-25°C. For general varieties, roots can form 40-60 days after cutting.
When growing flowers at home, in order to make them bloom earlier, the high-branch layering method can also be used for propagation. That is, in March, select robust 2-3 year old branches and perform girdling, cover them with a plastic bag, put leaf mold inside the bag, keep it moist regularly, and keep the temperature at around 20°C-25°C. After about 5-6 months, roots can form, and they can bloom in spring of the second year.
The above is the relevant introduction in this article. I believe that after reading it, you also have a simple understanding of this. If needed, you can continue to follow No. 1 Home Network to learn more information.