Causes and Solutions for Orchid Leaf Tip Burn and Yellowing
Orchids are plants with very strong vitality, and many people who grow orchids have this feeling. However, some people also encounter yellowing leaves. Below, let us look at the causes and countermeasures for orchid leaf tip burn, and how to deal with yellowing orchid leaves.
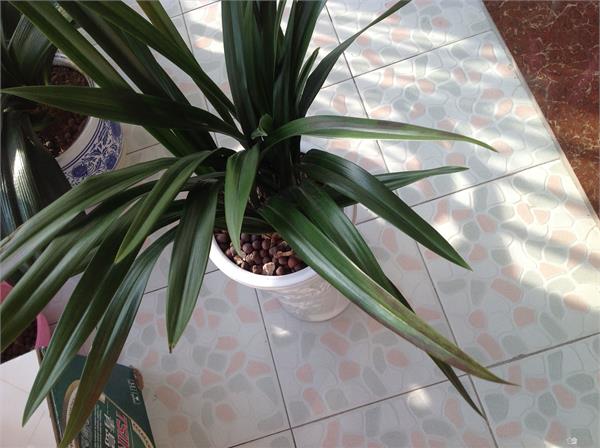
Causes of Yellowing Orchid Leaves
1. When the potting medium is too dry, or the air humidity is too low and the pot surface is too dry, this situation generally cannot immediately show up as leaf shrinkage. The first sign is that the orchid leaves appear dehydrated. After watering restores them, it easily starts to decline from the old pseudobulbs, and the orchid leaves begin to yellow from the top downward. If there is water damage in the pot, the orchid leaves yellow from the bottom upward, and the decline is slower.
2. Fungal damage to orchid roots or waterlogging of the root crystal tips should follow the same principle: waterlogging is the process, rotting of the crystal tips is the result, and burned leaf tips are the surface phenomenon. This kind of tip burn, as Feixiang says, shows black at the leaf tip; after the pot is treated, the burned tip generally no longer extends downward.
3. Tip burn caused by fertilizer damage: the burned tip area is brown or black. The boundary with the unaffected part of the orchid leaf is very obvious, and the normal orchid leaf tissue is also prone to fertilizer-damage spots. These irregular round spots have brown centers, and where they contact normal tissue there is a ring of black spots of uneven thickness, with a very obvious boundary.
4. When orchid plants suffer fungal damage, it is often shown through tip burn. For example, with tip blight, the burned tip is white-brown, and the junction with normal orchid leaf tissue is black-brown; the white-brown area is the dead, dried-out zone, and the black-brown area is the fungal infection zone. With leaf blight, the pale brown leaf tip is the dead, dried-out zone, and the black-brown area is the fungal infection zone; where it contacts normal orchid leaf tissue, it mostly appears yellow-green, and this yellow-green area is the infected zone of normal orchid leaf tissue, which differs from tip blight. Anthracnose also easily shows tip burn: the leaf tip appears as one segment of black-brown and one segment of pale brown, alternating as it develops toward the lower part of the orchid leaf, and independent or connected black-brown patches also appear on the leaf blade, with the edges of the patches appearing pale yellow.
Causes and Countermeasures for Orchid Leaf Tip Burn
(1) Excessive light. Orchids are semi-shade plants, suitable for morning light, diffused light, and soft light. If the light duration is too long and the light quality is too strong, it is very easy to cause the leaves to yellow and the leaf tips to burn. The countermeasure is to adjust the light duration and light intensity in a timely way in summer and autumn, avoiding direct strong light. The most commonly used and simplest method is to use shade nets of different specifications; the shading level is generally 60%-80% for ordinary varieties, and must reach 90% for marginal variegation, striped variegation, crystal variegation, and patterned variegation.
(2) Dry air. When the air is moist, orchid leaves are emerald green and glossy, radiant and attractive. If the air is dry, the leaf texture is rough, and tip burn occurs from time to time. Especially in the dry, rain-scarce, windy north, the air is often dry in spring, autumn, and winter, and orchid leaf tip burn is particularly severe. The solution is, when the air is dry, to frequently mist the leaf surface and sprinkle water on the ground. You can also place a water trough under the orchid pot, make a water pool in the orchid shed or orchid room with nylon cloth, hang wet door curtains, and install automatic misting humidifiers.
(3) Improper watering. Like other plants, orchids cannot do without water, but insufficient or excessive watering will also cause losses. There is often this situation: because the potting soil is too full, water flows out as soon as it is watered, resulting in the top being wet and the bottom being dry, forming "half-way" watering. Over time, because the root system loses water, scorching first begins at the leaf tips. Another cause is that careless omission of watering also easily leads to this phenomenon. On the contrary, whether with soil-based or granular growing media, watering on time and in equal amounts can cause the soil-based growing medium to be too wet and lack oxygen, making respiration difficult, causing the root system to turn black or even rot, and leading to dried and burned orchid leaf tips. The countermeasure is to water timely and appropriately according to the growth habits of different orchids, preventing the two adverse tendencies above.
(4) Excessive fertilizing. Orchids have fleshy roots and coexist with orchid mycorrhizal fungi, so only light fertilizer applied frequently is needed for them to grow robustly, with lush leaves and fragrant flowers. If fertilizer is applied excessively, especially if raw fertilizer or concentrated fertilizer is applied, it will cause root rot, yellowing leaf tips, and premature aging. The correct approach is to fertilize timely and moderately according to different orchid varieties, different growth stages, and different growth conditions. For root fertilization, liquid fertilizer fermented from organic fertilizer must be diluted with 1:10-20 parts clean water before use; chemical fertilizer should be prepared at 0.1%-0.2%, applied about once a month. Foliar spraying fertilizer should be dilute rather than concentrated. If using micro-fertilizers such as Lanjunwang or Penshibao, be sure to prepare them according to the product instructions, and do not arbitrarily increase the concentration, to avoid fertilizer damage.
(5) Abnormal leaf physiological function. In some cases, excessive nitrogen application causes leaves to be tender and reduces stress resistance; in some cases, spraying fertilizer or pesticide at too high a concentration accumulates at the leaf tips and causes damage; in some cases, inadequate winter cold protection causes frost damage to the leaf tips. There are also cases where the spacing between orchid pots is too small, and leaf tips rub and collide with each other, causing damage. The measures to take are to treat according to the specific cause. That is, apply the three elements nitrogen, phosphorus, and potassium rationally; when spraying fertilizer and pesticide, it is better to be dilute than concentrated; effectively carry out cold protection and warmth preservation in severe winter and early spring; and increase the distance between pots to prevent phenomena that affect leaf physiological function.
What to Do When Orchid Leaves Turn Yellow
1. A sudden change in the orchid's care environment leads to poor water absorption by the leaves, causing yellow leaves.
2. A directly purchased potted orchid was newly potted by the seller; the orchid is somewhat unaccustomed to the soil, temporarily affecting nutrient absorption and causing yellow leaves.
3. Water-induced yellowing, which is caused by watering too much, leading to long-term water accumulation in the soil, poor air permeability, and even partial rotting of fibrous roots, showing as dull yellow, lusterless young leaves and shrinking new shoots.
The above is the related introduction in this article. I believe that after reading it, you also have a simple understanding of this. If needed, you can continue to follow No.1 Home Network to learn more information.