A Detailed Guide to the Cultivation Methods That Make the Deodar Cedar Stand Tall and Proud
When we mention the deodar cedar (Cedrus deodara), it is a world-famous ornamental shade tree for gardens. It is a tree with its own environmentally friendly credentials: it can block dust, reduce noise, and has bactericidal properties, making it quite suitable for planting in industrial and mining enterprises. Yet few people are familiar with how to grow it. Today let us get to know the cultivation methods of the deodar cedar.

1. Best propagation time: sowing can be done in mid-to-late March, and cuttings can be taken in both spring and summer;
2. Best growing soil: the deodar cedar is suited to neutral or slightly acidic soil with deep soil layers and good drainage;
3. Humidity requirements for growth: the deodar cedar prefers a cool, moist climate;
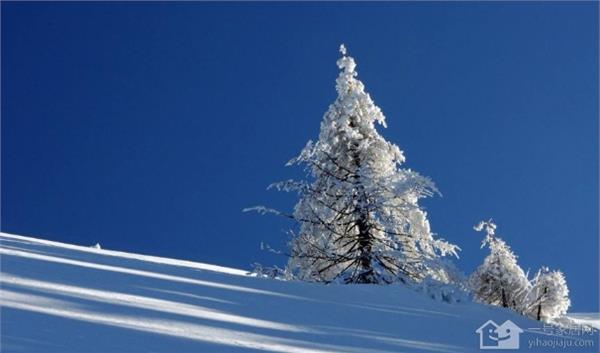
4. Best growing temperature: the deodar cedar is fairly cold-hardy, and large saplings can withstand short periods of low temperatures down to -25°C;
5. Best growing light: the deodar cedar is relatively light-loving, and young trees tolerate a little shade. Large trees require ample light from above, otherwise they grow poorly or wither.
6. Notes on growing the deodar cedar:
1. Fertilizer application:
For the deodar cedar, fermented and rotted human manure and cake fertilizer are suitable; for home use, cake fertilizer is the main choice. The best time to fertilize is from April to May. Note that the fertilizer solution should not be too concentrated and should not be applied too often; applying it 2-3 times a year is enough.
2. Key watering points:
The deodar cedar has a certain drought tolerance and fears waterlogging. It is best to keep the potting soil moist, and water only when the potting soil has dried out completely; when you water, water thoroughly. During long spells of overcast and rainy weather, be careful that no water accumulates in the pot; you can tilt the pot on its side to help drainage, and restore the pot promptly once the rain stops.
3. Pruning essentials:
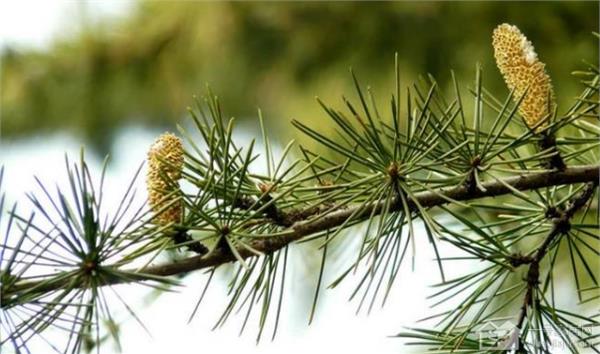
The deodar cedar can be pruned during the winter dormant period, removing overlapping branches, crossing branches, dead branches, and leggy branches. The deodar cedar's needles grow in clusters at the tips of short shoots. During the growing season, overly long branches can be cut back at any time, and upright small branches on side branches can be pinched back to encourage more short shoots and clustered needles to sprout, increasing the thickness of the cloud-like tiers so as to maintain a certain tree shape.
4. Repotting the soil:
The deodar cedar should be repotted once every 3-4 years, preferably in spring from March to April before budbreak. When repotting, remove about 1B2 of the old soil, cut away rotten roots, replace with loose, fertile potting soil, cover with moss, water, and place in a shaded spot; after half a month it will have settled into the pot.
5. Propagation essentials:
The deodar cedar is generally propagated by sowing and cuttings.
Sowing: this can be done in mid-to-late March, with a sowing rate of 75 kg per hectare. Sowing earlier is also possible to increase the seedlings' disease resistance. Choose sandy loam with good drainage and aeration as the seedbed.
Before sowing, soak the seeds in cold water for 1-2 days, let them dry, and then sow; they begin to germinate after 3-5 days, and this can last about 1 month, with a germination rate of 90%. During the seedling stage, pay attention to shading and to preventing and controlling damping-off and cutworms. One-year-old seedlings can reach 30-40 cm in height, and can be transplanted the following spring.
Cuttings: cutting propagation can be carried out in both spring and summer. In spring it is best before March 20, and in summer late July is ideal.
In spring, cut one-year-old sturdy branches from young mother trees and treat them with rooting powder or 500 mg/L naphthaleneacetic acid, which can promote rooting. Then insert them into well-aerated sandy loam, water thoroughly, and set up a double-layer shade frame for shading. In summer, it is best to select semi-lignified shoots of the current year as cuttings. In terms of management, besides strengthening shading, also cover with plastic film to maintain humidity. After insertion, 30-50 days later, callus tissue can form; at this point, a solution of 0.2% urea and 0.1% potassium dihydrogen phosphate can be used for foliar feeding.
After the propagated seedlings have stayed in the bed for 1-2 years, they can be transplanted. Transplanting can be done in February-March. The plants need to be moved with a soil ball, and support stakes should be set up. The row spacing gradually increases from 50 cm to 200 cm. Apply topdressing 2-3 times during the growing season. Generally there is no need for shaping and pruning; simply thin out diseased and dead branches and the shaded weak branches in the dense ☆forbidden☆ parts of the crown. Spray benlate or zineb to control gray mold, and spray omethoate, trichlorfon, and the like to control scale insects and moth and butterfly pests.
It can adapt to all types of soil, and can also grow on heavy loess and poor, dry land; however, in waterlogged lowlands or places where the groundwater level is too high, it grows poorly and may even die, as it is a shallow-rooted tree species. It is easily blown over by wind. Young leaves are extremely sensitive to sulfur dioxide, and its resistance to smoke damage is very weak. Young seedlings grow slowly. Usually male plants flower after the age of 20, while female plants do not flower and set seed until after the age of 30. Because the flowering periods differ, natural pollination is relatively ineffective. Usually pollen must be collected and stored in advance, and artificial pollination carried out when the female flowers mature, in order to obtain more high-quality seeds. It is generally propagated by sowing or cuttings. Sowing can be done in late March, with a sowing rate of about 5 kg per mu; seedlings emerge in about 15 days. Seedlings need a shade frame.
If the base of the cutting is soaked in 500 ppm naphthaleneacetic acid for 5 minutes, rooting can be promoted. After insertion, 1-2 layers of shade frames should be set up, and plastic film should be covered for strict shading. About 30-50 days after insertion, callus tissue forms. At this point, foliar feeding can be carried out with a 0.2% urea solution and a 0.1% potassium dihydrogen phosphate solution. After the propagated seedlings have stayed in the bed for 1-2 years, they can be transplanted. Transplanting is done in February-March, and the plants need to be moved with a soil ball, with support poles set up. The row spacing for the first transplant is about 50 cm, and for the second transplant it should be expanded to 1-2 m. Topdressing should be applied 2-3 times during the growing season. Seedlings are easily harmed by pests and diseases, especially damping-off and cutworms, which are the most severe; other pests include white grubs, bagworms, pine tussock moths, pine shoot borers, red wax scales, termites, and so on, which must be controlled promptly.
7. Pest and disease control:
1. Control of gray mold
Gray mold mainly harms the current year's young shoots and two-year-old small branches of the deodar cedar. Strictly speaking, it can be divided into the following types:
1) Young shoot tip blight type: it mainly occurs on young shoots. The early symptoms are the same as the canker type, but once water-soaked rot appears in the diseased area, it is difficult for healing tissue to form. When the diseased area reaches more than 2/3 of the circumference of the young shoot, the young shoot bends downward from the diseased area, wilts, and dies. The disease develops rapidly; from the appearance of symptoms to the death of the young shoot takes only 4 to 5 days. On rainy days, a layer of gray mold grows on the diseased area.
2) Canker type: it mainly harms the young shoots of the deodar cedar. In the early stage, light brown round or nearly round irregular small spots appear at the base of the young shoot, then gradually expand into large lesions that are sunken in the middle; in the early sunken stage they show dark brown water-soaked rot. After the disease heals, the previously rotted epidermis dries and cracks.
3) Small branch dieback type: it mainly occurs on two-year-old small branches. The lesions mainly spread from dead young shoots. In the early stage, a ring of reddish-brown depression forms at the junction of the dead shoot tip and the small branch, then gradually forms a distinct lesion; the lesion does not crack, a small amount of resin oozes out, and the cortex and surface layer of the xylem are dark brown. After the lesion extends around the small branch, the upper part of the small branch dies. The occurrence and prevalence of this disease are closely related to climatic conditions.
Control methods:
1) The deodar cedar should be planted in a place with good drainage, ventilation, and light, and should not be planted too densely.
2) Diseased and dead shoot tips should be cut off promptly and destroyed.
3) During the disease period, spray 65% zineb wettable powder at 500 times dilution, 45% amobam aqueous solution at 1000 times dilution, 50% benlate wettable powder at 1000 times dilution, 70% thiophanate-methyl wettable powder at 1500 times dilution, and so on.
2. Control of blight
Occurrence pattern of deodar cedar needle blight: the pathogen overwinters as mycelium (or apothecia) in diseased fallen needles, and in March-April of the following year forms apothecia; from April to May the ascospores mature one after another. On rainy days or under humid conditions, the apothecia absorb water, swell, and open, exposing milky white ascus clusters; after the ascospores are squeezed out of the asci, they spread further by air. The pathogen invades through the stomata of deodar cedar needles, and it takes about two months before obvious symptoms appear. Because the conidia produced in the conidiophores have very poor germination ability and no infectivity, no reinfection occurs. However, because the ascospores are released over a very long period, about 3 months, new infections may occur from spring to summer. During the period when ascospores are dispersing, if rainfall is heavy and humidity is high, invasion is favored. Dry woodland, poor soil, and the deodar cedar suffering from pests and diseases and poor management may all promote the occurrence of the disease.
Pollution-free control measures:
1) Strengthen tending and management so that the deodar cedar grows vigorously and its disease resistance is enhanced.
2) For small-area plantations, deodar cedar nurseries, and other places where conditions permit, clear away diseased leaves before the ascospores disperse, so as to reduce sources of infection.
3) During the period after the ascospores mature and are dispersing, spray 1:2:200 Bordeaux mixture, 0.3-0.5 Baume degrees lime sulfur mixture, or 25% wettable carbendazim at 400-500 times dilution, or 65% wettable zineb at 8 times dilution, for 2-3 treatments, with an interval of 10-15 days each time.
7. Pest and disease control:
1. Control of gray mold
Gray mold mainly harms the current year's young shoots and two-year-old small branches of the deodar cedar. Strictly speaking, it can be divided into the following types:
1) Young shoot tip blight type: it mainly occurs on young shoots. The early symptoms are the same as the canker type, but once water-soaked rot appears in the diseased area, it is difficult for healing tissue to form. When the diseased area reaches more than 2/3 of the circumference of the young shoot, the young shoot bends downward from the diseased area, wilts, and dies. The disease develops rapidly; from the appearance of symptoms to the death of the young shoot takes only 4 to 5 days. On rainy days, a layer of gray mold grows on the diseased area.
2) Canker type: it mainly harms the young shoots of the deodar cedar. In the early stage, light brown round or nearly round irregular small spots appear at the base of the young shoot, then gradually expand into large lesions that are sunken in the middle; in the early sunken stage they show dark brown water-soaked rot. After the disease heals, the previously rotted epidermis dries and cracks.
3) Small branch dieback type: it mainly occurs on two-year-old small branches. The lesions mainly spread from dead young shoots. In the early stage, a ring of reddish-brown depression forms at the junction of the dead shoot tip and the small branch, then gradually forms a distinct lesion; the lesion does not crack, a small amount of resin oozes out, and the cortex and surface layer of the xylem are dark brown. After the lesion extends around the small branch, the upper part of the small branch dies. The occurrence and prevalence of this disease are closely related to climatic conditions.
Control methods:
1) The deodar cedar should be planted in a place with good drainage, ventilation, and light, and should not be planted too densely.
2) Diseased and dead shoot tips should be cut off promptly and destroyed.
3) During the disease period, spray 65% zineb wettable powder at 500 times dilution, 45% amobam aqueous solution at 1000 times dilution, 50% benlate wettable powder at 1000 times dilution, 70% thiophanate-methyl wettable powder at 1500 times dilution, and so on.
2. Control of blight
Occurrence pattern of deodar cedar needle blight: the pathogen overwinters as mycelium (or apothecia) in diseased fallen needles, and in March-April of the following year forms apothecia; from April to May the ascospores mature one after another. On rainy days or under humid conditions, the apothecia absorb water, swell, and open, exposing milky white ascus clusters; after the ascospores are squeezed out of the asci, they spread further by air. The pathogen invades through the stomata of deodar cedar needles, and it takes about two months before obvious symptoms appear. Because the conidia produced in the conidiophores have very poor germination ability and no infectivity, no reinfection occurs. However, because the ascospores are released over a very long period, about 3 months, new infections may occur from spring to summer. During the period when ascospores are dispersing, if rainfall is heavy and humidity is high, invasion is favored. Dry woodland, poor soil, and the deodar cedar suffering from pests and diseases and poor management may all promote the occurrence of the disease.
Pollution-free control measures:
1) Strengthen tending and management so that the deodar cedar grows vigorously and its disease resistance is enhanced.
2) For small-area plantations, deodar cedar nurseries, and other places where conditions permit, clear away diseased leaves before the ascospores disperse, so as to reduce sources of infection.
3) During the period after the ascospores mature and are dispersing, spray 1:2:200 Bordeaux mixture, 0.3-0.5 Baume degrees lime sulfur mixture, or 25% wettable carbendazim at 400-500 times dilution, or 65% wettable zineb at 8 times dilution, for 2-3 treatments, with an interval of 10-15 days each time.