What are the special techniques for making stump bonsai?
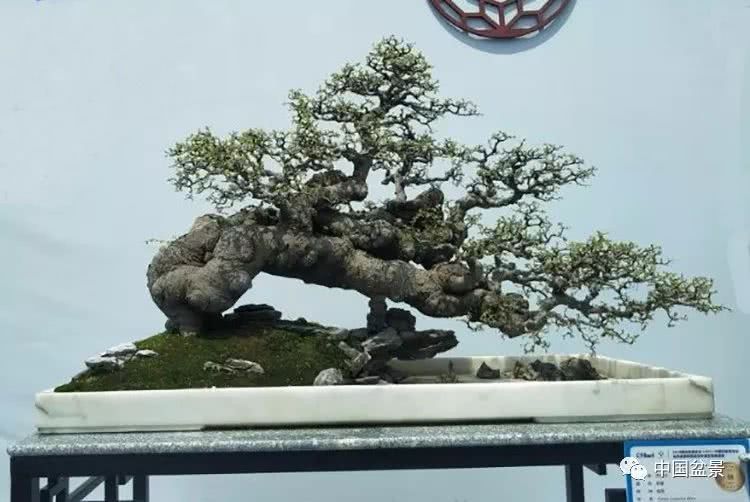
Dongguan Rongxing Horticulture Garden Bonsai, Guangdong
[Bonsai Enthusiast's Reflections]
Text | Xiamen, Fujian @Zhou Yingzhi
In a person's life, it is not just about how much money to earn; more often, it is about fulfilling the dream in one's heart, a kind of dignity, a kind of responsibility, a kind of mission - it is about making the latter half of one's life stronger, more independent, more complete. It may seem like the pursuit of material wealth, but in reality it is the pursuit of self-growth. After walking a stretch of the road, one realizes that when the inner self is strong enough, when cultivation and love are sufficient, earning money is merely incidental. In fact, a person's maturity is more important than success!
Special Techniques for Making Stump Bonsai
Recommended text | Bonsai Drunken Old Man
Stump bonsai, abbreviated as zhuangjing, is mainly appreciated for the roots, trunks, leaves, flowers, and fruits of the plant. Through artificial wiring, pruning, and shaping, it is made to stand elegantly and gracefully; or to have gnarled branches and ancient ruggedness; or to bear abundant fruit with spirited flair; or to have layered foliage all tinted, shining brilliantly. Below are several special techniques for making stump bonsai.
1. Luring ants to bore and feed
Most ancient tree stumps on the mountain appear even more aged and elegant after being damaged by termites. Artificially luring ants to bore and feed on potted plants can help them achieve the desired effect sooner. Ants begin to become active in late March and gradually disappear after mid-October. During their active period, you can forcefully carve away some phloem on the trunk, then drill some holes in the wood, apply maltose syrup to lure the ants to come and bore and feed. Scrape once a week and apply once a week; the boring and feeding speed is very fast. However, never let ants build nests at the root collar, to avoid boring into the roots and damaging the stump. If you find ants laying eggs and settling in, fill the area with hard mud, or use formalin at 20 times dilution to drive them away.
2. Prying and pulling side branches
If side branches on the main trunk are to be removed, you need not cut them off; instead, tear them off by hand together with the bark on the main trunk, imitating the way large tree branches are split and torn by wind after wind damage.
3. Prying to raise the bark
To make a certain part of the trunk bulge, during the period of most vigorous growth, insert a small knife into the bark and gently pry, separating the bark from the wood. Be careful to move gently; too much force will tear the bark. After 40-50 days the wound heals, and because the cells are stimulated, division intensifies and the wound bulges like a wart.
4. Hammering the trunk
If the main trunk of the potted tree is smooth and flat, during the growing season you can strike the trunk with an iron hammer, causing the cambium cells to be stimulated and intensify division; the injured part can thereby bulge, resembling the uneven trunk of an old tree.
5. Rock-attached style method
To make a rock-attached style, if you have stone material with good water absorption, such as pumice or sandstone, you can carve crevices around the stone according to its natural grain or as needed, then embed the roots. Hard potted stones can only use those with good natural grain.
The best time for the operation is spring, when the roots are soft and easy to inlay. First fill the gap with a thin layer of yellow mud, then embed the tree roots, embedding them tightly so that all side roots clasp the stone. Then wrap the outside with moss, covering more moss on the embedded parts of the roots, and finally bind and tie, spraying water frequently to keep moist.
Do not pile soil on the outside of the moss, to avoid side roots growing many fibrous roots through the moss. Once fibrous roots are exposed outside, they should be cut off promptly. After one year, you can begin to gradually remove the moss; you cannot remove the moss all at once, otherwise the roots are easily sun-damaged or sun-killed. Let the roots gradually be exposed and age, and only finally be fully exposed to the sun.
6. Borrowing dead wood
Some dead, withered trees, although not living things, have peculiar forms, with bark and flesh completely gone and rugged bones, and can be borrowed to help young seedlings become a landscape. Use their natural holes, cracks, and fissures to embed the main trunk of a young seedling, then wrap the outside with cloth strips, add thin bamboo, and bind with rope. After 2-3 years, remove it. By then the main trunk of the seedling has also thickened, and the embedded part fits tighter and tighter; the trunk exposed outside is forced to thicken on both sides, covering the traces of the join.
You can also artificially carve some longitudinal cracks or plant small seedlings in a hidden part on the back, or directly sow seeds, wrap the outside with mud, moss, etc., and remove after the plant grows; after shaping, you can achieve an artistic effect that is seamless and indistinguishable from the real thing.
7. Root-connected style method
Mainly used for some tree species that readily produce adventitious buds and adventitious roots. In spring, bury the main trunk of the potted tree horizontally in the soil, leaving all side branches exposed above the soil to grow. After a period, each side shape forms a small tree, still connected below to the main trunk, and at the junctions of the side branches and the main trunk new roots gradually grow. Three years of cultivation can bring the new roots to a certain thickness. At this time, gradually expose the originally horizontally buried main trunk above the soil and cut off its fibrous roots. Thereafter, the adventitious roots continuously thicken each year. As they grow downward, the exposed part also gradually increases, while the original main trunk runs through these adventitious roots, much like a thicket of trees sprouting from connected roots in nature.
8. Inverted or tilted flower pot method
Taking advantage of the plant's phototropism, you can turn the flower pot upside down or tilt it, causing the plant to grow in the opposite direction, then use wiring and pruning to shape it. After it takes shape, turn the flower pot upright again for cultivation and give further correction. The main trunk naturally bends and droops, suitable for cultivating the cascade style.
This article is selected from the Flower and Bonsai Network; copyright belongs to the original author.
Liu Chuangang's rainforest bonsai sets a new auction high
Bonsai friend @An Xianjin:At the Zunyi Golden Bullet bonsai exhibition, Teacher Liu Chuangang reworked a rainforest-style Golden Bullet, and today it was collected by a Jiangsu collector for 500,000 yuan.
@Zhang Xianjue:Congratulations to Chuangang's rainforest bonsai for setting a new auction high.
Bonsai friend@Tianyi Stump GardenSelf-recommended Golden Bullet bonsai as follows:
@Tianyi Stump Garden: Removing the clothes and changing to brocade better reflects the inner beauty of the bonsai.
Wonderful replay:
Chinese bonsai welcomes you!
Enjoy at any timethebonsai exhibition hall
Promote bonsai culture, exchange bonsai techniques!
Appreciate bonsai art, share a happy life!