When repotting a clivia, cushion the pot with country items and mix black and white soil, repurposing waste to grow flowers
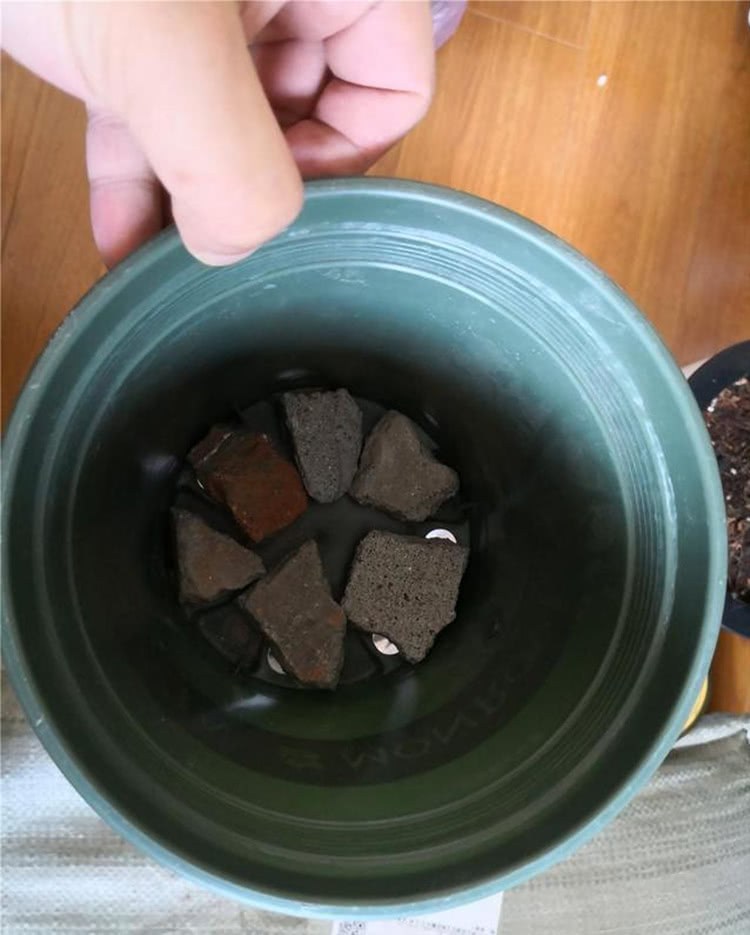
September is a good time to repot clivias. When it comes to repotting clivias, 1,000 people have 1,000 methods. Today let's take a look at one flower owner's repotting method. As soon as this little gardener saw his repotting method, he felt very familiar with it. The things he used to repot the clivia are all common things in our countryside. Come and take a look.
1. Step one: put a brick at the bottom of the pot
The first step is to place some small stones or small brick pieces at the bottom of a gallon flower pot; these are all fine. This little gardener thinks it is best not to use fine soil at the bottom, first because it easily clogs the drainage holes, and second because it is not good for drainage and airflow. What this flower owner used is just right. However, there are two details: first, it is best to soak the stones and broken bricks in water for 10 minutes first; second, it is best not to choose ones with overly sharp edges, since damaging roots and hands is not good.
2. Step two: straw + eggshells
The second step is to spread a layer of rice straw on top of the broken bricks. This has already been sun-dried for a long time, it is not fresh, and spreading a layer of it not only takes up space but also ensures bottom drainage. Then toss a few eggshells on top. The eggshells have been washed and sun-dried, so only then can they be used this way. There is no need to worry about fermentation and heat release. They are placed very deep, so the clivia roots cannot reach them, and there is no danger.
3. Step three: cushion with peanut shells
The third step is to toss a few peanut shells on top. New flower owners may ask: aren't peanut shells supposed to be put in the soil and then taken out for use? Why use them this way? Experienced flower owners can tell at a glance that these peanut shells have not been composted, and raw peanut shells cannot be mixed into the soil for use. Besides improving airflow and drainage, they can also supplement a certain amount of nutrients. However, the nutrients are not much, so we still need to use a special organic nutrient solution for flowers to supplement fertilizer.
4. Step four: black and white mixed soil
The fourth step is to mix the prepared nutrient soil with perlite. Nutrient soil is relatively fine, and mixing in perlite makes it more suitable for care in the south. Pure soil does not drain well enough, so this flower owner does not dare to use it. This little gardener's advice for clivia flower owners is: in the south, you can mix in some granular planting material or bark planting material, which helps increase drainage and airflow; in the north, flower owners can mix in some fine river sand, which can improve moisture retention. Just adjust it according to the environment.
OK, with a few simple steps, potting the clivia is easily finished. After that, just water it thoroughly once, place it in a well-ventilated spot, and once it has settled in, it enters the normal care stage. Flower owners, what do you think of this flower owner's potting method? Do you think potting it this way is good or bad?