Sixteen steps for repotting orchids: put effort into the planting method and management becomes simpler
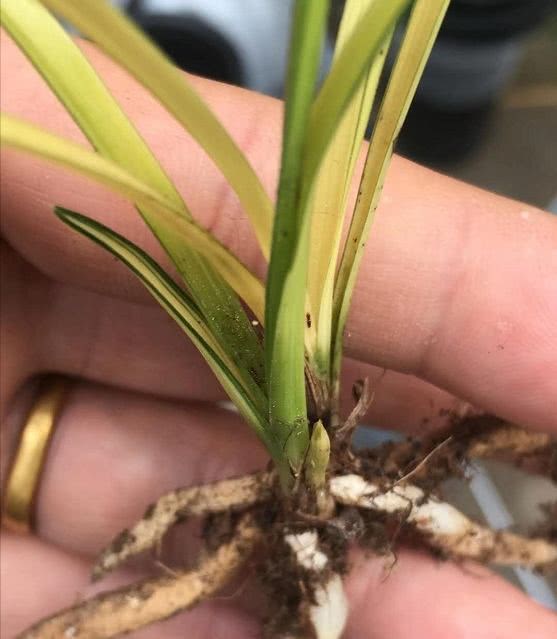
Repotting orchids is something every orchid grower must do, but because each person's steps and order of operations differ, the results of managing the orchids after planting vary greatly. My personal experience is that you must pay great attention to the steps and order of planting, and put effort into the "planting method," adopting the guiding principle of "seven parts planting, three parts management." If you are careful when planting, later management becomes simple. My specific method is as follows:
1. Taking out and washing the seedlings. After taking the orchid seedlings out during repotting, carefully rinse the entire orchid plant (including roots, stems and leaves) under a tap.
2. Cooling (sun-drying) the seedlings. Tie the orchid seedlings, whose soil has been washed clean, with a thin string around the orchid roots and hang them upside down in a ventilated place (or in the sun) to cool (sun-dry) for 1-2 hours (wait until the moisture has been blown dry and the root system becomes soft).
3. Preparing the disinfectant solution. Choose a pesticide you like to use to prepare the disinfectant solution. Two points must be noted when preparing it: first, it is best to choose a pesticide that treats both fungi and bacteria, such as "KeshaDe," "Kebo," etc.; second, the dosage must be accurate. My method is to weigh powder pesticides with a balance, draw up water (emulsion) pesticides with a medical syringe, and measure water with a measuring cup.
4. Dividing and pruning. Take down the cooled orchid clumps and divide and prune them, thoroughly removing rotten roots and diseased or damaged leaves (especially dry-rotted leaf sheaths).
5. Choosing pots and planning the mix. After dividing the clumps, first choose suitable orchid pots according to the number of seedlings in the clump and the length of the root system; second, plan the potting mix formula according to the variety, the strength of the seedlings, and the condition of the root system.
6. Soaking the seedlings for disinfection. Place the orchid seedlings that have been divided and pruned into the disinfectant solution to soak. First soak the roots and stems for 20-30 minutes, then soak the orchid leaves for 1-2 minutes. After soaking, take them out and rinse off the solution with clean water.
7. Applying medicinal powder and cooling (sun-drying) the seedlings. Use a pesticide with no systemic action (such as Daconil, chlorothalonil, etc.) or cigarette ash, etc., to coat the wounds from division and pruning, and tie the roots with a thin string and hang them upside down to cool until the moisture is blown dry and the root system becomes soft.
8. Measuring and mixing the potting mix. While the orchid seedlings are soaking for disinfection, first use the selected orchid pot to measure the total amount of potting mix, then measure out the proportions of each potting mix according to the formula planned above, and then mix the potting mix according to the formula. My method is: first fill the selected orchid pot with ordinary potting mix (you can use the old soil removed during repotting), pour it into a large basin, and measure it with a large soup spoon. If the total amount of potting mix for the orchid pot measures 10 soup spoons, then mix the new ingredients according to the determined ratio. For example, if the formula is 60% chestnut leaves (6 soup spoons), 20% bark (2 soup spoons), 10% tree fern (1 soup spoon), and 10% red Xiantu (1 soup spoon).
9. Disinfecting the potting mix. Disinfect the prepared potting mix at high temperature. The method can be steaming or boiling; my method is to treat it in a microwave oven for 8 minutes. During the high-temperature disinfection process, depending on the situation, you may mainly treat the potting mix that you think is susceptible to pests and diseases, such as chestnut leaves, bark, and tree fern. Generally, newly bought granular materials such as Lecca stone and sphagnum peat do not need to be treated, but they must be soaked for 1-2 days before use.
10. Disinfecting the orchid pots. First rinse the selected orchid pots clean with clean water, then soak the pots in the pesticide solution used for soaking the orchid seedlings to disinfect them.
11. First soak the sphagnum moss soft with clean water, then disinfect it at high temperature together with the potting mix and set aside for later use.
12. Padding the bottom of the pot. Before planting, pad the bottom with an appropriate amount of small plastic foam pieces, or use a commercially available special plastic bottom pad or plastic cover as a bottom pad.
13. Setting the depth. When planting the orchid, hold the seedling with one hand and set the depth according to the orchid pot and the condition of the seedling. Generally, it is best for the pseudobulb to be about 2 cm above the rim of the pot.
14. Sifting while planting. Pour the potting mix that has been disinfected at high temperature and cooled back into a sieve, and plant while sifting. Gather the coarse material on the surface of the sieve and place it at the bottom of the pot, and place the fine material from inside the sieve on the surface of the pot, mounding it into a steamed-bun shape.
15. Covering with sphagnum moss. After the potting mix is filled in and mounded into a steamed-bun shape, evenly spread fully softened and high-temperature-disinfected sphagnum moss over the orchid pot, so that it both retains moisture, makes watering easy, and looks attractive.
16. Watering thoroughly with the settling water. After the potting mix has been disinfected at high temperature, while fully killing pathogens and insect eggs, the beneficial microorganisms that are good for orchids are also killed at the same time. At this point, water with 500 times diluted "Lan Jun Wang" water as the settling water, which can timely replenish the beneficial microorganisms (orchid fungi) in the potting mix and make the orchid roots grow well. The timing of watering the settling water should depend on the condition of the orchid clump's root system (the size of the wounds), the degree of dryness or moisture of the potting mix, and other circumstances. You can water immediately after planting, or wait 1-2 days before watering.
After watering the settling water, the planting of the whole pot of orchids is complete only after going through sixteen steps. The whole process takes about 5-10 hours (if the settling water is watered the next day, it takes 30-40 hours).