Sharing the Whole Process of Restyling a Buddhist Pine Bonsai into the "Thousand Sails" Design
Author: Wang Haiping, text/photos
"Past the sunken boat, a thousand sails go by; ahead of the diseased tree, ten thousand woods are in spring." The poet Liu Yuxi used these two lines to voice the pent-up feelings in his heart. He likened himself to the sunken boat and the diseased tree; though deeply melancholy, he was also quite philosophical - beside the sunken boat, a thousand sails race forth; ahead of the diseased tree, all the woods are in spring. In fact, each of us needs this realm of a thousand sails racing and ten thousand woods in spring. Moved by this, I named one of my Buddhist pine (Podocarpus macrophyllus) works "Thousand Sails."
Figure 1 The original stump of "Thousand Sails" (between the two trunks on the left)
The original stump of "Thousand Sails" was a gnarled Buddhist pine branch I picked up in Xiapu, Fujian, at the end of 2006. At the time, by eye it looked to be a century-old stump, and I liked it very much. Its naturally twisting, coiling curves had considerable strength, showing a proud and majestic air amid its antique plainness, powerful yet free and graceful, so I resolutely bought it. Follow Ai Mu Bonsai and play with bonsai alongside Ai Mu.
The original stump of "Thousand Sails" was very large and had almost no leaves, but the bark on the branches and trunk was very fresh, so I felt there was a chance it would survive. It also had almost no fine roots, only two thick roots. One was about 10-20 cm in diameter at the base and 60-70 cm long; the other was about 5-6 cm in diameter at the base and 40-50 cm long. On the two thick roots there were only 1-2 extremely sparse fine roots. Whether the thick roots could produce more fine roots was completely uncertain; I could only give it a try.
Figure 2 "Thousand Sails" being grown in a wooden box
Step One After transporting the original stump home, since I had no place to plant it for the moment, I wrapped the whole thing in burlap sacks, sprayed it with water to keep it moist, and kept it indoors. This way I held out for half a month.
Step Two I made a wooden box 1.1 m wide, 1.5 m long and 0.4 m deep, and planted the original stump in it. The substrate was mainly coarse sand, mixed with a little loess, to fix the roots and retain water. When planting, because the root tips of both thick roots were partly damaged or shriveled, I cut off 3-5 cm from each to expose fresh tissue and help it survive. I smeared the cuts with yellow clay to prevent rot.
Figure 3 The original stump survives and grows new fine roots
As for the parts that needed to produce roots, I used the method of nicking the root bark to stimulate rooting. The nicking procedure is as follows: with the blade facing upward, cut into the bark layer, stopping just as it touches the xylem (that is, the place where the bark and xylem naturally meet). The nicked root bark forms a half-moon shape, 1.5-2 cm long. Then lift the bark slightly and stuff a layer of yellow clay into the cut; if a small amount of rooting powder can be mixed in, so much the better. Treat each part that needs to root in this way one by one, and it can be planted. When planting, cover all the roots with substrate; in particular, the nicked parts must be buried in the soil.
Figure 4 The lush new fine roots that grew out
Step Three Immediately graft leaves onto the leafless branches and trunk; this is the key step to ensure survival. Everyone knows that a leafless Buddhist pine stump has smooth bark and no buds, and will not produce leaves on its own. Only by grafting leaves immediately can the stump breathe and have a chance to survive. At the same time, this is also a good opportunity to graft and change the crown. What I grafted was Chrysanthemum Buddhist Pine (locally abbreviated as Chrysanthemum Luo). The scions were 10-20 cm long, the shortest 5-6 cm, about the thickness of a chopstick, and I grafted all the branches and trunk from the middle of the trunk upward using the bark-grafting method. After completing everything according to standard practice, I fixed each graft union with a nail, so that after it survived it would not, as it grew, push the scion out. If the nails later get buried, never mind; if they remain exposed, they can be removed after the scions have grown completely sturdy.
Figure 5 The fork of the thinner thick root is 80 cm across, which does not look good
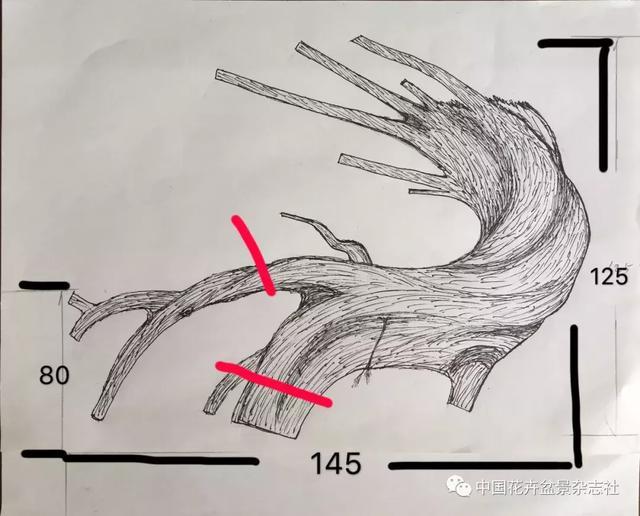
Step Four After planting it in the wooden box, I cultivated it carefully. For 1 year I applied no fertilizer, only watered with clear water, ensuring ample light and suitable temperature. Only after 1 year, when I saw signs of life, did I begin applying very dilute fermented rapeseed cake water. Later I also put broken pieces of rapeseed cake into plastic covers specially used for fertilizing, and placed a ring of them in the middle position between the roots and the wall of the pot (wooden box), with a certain distance between the plastic covers. The reason for emphasizing placing them in the middle position between the roots and the pot wall, rather than directly against the pot wall, is to prevent the roots from growing too close to the pot wall, because roots will follow the fertilizer. After 1-2 years of such care, the original stump miraculously survived in the wooden box, and its branches and leaves also became lush, with many fine roots growing below, about as thick as electrical wire. Follow Ai Mu Bonsai and play with bonsai alongside Ai Mu. But the form of the main roots was not very attractive, especially the slightly thinner thick root, which in the middle split into two forks 80 cm apart, very difficult to deal with. I once thought of trying to press down the raised end, but without success, and in the end I had to cut it off when potting. The thicker root was also shortened to just over 20 cm. At the same time I thinned out the excessive fine roots.
Figure 6 Treatment by nicking the root bark
Step Five For missing roots at the base, most people choose to graft small saplings to make up for it, but this creates scars on the stump and destroys its original sense of weathering and age. Moreover, a century-old stump does not have the vigorous vitality of a young tree, and grafting often causes infection, leading to the death of the stump. I preferred to handle it with a natural method. My method was still nicking the root bark; the difference this time was that it was not to promote rooting, but to shape the root flare. I observed the already shortened roots, and if there was a concave gap, I chose a spot close to the soil surface and nicked the root bark open, in the same way as above. Follow Ai Mu Bonsai and play with bonsai alongside Ai Mu. The two nicked spots must not be too close together, to avoid damaging the water line and affecting survival. After roots form at the nicked spots, I took advantage of repotting to scrape away the covering soil and expose the new roots to natural weathering. After a period of time, the original root area was not only fuller, but also free of scars. If new roots grow again, the root bark can be nicked again to let them weather. This is a little experience I worked out for myself while caring for Buddhist pines.
Figure 7 The state after shortening the main roots
Step Six After the above treatment, I began to pot the original stump. Before potting, I pruned the side branches to highlight the main trunk's coiling, twisting, highly dynamic character. After pruning and potting, the half-reclining arc-shaped main trunk had somewhat the feel of a small boat and a mast, while the branches and leaves on the crown looked like unfurled sails, and so it got the title "Thousand Sails."
Figure 8 Shortening the root system before potting
"Thousand Sails" set sail again carrying my hopes. After potting, I patiently cultivated it for another 2-3 years. Once the branches had grown thick and sturdy, I pruned and styled it again, then observed again and styled again. Repeating this for 3-4 years, like the Foolish Old Man moving the mountains, bit by bit, over and over, advancing step by step. After many rounds of pruning and shaping, the life of "Thousand Sails" remained just as vigorous and strong, and its form gradually approached the effect I had envisioned. Follow Ai Mu Bonsai and play with bonsai alongside Ai Mu.
Figure 9 Cultivation after potting
After another half year of rest in the pot, "Thousand Sails" had basically recovered its "strength," so only then did I plant it into my beloved petal-shaped purple clay pot and begin more refined styling. During this period the work was mainly styling the branches. After about another 3-4 years, it had its present form, so strange, smooth and wonderfully indescribable. Of course, it still has a long road ahead before it reaches final maturity.
Figure 10 The state before going into the display pot
"Thousand Sails" has accompanied me through more than ten years of inner journey. During this time with it, I felt that every time I pruned and styled it, it was a reshaping and baptism of my own spirit and will. In my view, the meaning of life does not lie in greedily seeking comfort, but in constantly exploring the unknown ahead in the art of bonsai, and in discovering how many beautiful stories lie behind the art of bonsai. I hope everyone, like my "Thousand Sails," even when encountering setbacks, can still have a thousand sails racing and ten thousand woods in spring.
Figure 11 "Thousand Sails" has taken preliminary shape
Originally published in: China Flowers & Penjing. Authorized release; please indicate the source when reprinting.
The best way to approve of Ai Mu Bonsai - share it,
The best way to support Ai Mu Bonsai - follow,
Follow Ai Mu Bonsai and play with bonsai alongside Ai Mu.
Click the blue "Learn More"