Wax begonia propagation is very simple: stem cuttings root quickly, with pictures
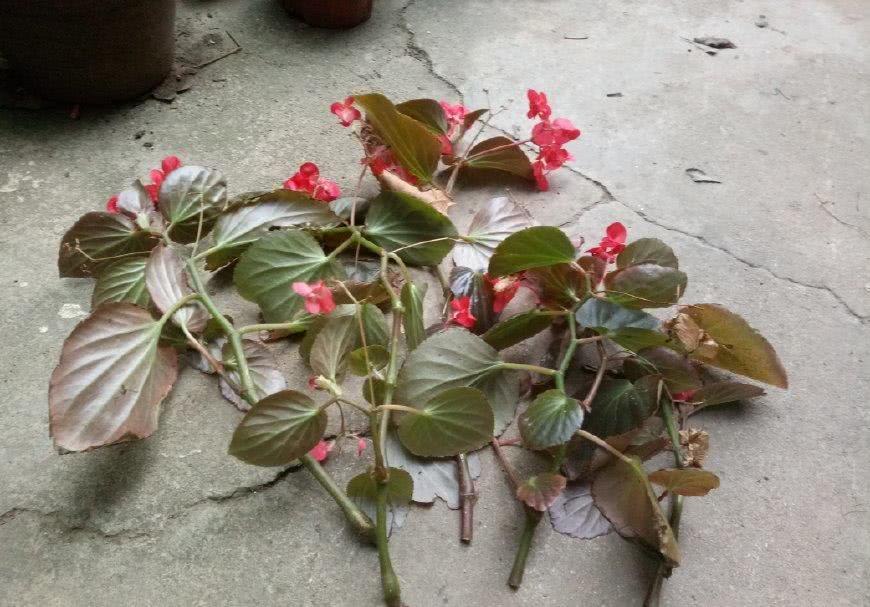
Hello everyone, I am your lovely urban landscaping gardener, who loves greenery and loves growing flowers. Speaking of wax begonia, it is often used in urban landscaping, and is used at high frequency for flowerbed planting and holiday flower displays. Of course, wax begonia also works very well as a home potted plant. The main method of propagating wax begonia is cuttings, and the process is simple. Propagating wax begonia is very simple: stick a stem in, and it roots quickly. Today I happened to be at the nursery base, so let us share the wax begonia cutting process with pictures; pictures do not lie.
Before taking cuttings, select the stems. Selecting wax begonia stems is very simple; there is no distinction of several-year-old stems, as almost all are current-year stems. As you can see, the stems I selected are still flowering; they had just grown too tall, so I pruned them off to bring back for cutting propagation.
Prepare the cutting tools. I use small plastic pots for landscaping seedlings to take cuttings, so that after rooting, they can be used again after being cared for a while. If cuttings are taken now and cared for well, they can bloom in November.
For the cutting soil, I choose ordinary garden soil, humus soil, and sand, then mix them together. As for the ratio, I always put in a larger proportion of sand to increase air permeability, and the humus soil at our base is almost always mixed with farmyard manure.
To take wax begonia cuttings, the usual tools still need to be prepared: scissors for pruning the stems, and a small hoe for digging soil. These tools are basic for a gardener, especially the scissors, and our scissors need to be sharp.
Once prepared, cut the wax begonia cutting stems. When cutting to length, I suggest three nodes; the length should not be too long, just suitable.
As shown in the picture below, cut to a length of three nodes. You can see that each node of the wax begonia has a joint; just cut three sections according to the nodes, and this way it will adapt to the pot more easily when planted as a cutting.
When pruning wax begonia stems, I suggest cutting the end of the wax begonia cutting into a slanted surface, which increases the contact area between the stem and the potting soil and makes it easier to adapt to the pot and root quickly.
When pruning wax begonia cutting stems, if the leaves are very large, I suggest cutting off half of the leaf to reduce transpiration water loss; small leaves can be left. Do not prune off all the leaves on the stem; I suggest leaving one to two. Of course, if the stem is vigorous, it is fine not to leave any leaves.
Then put the prepared potting soil into the pot. Do not fill the pot too full, or water will easily overflow; fill the potting soil just enough for us to take cuttings, as shown on the left in the picture below.
Next comes the wax begonia cutting step. The cutting stems we cut have three nodes, so when planting we directly insert two nodes into the potting soil, leaving one node outside. What should be said here is that I almost never disinfect wax begonia stems; just plant them directly, because wax begonia is very easy to root from cuttings, the stems are full of water, and the healing ability is very strong.
After planting the cuttings, the next step is watering. I water with a small spray bottle. Water thoroughly until water flows out of the potting soil. When watering, I suggest watering from the edge of the pot, not spraying directly at the wax begonia stems.
The last step is to move the planted wax begonia cuttings to a shady place for care. I directly move them under the table and benches at the nursery base; there is scattered light in the morning here and no blazing sun at noon, a very good place for care and acclimation. At this point, the picture guide to taking wax begonia cuttings ends.
Through the above picture guide sharing of wax begonia cutting propagation, you can see that propagating wax begonia by cuttings is very easy. The main key points for taking wax begonia cuttings are: potting soil and acclimation. As for the stems, there is no need to worry, and no disinfection is needed; the healing ability is very strong. Through such simple cuttings, wax begonia will quickly root and sprout; generally it roots in about half a month. I hope this is helpful to everyone.