This undressing pose really makes one blush
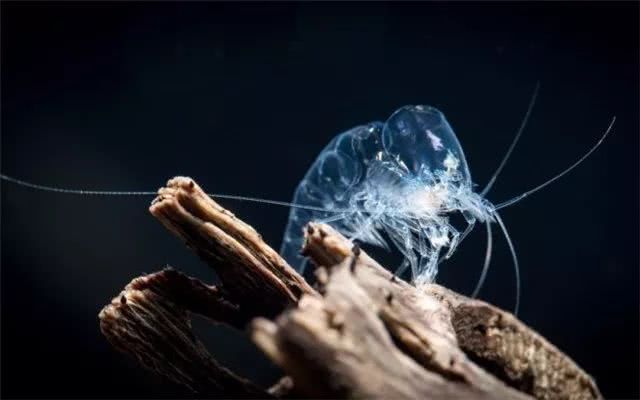
Crystal shrimp, just hearing the name, you feel this creature is something extraordinary. Because among all shrimp species, it is an extremely ornamental type; its body color is vivid and has a kind of transparent quality, so more and more people are paying attention to this little transparent sprite. And the red crystal shrimp's body color is a mix of red and white, and paired with green aquatic plants, it is simply stunning.
Everyone knows about crystal shrimp, but do you know how it "takes off its clothes" as it grows? Shh, let us quietly enjoy it below!
Because of their vivid colors and cute appearance, crystal shrimp are accepted and loved by more and more hobbyists, but since they are somewhat difficult to keep, many beginners are deterred. Some people set up their first tank very smoothly. The shrimp quickly berry and breed, but later attempts repeatedly fail, even to the point of total wipeout, and there are many reasons for this. How can you raise some beautiful shrimp? This editor believes the most important thing is setting up the tank. How can you set up a very stable shrimp tank? Let me introduce it to everyone below~
Equipment issues:
Choice of substrate
Personally, I still recommend using mud, because mud can maintain its own fertility for a long time, can promote the normal reproduction of some beneficial algae and microorganisms, and these are natural shrimp food that no tool-type shrimp food can replace. Moreover, mud itself has a certain bacteria-cultivating effect, and the effect actually seems quite good. Nowadays there are truly more and more muds claiming to be for crystal shrimp;
At present, I will only mention two, ADA and ELOS. ADA goes without saying; it should be the first choice for most hobbyists, but the newly released ADA is much worse than the old version, for example in fertility, acid reduction, speed of crumbling, and so on. To address these problems, I mixed in ELOS. Actually, ELOS has not been popular in China for many years: the most direct impression it gives me is that its fertility is average, its acid reduction is okay, and its crumbling speed is relatively slow, but when the two are mixed, they can basically complement each other and each exert its greatest effect. Another very important point is that there are few fakes, you know what I mean. As for energy sand, my personal opinion is that it can be used or not. Energy sand indeed ensures to the greatest extent that the fertility in the tank is sufficient, but the price is not low. Those who can afford it can use it, and those who cannot need not worry about it.
Choice of tank
Personally, I suggest beginners use a 60*40*40 tank. If you really think it is too small, then use a 90*45*45. After such a tank is set up, the water quality will be relatively stable, and adjusting water quality and such will be relatively easier. If it is smaller, controlling water quality becomes relatively difficult. If it is larger, it is not impossible, but if it is too large, the initial cost of buying shrimp will be greater, because the shrimp we keep need to breed. If there are too few shrimp at the beginning and the tank is too large, male shrimp will have a hard time catching the molted shell of female shrimp, and there will be no way to mate, so how can we even talk about breeding?
Choice of filtration
Personally, I do not recommend undergravel filtration or reverse air lift. The biggest drawback of both methods lies in the mud itself, because the powder from the mud crumbling and disintegrating disperses into the water, causing turbidity in the water body, and unwanted algae will take the opportunity to grow. Also, with these two methods, fertility is lost very seriously. Ordinary hobbyists only have one or two shrimp tanks, so if it does not work you can only tear down the tank and start over, and that long water-culturing time is enough to wear a person down. I have always used canister filters, and only two canisters connected in series, with the same two power canisters. Turn on the front one as the power source, fill it entirely with filter wool, and put all bio-media in the rear one. Run it once every half month, about 10 minutes each time is enough. This can avoid blockage in the rear rotating barrel section. If at the same time a problem occurs in the front canister, for example the impeller breaks or the motor burns out, you can immediately open the rear one, so that shrimp deaths caused by filtration problems are avoided. The disadvantages of this are, first, that because there are more pipe connections, the risk of water leakage increases, and second, the combined filter media volume of the pre-filter is not as much as one canister, so personally I think it is also not suitable. For shrimp keeping, what is important is stable water quality. Stable water quality is mostly maintained by filter media. Personally, I think shrimp tank filtration does not need high flow, but needs more filter media to stabilize water quality.
Choice of water
Basically it is divided into two types, tap water and pure water. Tap water differs from place to place, and values such as pH and hardness will differ. The data for pure water is basically the same. Usually tap water has more unstable factors, so the experience of hobbyists who use tap water is still relatively important. Pure water is relatively safe and secure, but because pure water does not have much nutrients, minerals, or trace elements, it must be solved through later additions. This is the drawback of pure water, but overall, considering it all, the risk of pure water is still smaller, so personally I suggest using pure water to keep crystal shrimp.
Choice of nitrifying system
No matter which kind, or even not using any, is possible, but there is one thing to note: if you choose one, then use only one kind, because nitrifying bacteria will conflict with each other. Also, if the overall nitrifying system has already been established, my personal opinion is not to add any nitrifying bacteria later. Many hobbyists add nitrifying bacteria when changing water. Personally, I think this method is not advisable, because the process of establishing nitrification consumes a large amount of oxygen, which will cause the oxygen content of the water body to drop sharply, thereby causing old nitrifying bacteria to die. This is also the reason why many hobbyists' water is clearly already very clear, but after changing water and adding nitrifying bacteria it suddenly turns white.
Lighting
Choice of lighting. Personally, I have tried many. Currently the more popular option is LED, but I still choose T8 and T5. Considering overall value for money, these two are still the highest. Metal halide is said to be beneficial for shrimp coloration, and many shrimp rooms also use metal halide, but the biggest drawback of metal halide is that it produces too much heat. This heat is a very big blow to people who cannot afford a chiller. Also, metal halide easily grows black beard type algae. The advantage of LED is of course power saving. But for algae blooming during the water-culturing period, it is not as effective as tubes.
Now let us start building a shrimp tank:
Tank model: 90*45*45
Substrate: one bag each of ADA and ELOS, then later added another half bag of ADA
Filtration: two LED lights, 47w total
Heating: 300w glass explosion-proof
Auxiliary: dual-outlet air pump plus two off-brand sponge filters
Step one
Separate the ADA mud and ELOS mud into coarse and fine grains. Use an ordinary undergravel plate. After sifting, crumbling will be much faster, and the particle size sifted out is just right, but ADA will sift out a few more fine particles;
Step two
When starting to lay the mud, it is suggested to use ELOS coarse-grain mud as the base, then ADA coarse-grain mud, and finally lay a mixed fine mud of the two. If someone wants to layer it, it is suggested to lay ELOS mud on top, because based on past experience, it crumbles more slowly;
Step three
First spray the whole tank with water to keep it moist. You can appropriately pour in a small basin of water, but cover it with its packaging bag and leave it for about one hour. This can avoid cloudy water when water is added and slow down mud crumbling. Air in the mud can also be expelled, avoiding trapped air in the mud crevices after water is added. When the time is about right, add water to soak the mud. The water does not need to be too high, 5-10cm above the mud surface is enough;
Step four
After all the water is changed, then fill it up with water, and nitrifying bacteria can be added. Please note that it is suggested to use tap water in the early stage. In the early stage, tap water has a better algae-blooming effect, while pure water has an average algae-blooming effect;
Step five
The filtration system can start running, and connect the sponge filters;
Step six
You can consider putting in fast-growing plants like small bamboo knot, and one apple snail, so that it will not reproduce. Also, when nitrification is first being established, there needs to be debris and feces to decompose, so this is still quite necessary. Apple snails are very good at eliminating brown algae and blue-green algae. If blue-green algae appears during the initial algae bloom, it will eat that too;
Step seven
After one week, plug in the power of the other canister and run it for about one hour, then start turning on the lights. Note that the lights were not turned on before. It is suggested to run about 8 hours a day. If using LED lights, it is suggested to extend it a little, but still keep it under 12 hours, because water quality is still unstable in the early stage and other algae may grow. At this time the bacterial film in the water will be very obvious, appearing white;
Step eight
Then change all the water, continue adding tap water and begin culturing the water, using water flow to wash the water surface to achieve oxygen enrichment and algae blooming;
Step nine
After completing this stage, control it for another period without changing water. At around 35 days, change 80 percent with pure water. At this time NO3 will break out on a large scale, then it will tend to stabilize, and the most effective way to solve it is changing water. By this time the nitrifying system is already very stable, so even changing water is not a big problem;
Step ten
The next stage has no fixed time. Water quality differs in every place, the amount of water evaporation also differs, and differences in hardware equipment and operating methods will definitely lead to differences in the final water quality in the tank. Add moss at the appropriate time. When the moss is in very good condition, you can add shrimp.
Basically, building the tank is completed like this. Generally it can be maintained for one and a half to two years without tearing down the tank.
There is still a surprise here