Super large tank, lavish rainforest aquascape, all DIY, stunning results
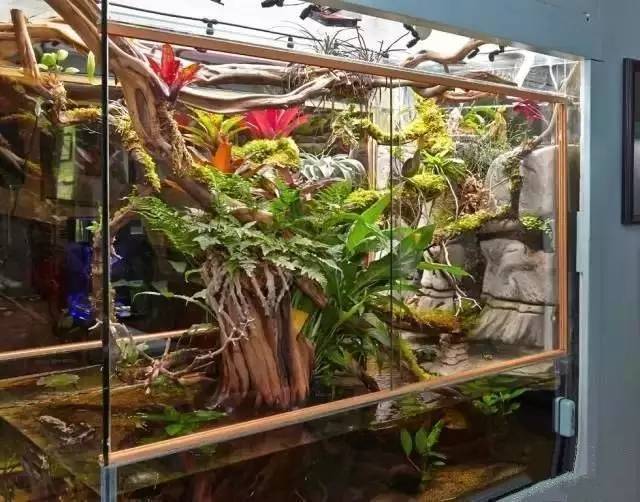
Without further ado, let's see how it's done!
Part One: Building the Tank
Between the living room and dining room there's a partition like this
First, two root-shaped driftwoods were chosen and joined into one piece, what a great shape
The driftwoods are fixed together with screws and zip ties, leaving gaps as space for planting orchids and similar plants later.
Once the glass was glued, the tank appeared. This rainforest tank can actually be considered a paludarium, divided into an above-water and an underwater part, so the lower half is a sealed tank, while the upper half has movable glass doors; the two orange strips at top and bottom are the sliding rails for the glass doors.
Detail of the glass door sliding rails; the curved cardboard marks the future boundary between the above-water and underwater sections.
The old bottom filter from a previous discus tank was used directly, connected under the cabinet.
With this many layers of filter cotton, the filtration system must be extremely powerful
A rear filter was made; this is the back of the in-tank section. See the valves? And pipes as thick as the household water pipes.
Part Two: Carving
Rainforest tanks generally have three-dimensional shapes and complex layouts, and rocks are rarely used because they can easily make the tank unstable and bear too much weight, so foam sealant is usually used to simulate the shape of rocks instead. But this master didn't use foam sealant, but carved foam board instead.
The structure seemed okay, but it was so smooth and round, it looked more like an Eskimo's snow cave.
After looking at it for a long time, it still wasn't impressive enough. To make the rocks look more like rocks, they needed signs of age, that is, the holes and textures of water-eroded and weathered stone. So, throw it away and start over. This time, use harder foam board, carefully carve out the textures and cavities, imitating the traces of erosion and weathering over time.
Carve it layer by layer, then glue them together
Finally the carving was done, but it still needed sanding to make the texture finer and less rough.
But foam is really too light; the underwater part has to overcome too much buoyancy, making it very unstable, so a hole needs to be dug inside and something heavy placed in to hold it down.
The hole was stuffed full of lead beads and stones to make sure it no longer floats
Could the lead beads be arranged any more neatly?
After all the parts were carved, put them in the tank to see the effect
Then carve the above-water part, the rock wall. The narrow passages serve as channels for water flow and areas for planting moss, Dendrobium, etc. The gaps between the three large rocks can hold flower pots for planting large plants later.
Part Three: Painting
First apply a thin gray paint; when finished it looks like this
This color is too fake, it can't really be called stone yet, so a new earth-tone palette was mixed and another coat of paint was applied.
This is the color
It looks much better, but as for those water-eroded holes, the obsessive-compulsive master felt that if they were green, it would look more realistic. So began focused painting of those grooves and holes.
Painting...
Painting...
After painting for a very, very long time, watching each "rock" truly come to life like this.
It felt too green, so another coat of light-colored paint was applied, and now it seems much better. Put it in the tank and turn on the light to see; the color is very consistent.
Part Four: Planting Areas
The hardest work was finally done. Now foam sealant can be used to fill the gaps in the background wall and fix the planting baskets.
Using planting baskets like these, wrapped with sphagnum moss and mud, is very breathable for growing tropical plants and convenient for removal.
Coco coir was glued onto the foam sealant, covering the glaring white foam, making it very natural, and the misting heads were installed at the same time.
Fans were added at the right time too
Part Five: Adding Water
The hardscape was finally built, put in the substrate, add water and see the effect (front view).
Back view
Distant view
Close-up view
Angled side view
Part Six: Planting
The first batch of green life arrived: the fuzzy, cute aerial-rooted rabbit's-foot fern.
Maidenhair fern planted into the planting basket
Corkscrew grass and oxalis
This plant is unfamiliar; tied onto sphagnum moss with straps for planting
Dendrobium
Phalaenopsis
Bulbophyllum
Some other orchid family plants
Panorama
Part Seven: Underwater
The aquatic plants arrived: Hydrocotyle, large Anubias, and small Cryptocoryne
The water lily is growing fast and about to bloom
The bromeliads arrived too
Carnivorous plant - Nepenthes
A gorgeous Begonia
All kinds of orchids have bloomed
The peace lily has bloomed too
The rabbit's-foot fern's fronds are even longer
Even mushrooms have grown
Part Eight: Cooling
Summer came, the temperature was too high, fans weren't enough, so a cooler was added
So many wires
Part Nine: Creatures
A cute little gecko
A little sprite with blue eyeshadow
This little guy is a chubby one
This flower-fondling creature really knows how to sleep
The back view is a bit scary
This lecherous little goofball is a type of green frog
Part Ten: The Finished Scape
There's still a surprise here