Orchids are easy to grow but hard to water: a 10-year veteran orchid grower teaches you to master the 5 watering stages
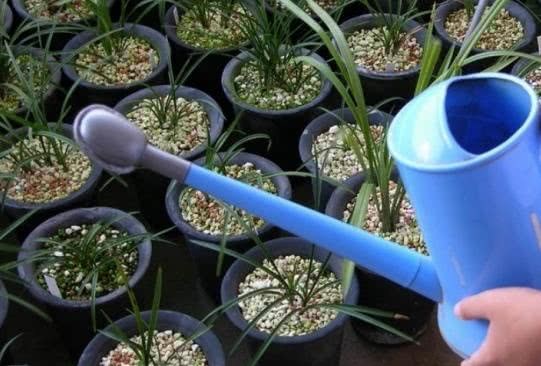
There are many discussions about watering orchids, and the methods of many famous orchid growers differ. "Orchids are easy to grow but hard to water" is a widely circulated old saying. Many orchid enthusiasts believe that as long as you master watering techniques, you have got the basics of growing orchids. Absolutely true. But how do you master watering techniques? Even though predecessors had many key tips such as "three parts wet, seven parts dry" and "not dry in autumn, not wet in winter," they are still relatively difficult to apply in practice. Because climate conditions vary from place to place, home growing environments differ, and the pots, potting materials, and orchid varieties each person uses are different, the water storage and moisture retention capacity and the evaporation capacity in the orchid pot also differ, which brings great difficulty to watering orchids. Most people are afraid, afraid that watering too much or too often will cause root rot and plant death, so following the tradition of "dry orchids, wet chrysanthemums" they water as little as possible. But once the water supply is insufficient, nutrition will inevitably be insufficient, causing poor growth and poor quality. Therefore, I think that when watering orchids, the first thing is to make distinctions according to your own orchid-growing environment, the potting materials used, and the orchid category!
The general principle of watering is "water only after the potting medium is dry, and when watering, water thoroughly." When the potting soil is dry, leave it for another day to make the potting medium even drier, and then water. When watering, first rinse the leaves, then water back and forth to thoroughly soak the potting medium, so that excess water flows out from the bottom of the pot, replacing the air in the pot. Never keep the potting medium constantly moist.
Watering orchids
The key is to master the following 5 stages:
1. Potting stage. After a newly potted orchid is thoroughly rinsed with water, water it again after 5-7 days. After potting, before the new roots have fully extended, slightly control watering to let it be a little thirsty. First, the roots of a newly planted orchid are more or less injured, and controlling watering helps the wounds scab over, which can effectively prevent bacterial infection; second, in order to survive, the plant's instinct is to send out new roots to take up water.
Fine and sufficient moisture: when the remaining root system alone is already enough, the orchid plant will sit back and eat comfortably and be very unwilling to grow roots. Hence the saying "dry roots, wet leaves."
2. Leaf bud germination stage. From the leaf bud emerging from the surface of the medium to the leaf opening into a small trumpet mouth. During this period, nutrients are basically supplied by the mother plant, and not much external supply is needed. If the mother plant is strong, then although the leaf bud is delicate and tender at this time, it is also at its most vibrant. From when the leaf bud emerges 3-5 cm above the surface of the medium to when it is just about to open into a small trumpet mouth, there is a slow-growth period. At this time the mother plant itself shifts to flower primordium differentiation, the supply to the new bud drops sharply, and the young bud begins to grow roots (the first rooting) to meet its own growth needs. At this time, you can cut off water for 5-7 days to make it on the dry side, and then return to normal management. After cutting off water, if you can apply a little phosphorus fertilizer, first it can promote flower primordium differentiation in the mother plant, and second it can promote rooting in the orchid seedling. If the root system grows early and quickly, future management will get twice the result with half the effort.
Watering orchids
3. Leaf bud elongation to leaf expansion and development stage. This period is the key period that determines the width, thickness, sturdiness or weakness of orchid leaves, that is, the quality of the orchid. Its nutritional needs will increasingly grow (generally at this time orchids begin to be fertilized, and all nutrient absorption must be dissolved in water and in ionic form to be absorbed by the plant). At this time it is exactly April-May, when temperatures gradually rise and light gradually strengthens. Growers often, because of high temperatures, strong light, and rapid water evaporation, find that air humidity is often insufficient and frequently spray water mist to increase humidity, but this also easily leads to excessive moisture that damages tender buds, or even rots buds. Therefore, whenever after spraying or rinsing with water, ventilation should be strengthened to keep the leaves air-dried within one hour, letting them be dry and wet in measure, with clear distinction between dry and wet. Never keep the potting soil constantly in a soggy state. Wet and dry in turn, healthy and strong.
4. When the new bud has grown to seven or eight parts woody, it ushers in the second rooting period. That is, when the new shoot body is about the same size as the mother plant but has not yet formed a pseudobulb (around early autumn), cut off water again for 5-7 days, and the orchid plant will send out roots a second time. After cutting off water, apply a high-phosphorus, high-potassium fertilizer to promote rooting, bulb formation, and bursting of bud points. This phosphorus-potassium fertilizer affects the quality of the orchid and the germination of bud points the following year.
Watering orchids
5. Two small tips:
(1) If you find that a new bud has already opened leaves but has not yet sent out roots, you can remove the sphagnum moss or push aside the covering material, clear away dirt from the pseudobulb and the upper layer of potting medium, and let the pseudobulb and potting medium be suspended about 2-3 cm apart, then manage normally (including watering and fertilizing). After about two weeks, cover it back with potting medium. This can promote root growth.
(2) After early autumn (about September-October), most orchids are sending out their second roots. You can pinch a ball of sphagnum moss, wring it dry to about the size of a thumb, push aside the potting medium, stuff it directly below the taro-like pseudobulb (so the roots will touch it when they grow out), and then cover the potting medium back. After that, when you water, fertilize, or apply chemicals, the sphagnum moss will absorb them. By using the roots' tendency to grow toward moisture, this is very helpful for root growth, and the root tips are less likely to turn black when the roots grow out.