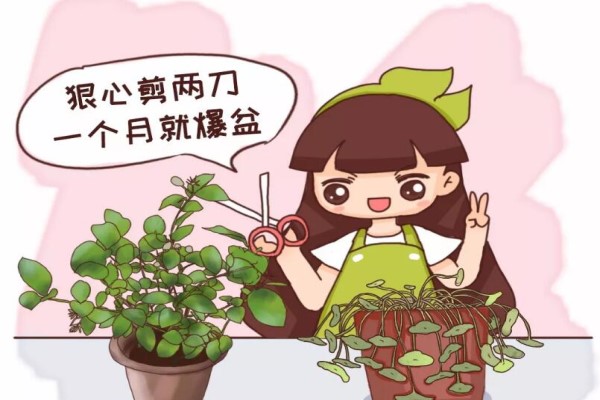
Jasmine or pennywort looking half-dead? Be ruthless and make 2 cuts, and it will grow back vigorously in 1 month
Jasmine turning yellow and not blooming? Make 2 cuts, and it will bloom in 1 month!
There is a gardening saying: "If jasmine is not pruned, weak branches and few flowers are very obvious." So jasmine must be pruned regularly to have more flowers, greener leaves, and vigorous growth. Summer pruning of jasmine includes: pinching, renewal pruning, and heading back.
1. Renewal pruning
Renewal pruning targets the spent flowering branches of jasmine. That is, after the jasmine flowers fade, cut off the flowers together with the 2 pairs of leaves below them.
2. Heading back
Heading back targets the leggy branches of jasmine. That is, cut short the branches that have grown too long among the jasmine branches, shortening them to the same length as the other branches.
3. Pinching
Pinching targets the shorter jasmine branches. That is, cut off the tips of the jasmine branches to promote the growth of axillary buds, helping the jasmine form a full plant shape and thus produce more flower buds!
For pinching, control the cutting position to within 1 cm above the axillary bud.
Pennywort with yellow leaves and wilting? Make 1 cut, and it will fill the pot in 1 month!
Pennywort is most suited to growing in summer, but if you do not know how to care for it, it not only grows slowly but also easily wilts and develops yellow leaves. What should you do? Simple! Follow the method below from Huahua, and with one snip of the scissors, pennywort can regrow into a full, lush green pot!
1. When pennywort has been grown for a long time, there are too many leaves, making the lower leaves too dense and poorly ventilated, which easily causes yellow leaves and rot.
2. If you want pennywort to regain its vitality, find a sharp pair of scissors and cut off all the branches and leaves, leaving only 2 cm above the roots.
3. Place the trimmed pennywort in a bright, indirectly lit, well-ventilated place, and water it once each morning and evening. In less than 1 week, it will sprout lots of new leaves again.
4. You can also directly use a flowerpot without drainage holes for semi-soil, semi-water cultivation, with the lower half of the pot being soil and the upper half being water, so you just need to keep water accumulated in the pot at all times.
5. Throw a few granules of slow-release fertilizer or 1 granule of compound fertilizer into the pot every week, give it plenty of sun, and do not let it lack water. Then pennywort will grow like crazy and fill the pot in less than 1 month!
Make 2 cuts on kalanchoe now, and it is guaranteed to bloom all over the pot in autumn!
August is the best time to prune kalanchoe, because in September kalanchoe begins to differentiate flower buds and can no longer be pruned! So if you want to enjoy kalanchoe blooming into a ball in autumn and winter, pick up the scissors now!
1. Quickly pinch the top
Because kalanchoe will begin to form buds in September, you must quickly pinch the tops in August, pruning off the part of the branch tips that exceeds 10 cm. This lets the branches grow more side shoots, and more side shoots mean more flower buds.
2. Quickly pinch the growing points
If your kalanchoe is a young seedling, you need to pinch it for the first time when the seedling grows to 5 pairs of leaves. After pinching, once the new shoots that grow out have 5 pairs of leaves, pinch again, and repeat this cycle until the kalanchoe's plant shape is perfect.
3. Quickly remove excess shoots
Removing excess shoots means cutting off the overly dense, weak, pest-infested, or diseased branches at the base of the kalanchoe, promoting the growth of the inner branches, increasing ventilation and light penetration inside the plant, and reducing the occurrence of pests and diseases.
Lucky bamboo with yellow leaves and rotten roots? Make 1 cut, and it will rapidly grow leaves!
In summer, the weather is too hot, and lucky bamboo can easily suffer root rot due to high temperatures, leading to yellow leaves, the whole plant wilting, and death. At this time, you must steel your heart and snip, snip, snip!
1. Observe whether the roots of the lucky bamboo smell bad or have turned black, and pinch them to see whether the roots are soft. If so, the roots have rotted or aged and need to be cut off.
2. Use a knife to cut off all the stem nodes of the lucky bamboo that have roots growing from them! Do not leave even a bit of root.
3. After cutting off the roots, cut the cut surface into a 45-degree slant, then insert it again into a clean vase.
4. Pour clean water into the vase, and do not let the water level be too high; about 1/3 of the vase body is enough. Change the water about once every 2 days, and new roots will grow in half a month!
5. The newly grown roots of lucky bamboo have a stronger ability to absorb water and nutrients. If you throw in 2 granules of slow-release fertilizer each month, lucky bamboo will grow faster and its leaves will be even more oily green!
Spider plant with dry tips growing slowly? Make 1 cut, and it will sprout in 2 weeks!
Spider plants grown indoors, if ventilation and light are poor, easily develop yellow leaves, dry tips, and broken leaves, affecting their ornamental value. You might as well cut everything off with one cut, and in 2 weeks they will sprout again, and in 3 months they will be lush green again!
1. If the spider plant at home looks on the verge of death, do not rush to throw it away. Push aside the soil and check its roots. If the roots are not rotten, then it can be saved. With just a little care, it can grow back into a beautiful pot of spider plant.
2. Use scissors to cut off all branches and leaves of the spider plant above 3-5 cm from the soil surface!
3. Place the trimmed spider plant in a cooler place to recover slowly. When you touch the surface of the potting soil and it feels dry and has turned pale, water it thoroughly. Gradually, new shoots will grow out!
4. Once the new shoots grow to more than 3 cm, you can give them normal sunlight and fertilizer! After another 1 month, you will have a beautiful pot of spider plant again!