Reuse Waste to Grow Succulents and Make Your Plant Care Journey Even More Exciting
Foreword
Follow the Encyclopedia · Meet Beauty (WeChat ID: duoroubaike)
Text begins:
Thanks to the author [Xia] for theoriginal submissionsharing
Submission date: July 29, 2018
Edited and compiled by: Encyclopedia Jun
Location: Wuchang, Heilongjiang
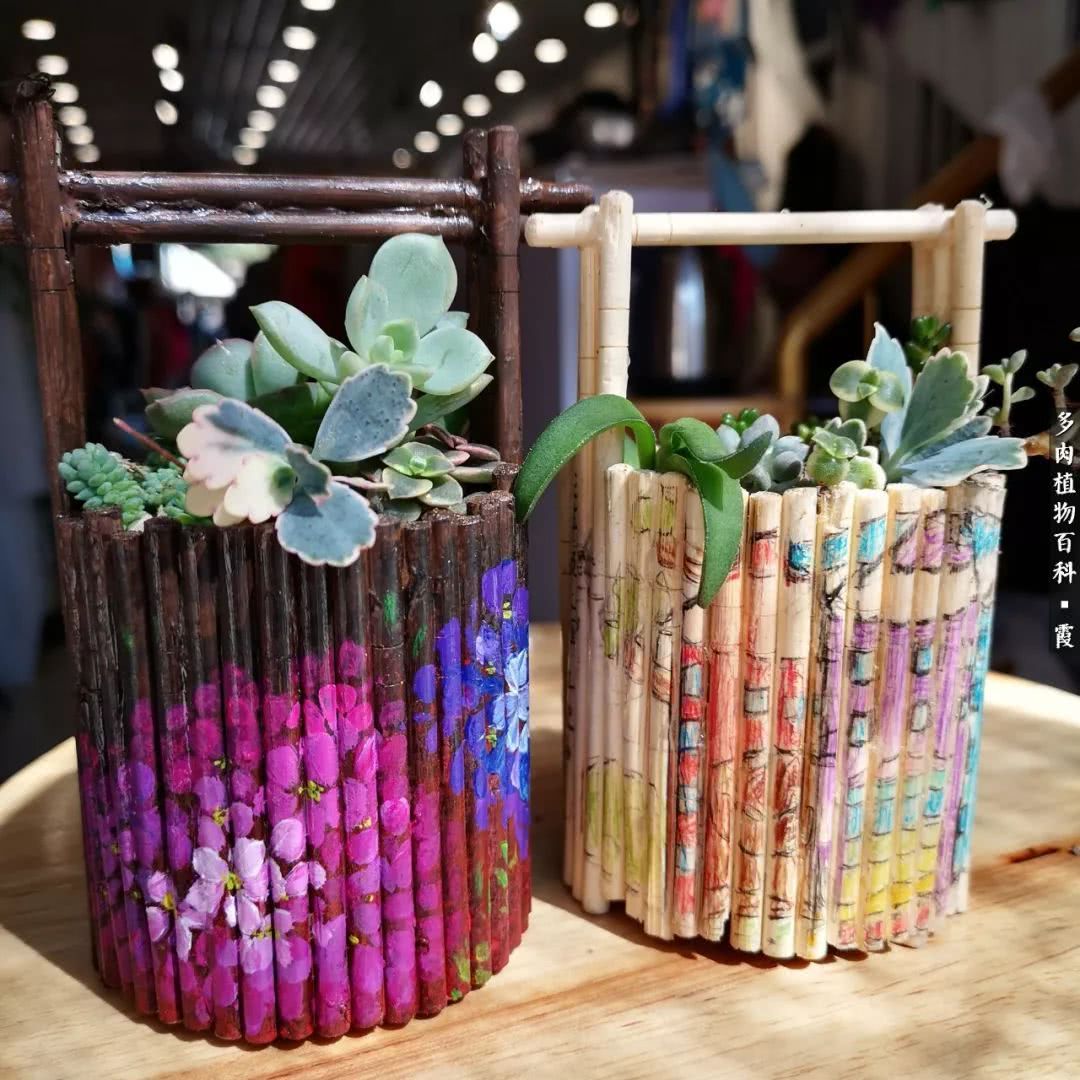
Let me put the finished product photos first, so they can attract you to keep reading. After reading, don't forget to give me a like, so Encyclopedia Jun will stop saying the readership for hand-painted articles just won't go up.
Summer has arrived, and everyone has started to slow down, with fewer people posting beautiful photos. More people are drinking beer and beverages, and I've always felt it was a pity to throw away all those bottles and cans. You know, flower pots for growing succulents are also an important expense, and we've all been driven by succulents to pick up trash everywhere and rack our brains to reuse waste! One day I finally came across a video about making a flower pot from a soda can, and here I'm sharing the method with all you succulent slaves.
First, choose an aluminum soda can. Why aluminum? Because it won't rust and fall apart.
Then cut it open at the height you like.
Don't forget to poke a hole in the bottom.
Then cut disposable chopsticks into 4 long ones, 2 slightly shorter ones, and 38 short ones.
Sand the cut ends with sandpaper.
Next, use a glue stick, or AB glue, or E6000 glue to stick the cut wooden sticks around the outside of the can. Let's glue the long ones first.
Then glue the long one on the opposite side, so the can is divided into roughly two equal halves.
Then glue all the short ones around the sides in a ring. No need to make them especially neat. Anyway, I just glue them randomly. I like this kind of messy beauty. Finally, add one or two horizontal pieces across the middle, and a homemade little bucket flower pot is done.
Is that the end? No, no, no. For someone like me who loves to tinker, I still really wanted to leave my mark on it. So I started the hand-painting process.
First apply a layer of brown base. Actually, this already gives it a bit of a carbonized wood feel.
Then add black paint randomly dotted on the front of the pot to create a gradient shadow.
Then use red to dot out a smaller area of shadow.
Use a round brush to pick up rose red, one stroke per petal, paint a ring freely.
Then use rose red mixed with white or a bit of dark blue for the second layer. On this layer, each petal needs to be painted once more to deepen the color.
For the third layer, add more white, and likewise paint each petal once to twice.
In the very center, use white mixed with rose red, repeat twice, until the color is rich enough.
In the same way, paint the blue and purple part on the side.
With just a few strokes, paint the flower center and leaves.
Brush on waterproof paint, and once dry, pot the succulent. My daughter thought my flower pot was interesting and wanted to paint one herself. Hers was drawn with colored pencils. During this holiday, creating together with your child is also a very interesting parent-child activity! Take a look at the group photo of my and my daughter's works. Aren't they pretty!
There's also one where I used the disposable plate from a birthday cake as the base, painted it, and used it to hold the bottom of a flower pot or as decoration, both are nice. As before, first the finished product photo. Forgive me that the thumb pot didn't get its rhinestones glued on in time. Here I thank @Jintuantuan for sponsoring the pinched peach eggs.
Original
Apply base color
Draw the draft, an HB pencil is fine. I'm regretting using a 2B pencil now.
For this piece, I only want to focus on blending, because our base material doesn't absorb water, so blending can't be as easy as in gongbi painting. But we can do it layer by layer.
First prepare two brushes. After one brush picks up color, the other clean brush blends the color outward. A very light layer.
After it dries completely, repeat the blending once.
Paint the leaves and the little bird, then outline, and it's done.
Because space is limited and I was afraid it would get too long and tiring, I omitted some parts later on. If there's anything you don't understand, you can find me in Encyclopedia Hand-Painting groups 1-5 and 9. Let's exchange ideas, or leave a comment to let me know what you think, so I can improve next time. Thank you!
This article has beenexclusively authorizedby the author to WeChat public account: Succulent Plant Encyclopedia (ID: duoroubaike). The article content does not represent the views or stance of the public account! The Encyclopedia has signed with a third-party internet copyright protection company and opened whole-network rights protection. Unauthorized private reprinting by other platforms is strictly prohibited! If unauthorized reprinting is found, infringement liability will be pursued! Readers are welcome to report it!
Appreciate this article
At present, the public account's appreciation function has been adjusted. The author's WeChat appreciation code is used instead of the system appreciation. If you want to appreciate the author, please directly identify the WeChat appreciation code and tip the author of this article!
Advertisement ADVERTISEMENT
The culture of succulents needs you and me to promote it! Remember to share good articles more, so more people fall in love with succulents! Use the power of plants to influence and heal the people around us!