A Complete Guide to the Techniques of Making Serissa Bonsai
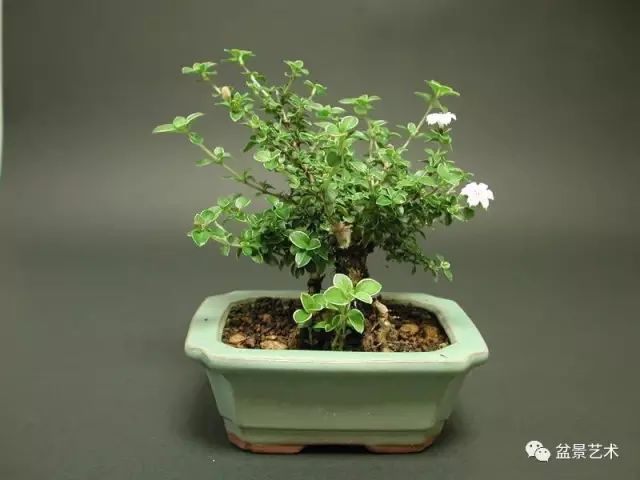
Making Serissa Bonsai
In midsummer, Serissa puts out pure white flowers, so dense and numerous that they look like snow, which is how it got its name. Serissa is an evergreen small shrub, suitable for making miniature bonsai, and can be placed indoors to accent the setting. Placing a pot of Serissa bonsai on a bright, clean table has a distinctive elegance. The process of making Serissa bonsai is relatively simple and easy to master.
I. Sourcing and Propagation Measures for Serissa Bonsai
1. Artificial propagation:Cuttings or division are usually used for propagation. For cuttings, either hardwood or softwood cuttings can be used. Hardwood cuttings are taken in February to March, using dormant branches as cuttings; softwood cuttings are taken in the plum rain season in June to July, using semi-ripened branches as cuttings. The seedbed soil should be deep, fertile and moist. The cuttings should be 6 to 8 cm long and inserted to a depth of 12. After insertion, a shed should be built for shade, and attention should be paid to watering to keep the soil layer moist. They root very easily, and can be transplanted in the spring of the following year. Division propagation is carried out in March in spring: dig up the plants sprouting from the roots together with their roots, separate them with a sharp knife, and replant them with roots; they also root easily.
2. Collecting from the wild:Serissa grows in great abundance wild in the mountains. Old stumps with thick, sturdy roots and stems can be selected. After digging them up, cultivate them in a shady, moist, fertile spot. Once the root system has resumed growth and the branches and leaves are luxuriant, transplant them into pots.
II. Potting Process for Serissa Bonsai
1. Choosing a pot:For Serissa, relatively shallow rectangular or oval pots are mostly used. The material can be purple clay pottery or glazed pottery, and the color should preferably be darker.
2. Soil:Serissa prefers a loose, well-drained, slightly acidic loam rich in humus. For potting, leaf mold or pond mud that has been sun-dried and frozen until crumbly can be used. Line the bottom of the pot with a layer of river sand and leaves to aid drainage.
3. Planting:Transplanting into pots for planting can be done in early spring or late autumn. When planting, some of the long roots can be cut off. If it is an old wild root stump, the roots can be raised appropriately to show an aged posture.
III. Shaping Techniques for Serissa Bonsai
1. Working the material:Serissa is generally shaped by a combination of pruning and wiring. The main branches and trunk need only be wired appropriately; the rest is shaped by pruning. For wiring, palm fiber is best, and care should be taken not to damage the branches or bark when bending them into shape. For old root stumps, root-raising treatment can also be used to add to the beauty of the tree's posture.
2. Tree forms:Common forms of Serissa bonsai include slanting-trunk style, curved-trunk style, cascade style, forest style and root-raised style. Serissa is also suitable for use in landscape bonsai and water-and-land bonsai. Its branches and leaves spread horizontally and are best shaped into a bun shape, but it need not be too regular; pay attention to variations in density. Side branches can droop appropriately, which is quite picturesque. Serissa can also be made into root-over-rock bonsai, with roots gripping into rock crevices, hanging roots and exposed claws, and gnarled, interlocking branches, ancient and peculiar, with a quite natural wild charm.