Spend 4 yuan on a pot of ornamental peppers, get 100 fruits, and make hot sauce that lasts 3 months
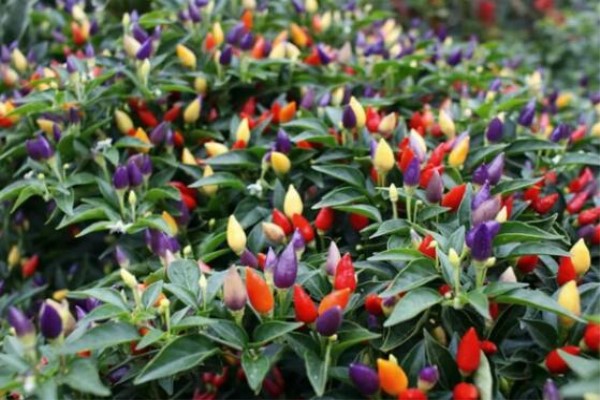
4 little tricks to make ornamental peppers bear fruit like crazy!
1. Choose fertile soil for planting, and you will get twice the result with half the effort!
Ornamental peppers are actually a variety of the small chili pepper, an agricultural crop. Generally, vegetables do not have high soil requirements. Mixing nutrient-rich leaf mold, black soil, potting soil and so on with our ordinary garden soil is already the top configuration, and they will immediately grow like crazy!
2. Sunshine is indispensable
Ornamental peppers have the nature of a vegetable: they love basking in the sun, and daily sunlight must not be less than 4 hours, so they can flower and fruit to their fullest. If you cannot grow them outdoors at home, it is best to place them on a south-facing balcony for care.
3. Control water appropriately
Ornamental peppers prefer a moist environment. Before flowering, you can water once every 1-2 days. During the flowering period, it is best to control water and water only when the soil is dry, which can stimulate flowering and fruiting. In summer, evaporation is high; if they look a little wilted, you can mist them appropriately to increase humidity and lower temperature.
4. Top-dressing makes the fruits more numerous and larger
Before the flowering period of ornamental peppers, you can spray or water with some monopotassium phosphate to promote flowering; during the flowering and fruiting periods, you can water with 1-2 applications of urea (2-3 granules of urea mixed with 500ml water), which can make the peppers grow more numerous and larger. If it is not convenient to buy these where you are, you can put rice-washing water in a bottle, sun it for 1 week to ferment, mix 10ml rice-washing water with 100ml clean water, and water the ornamental peppers with it.
Pickled ornamental peppers, eat three bowls of rice in one meal!
Ornamental peppers start out white, yellow, and purple, and turn red when fully ripe. Because the flowering period on one plant is not uniform, the colors differ, making them look brightly colored.
If you want to keep the ornamental peppers looking pretty, just leave them alone. Ornamental peppers can be enjoyed for 1-2 months, and in the end they turn into dried chilies on their own.
One plant can yield quite a few dried chilies, and home cooking cannot do without them~ But fresh ornamental peppers taste even better, with a crisp texture and a refreshing, delicious flavor. They are generally used to make pickled peppers, with only soy sauce and sugar needed!
1. Prepare the materials
Prepare 50ml soy sauce, 20g rock sugar (according to personal preference), 3 heads of garlic peeled clean, and ornamental peppers washed and air-dried to ensure there is no water.
2. Put into the jar
Prepare a glass jar, boil it in water to sterilize it, and after it dries, first put a layer of rock sugar at the bottom of the jar, then add ornamental peppers and garlic, then more rock sugar... fill it layer by layer like this, pour in soy sauce, seal it, and pickle.
3. Ready in 1 month
Ornamental peppers and garlic can be pickled in one month. After pickling, they can be eaten as a side dish, or used in stir-fries, noodle soups... People who love spicy food must not miss it!
You can plant now and harvest fruit in autumn!
1. Ornamental peppers can still be sown now. The seeds are inside the ripe peppers. Ask around whether anyone you know grows ornamental peppers, and just ask for one ripe red fruit. Cut it open and you will see it is full of seeds!
2. Take out the pepper seeds and scatter them on moist soil. No need to bury them. Just leave them in a cool, ventilated place, and mist water over them every morning. Just mist them damp, not too much.
3. Seed germination likes a dark, moist environment. You can also cover the seeds with a thin piece of cotton cloth, which can increase the germination rate. Once the little sprouts emerge, you can remove the cotton cloth.
4. Within a week, the peppers will grow into seedlings. At this point they can be exposed to the sun, and they can be sunned in both morning and evening. Do not water too much, to avoid the seedlings growing leggy. Water about once every 2-3 days.
5. When the seedlings grow to more than 8 cm, they can be taken out and transplanted into pots. A medium flower pot can generally hold 2-3 plants. When transplanting, place the roots together with the soil into the new pot, press the soil firmly after transplanting, then water thoroughly to settle the pot. Put them in a cool place to adjust for 2-3 days, and after they survive, move them to a sunny place for normal care.