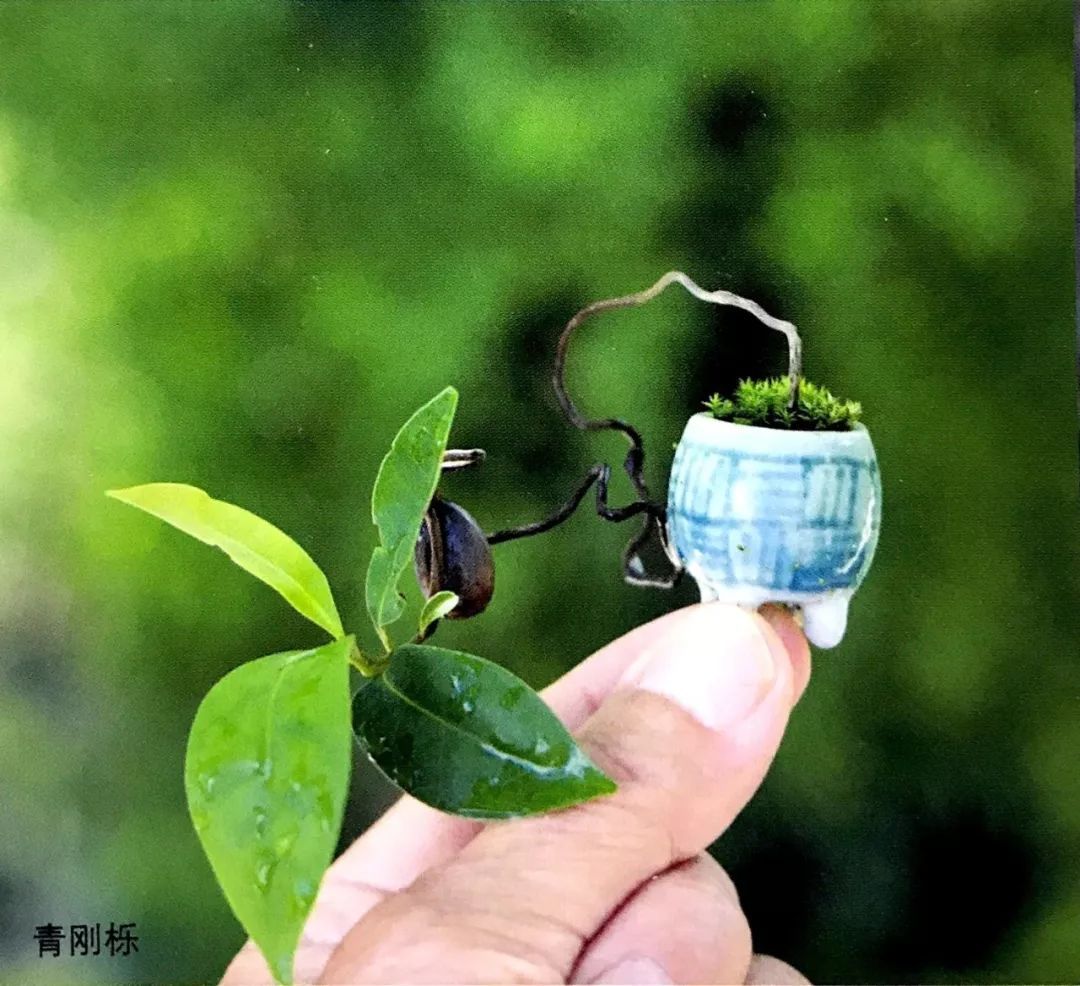
Exposed roots and branches in bonsai are nothing rare, but have you ever seen a bonsai with exposed seeds?
Surprisingly, some Tai friends said the growing techniques the editor recently presented were not new! Unusual! Special!
Alright, for veteran Tai friends, the editor always has to find a way to "match their taste"! As usual, after three pats on the head, inspiration struck...
For Tai friends growing plants on the balcony, thumb-sized potted plants are no longer a novelty. So then... what about a small potted plant with "exposed seeds"?
In this article, the editor will explain how to make and grow an "exposed seed" potted plant. As the old saying goes, this article is wonderful and not to be missed!
What the editor introduces this time is a thumb potted plant in which the seed portion of a seedling grown from seed is exposed above the soil and appreciated as part of the tree form.
This is a styling type unique to thumb potted plants.
"Exposed Seed" Thumb Potted Plant
Materials to Prepare
· A seedling grown from seed with its seed still attached
· Pot, potting soil
· Sphagnum moss, moss
"Exposed Seed" Thumb Potted Plant
Essential Tools
· Scissors
· Tweezers
· Binding wire (aluminum alloy wire about 1.0mm thick)
· Wire pliers
· Small spoon (for adding soil to the pot)
· Bucket, or a large-volume container (for soaking the potted plant)
"Exposed Seed" Thumb Potted Plant
Production Steps
One
Choose the starting point for exposing the roots
Observe the plant and decide the starting point where the roots will be exposed (that is, the dividing line between the part of the roots exposed above the soil and the part placed within the soil).
Begin wrapping the binding wire starting from the point where the plant's roots become exposed.
Editor's tip: leave a longer piece of wire at the position below the starting point, because the plant will need to be secured when the work is finished, so reserve a fairly long section of wire.
Two
Bind the roots with binding wire
After binding the roots with binding wire, set it aside for use.
Use the binding wire to create a twisting, winding effect in the root system and shape the form.
Three
Bind the branches with binding wire
Similar to the treatment of the roots, bind the branches with binding wire.
Bind with binding wire up to a position slightly below the leaves.
Keep an appropriate length of binding wire, then use the wire pliers to cut off the excess portion.
Four
Arrange the shape
This is how the plant's root system and branches look after being treated with binding wire.
Following the binding wire, bend the plant's root system and branches to adjust the overall shape.
Editor's tip: you can freely choose how to bend the shape according to your own feeling. But the only thing to note is that, in order to avoid the potted plant tipping over due to a shift in the center of gravity, you should design the shape while paying attention to overall balance.
Five
Plant into the container
The seedling after shaping is complete is shown in the figure.
Place into the container the binding wire that was reserved when you began wrapping.
Pass the binding wire through the hole at the bottom of the container.
As shown in the figure, pass the binding wire through the bottom of the container.
Remember to confirm once again the overall balance of the plant and the container.
Six
Secure the seed with binding wire
Bend the binding wire that passed through the bottom, and roll it upward.
While adjusting the tree form, secure the seedling with the binding wire.
Use the wire pliers to cut off the excess binding wire.
Seven
Plant the plant
Add an appropriate amount of soil, then compact it with tweezers until the soil is firmly filled to a position slightly lower than the rim of the container.
Eight
Cover with sphagnum moss
Prepare a small amount of sphagnum moss that has been soaked in water and cut into pieces, and cover the soil with the sphagnum moss.
Nine
Add moss accents
At three different positions on the sphagnum moss, plant moss with tweezers.
Ten
Complete
Soak the finished potted plant in water so that it fully absorbs moisture. Before the seedling and soil have fully settled together, place the potted plant quietly in a semi-shaded spot for 7~10 days, watering daily and tending it carefully.
"Exposed Seed" Thumb Potted Plant
Care Essentials
1. Be careful to prevent the roots from drying out.
The roots of an "exposed seed" thumb potted plant originally need to be planted deep in the soil, so the root system exposed outside the soil dries out and withers more easily than the plant's branches.
When the climate is relatively dry, you can only feel at ease after putting on a plastic bag to seal it.
2. Every 2~3 days, take out the thumb potted plant and let the vapor inside escape.
What is very interesting is that the thumb potted plant we make in this article is not only a potted plant whose seeds can be appreciated, but also a "root-viewing potted plant."
The so-called "root-viewing potted plant" refers to a type of potted plant in which part of the plant's root system is placed outside the soil for people to appreciate.
The scenery of a "root-viewing potted plant" is very similar to the plant scenery on precipitous cliffs or coastal areas that have long been exposed to wind and rain and endured their trials. The twisting, winding roots that grow in coils and are exposed outside the soil, setting each other off beautifully with the plant's branches, are its most popular source of enjoyment.
Tai friends, why not give it a try?
Alright, this article ends here. If Tai friends still have any questions, check in at the comment section below.