How to repot potted jasmine? A few key points you must learn
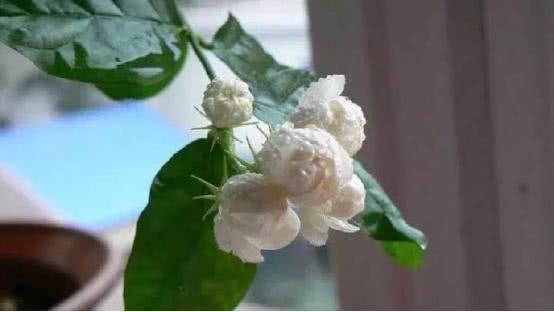
Delicate, elegant, pure, and fragrant - when talking about jasmine, we never hesitate to heap on all kinds of praise, and in fact, as an excellent flower variety with both ornamental and aromatic value, jasmine has indeed relied on its super popularity to keep appearing in our homes. Of course, as more and more people grow jasmine, questions about jasmine cultivation have also begun to be mentioned frequently, and among them the one that flower lovers reported to the editor the most is the issue of repotting jasmine, so today we will specifically introduce this issue.
Why does jasmine need repotting?
First, many friends may not know why jasmine needs repotting. In fact, the reason is not hard to understand: as jasmine keeps growing, its root system buried beneath the potting soil also gradually becomes more developed, and because the capacity of the pot itself is limited, if it is not repotted in time, the originally relatively small flowerpot is very likely to hinder the stretching of the jasmine root system, causing uneven nutrient uptake by the roots, and even the phenomenon of root oxygen deficiency and rot.
So why not just use a particularly large flowerpot from the start? In fact, trying to become fat in one bite is not a foolproof strategy either. You should know that in the early stage of jasmine growth the roots are not well developed. If it is directly placed into a large flowerpot, whether it is the base fertilizer already contained in the potting soil, the later topdressing we apply, or even the water we give, all of it exceeds what the jasmine roots can handle, so it very easily causes an excess of fertilizer and water, ultimately leading to phenomena such as soil compaction.
Now that we understand why repotting is done, let us look again at the specific operation of repotting jasmine. First, jasmine can be repotted in spring when the axillary buds on the branches show signs of sprouting. Before repotting, you can pick off old leaves and spent flowers, which have already lost their photosynthetic capacity but still absorb nutrients. Before repotting, remember to stop watering for a few days. The benefit of doing this is that during repotting the soil will be very loose and easy to shake off, which can effectively reduce damage to the roots.
During repotting, you first need to shake off the soil around the roots so that the entire jasmine root system is completely exposed. At this point we can inspect the roots. If there are diseased roots that have turned black or dried out, they should be cut off with sterilized scissors, while healthy roots should be appropriately shortened a bit. Doing this can promote the growth of new roots. The old flower soil that is removed does not need to be completely discarded; a portion of "protecting soil" can be kept, but note that the newly added flower soil must not contain fertilizer, because at this time the jasmine roots need a period to recover, and applying fertilizer too early may cause root rot.
Many flower lovers think that after filling in the soil, the jasmine repotting work is complete. In fact, this is completely wrong. Because jasmine must adapt to the new environment, it needs to consume a lot of energy, but the roots of newly potted jasmine are weak. Therefore, during the acclimation period, jasmine can only consume its own original nutrients to adapt to the environment. So it is not surprising that jasmine turns yellow and drops leaves; this is caused by it consuming its own nutrients. And in order for jasmine to consume fewer of its own nutrients and adapt to the environment faster, we need to prune the jasmine. The flower buds and flower buds on the branch tips must be cut off, as they consume nutrients heavily.