What are the cultivation techniques for daylily? A detailed explanation
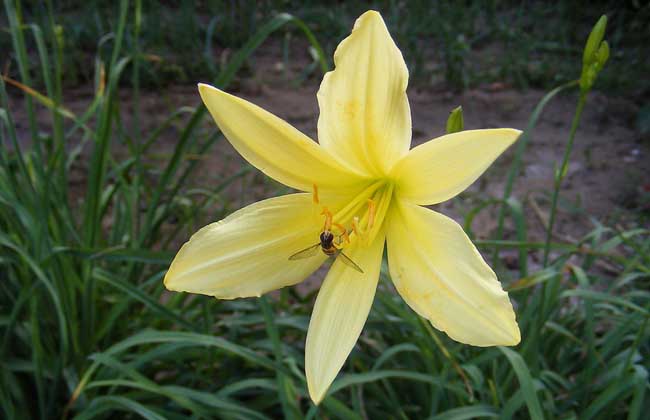
Daylily is a perennial herbaceous plant of the genus Hemerocallis in the lily family. It is cultivated throughout northern and southern China, mostly distributed south of the Qinling Mountains, in Hunan, Jiangsu, Zhejiang, Hubei, Jiangxi, Sichuan, Gansu, Shaanxi, Jilin, Guangdong and the Inner Mongolia grasslands. Quxian County in Sichuan is known as "the hometown of Chinese daylily." Let us take a look at the cultivation techniques for daylily.
Growth habits of daylily
Daylily is tolerant of poor soil and drought, and has low soil requirements; it can be cultivated on field edges or hillsides. It adapts to a wide range of light conditions and can be intercropped with relatively tall crops. The above-ground part is not cold-tolerant, while the underground part tolerates low temperatures of -10°C. It dislikes overly wet or waterlogged soil. When the average temperature over a ten-day period exceeds 5°C, seedlings begin to emerge. The optimum temperature for leaf growth is 15-20°C, and the flowering period requires higher temperatures, with 20-25°C being more suitable.
Cultivated varieties of daylily
1. Early-maturing type: Early-maturing daylily varieties include Siyuehua, Wuyuehua, Qingzaohua, and Zaochashan Tiaozihua.
2. Mid-maturing type: Mid-maturing daylily varieties include Aijian Zhongqihua, Gaojian Zhongqihua, Mengzihua, Baihua, Qiezihua, Chazihua, Changbahua, and Heizuihua.
3. Late-maturing type: Late-maturing daylily varieties include Daojianhua, Xiyegzihua, Zhongqiuhua, and Dayezihua.
Propagation methods for daylily
1. Division: Division propagation is the most commonly used method for daylily. One approach is to dig up the entire mother clump and replant the divisions; another is to dig out part of the plants from one side of the mother clump as seedlings while leaving the rest to continue growing. When digging and dividing seedlings, minimize root damage, and plant the seedlings immediately after digging and dividing.
2. Slicing: After the daylily harvest is complete, dig up the root clumps, separate them one by one according to bud segments, remove the hairy leaves around the shortened stem and dead leaves, then leave the leaves 3-5 cm long and cut off the upper portion. Use a knife to split the rhizome longitudinally from top to bottom into two pieces first. When dividing, each seedling piece must have a seedling stem on top and fibrous roots below. After dividing, soak in a 50% carbendazim 1200-fold solution for 1-2 hours for disinfection. Remove, spread out to dry, then mix with fine soil or a mixture of plant ash and loess for seedling raising.
3. Cuttage: After the daylily harvest is complete, select from the middle and upper parts of the flower scape those with fresh green bracts and obvious growth points below the bracts. Cut about 15 cm above and below the growth point, insert them slightly curved and flat into the soil, with both upper and lower ends buried in the soil, leaving the portion with the growth point at the bract exposed above ground. Cover lightly with fine soil for protection. After about 1 week, roots and shoots will grow. After 1 year of cultivation, the number of tillers per plant can be as many as 12, or at least 5, and they will bloom the following year.
4. Sowing: Hand-pollinate daylily 10-60 minutes after flowering. The highest fruit-setting rate is on the branches at the top of the main inflorescence and the second branch. Looking at node position, the first and second fruit nodes have the highest fruit-setting rate. Therefore, for the first to fourth branches, buds on fruit nodes 1-4 can be retained; for the top branch of the main inflorescence, buds on the first and second fruit nodes can be retained; the remaining buds should be thinned out so that nutrients are concentrated in the fruit and seeds.
Cultivation techniques for daylily
1. Reasonable close planting: Close planting of daylily can leverage population advantages, increasing tillering, bolting and the number of flower buds, thereby achieving the goal of increasing yield. Generally, wide-narrow row cultivation is mostly used, with wide rows 60-75 cm, narrow rows 30-45 cm, hill spacing 9-15 cm, 2-3 plants per hill, 45,000-75,000 plants per hectare, reaching 1.5 million-2.25 million plants per hectare at peak production.
2. Appropriate deep planting: The root mass of daylily grows from around the shortened stem, with 1 layer per year, and the rooting position moves upward year by year from bottom to top. Therefore, appropriate deep planting helps the plant survive and thrive, with a suitable planting depth of 10-15 cm. After planting, water to settle the roots. Before autumn seedlings emerge, keep the soil moist regularly to facilitate new seedling growth.
3. Intertillage and earthing up: Daylily has a fleshy root system and needs a fertile, loose soil environment to facilitate root growth and development. During the growing period, intertill 3-4 times according to growth and soil compaction conditions. The first intertillage is done when seedlings are just emerging, and the 2nd to 4th are done during the bolting stage combined with earthing up.
Fertilization management for daylily
1. Winter fertilizer: Apply when the above-ground part of daylily stops growing, i.e., after autumn seedlings wither from frost or at planting time. Mainly use organic fertilizer, applying 30,000 kg per hectare of high-quality farmyard manure and 750 kg per hectare of superphosphate.
2. Seedling fertilizer: Seedling fertilizer is mainly used for emergence and leaf growth, promoting early and rapid leaf development. Seedling fertilizer should be applied early rather than late, applied when daylily begins to sprout, with 150 kg per hectare of superphosphate and 75 kg per hectare of potassium sulfate.
3. Bolting fertilizer: The bolting stage of daylily is an important period of transition from vegetative growth to reproductive growth. This period requires more fertilizer and should be applied when flower scapes begin to emerge, with 225 kg per hectare of urea, 150 kg per hectare of superphosphate and 75 kg per hectare of potassium sulfate.
4. Bud fertilizer: Bud fertilizer can prevent daylily from nutrient deficiency and premature aging, improve bud-setting rate, extend the picking period and increase yield. It should be applied within 7-10 days after picking begins, with 75 kg per hectare of urea. At the same time, during the picking period, spray foliar fertilizer every 7 days or so with 0.2% potassium dihydrogen phosphate plus 0.4% urea plus 1-2% superphosphate aqueous solution, plus 15-20 mg/kg of 920, sprayed once after 17:00. This has a clear effect on strengthening buds and preventing bud drop.
Pest and disease control for daylily
1. Rust
[Damage] Rust mainly damages leaves and flower stems. Initial infection produces blister-like spots, which later break through the epidermis and rupture to release yellow-brown powder, the summer spores of the pathogen. Sometimes many blister spots merge into one area, the epidermis rolls back, and the leaf surface is covered with yellow-brown powdery summer spores. The area around the blister spots often loses chlorophyll and turns pale yellow, and the entire leaf turns yellow. In severe cases, the whole plant's leaves wither and die, the flower stems turn reddish-brown, and flower buds shrivel or drop.
[Control] Fertilize reasonably, drain promptly after rain, and prevent waterlogging in the field or excessive surface humidity. After harvest, pull up scapes and cut leaves and burn them in a centralized manner, and turn the soil promptly. In early spring, loosen the soil and weed. In the early stage of disease, use 50% carbendazim wettable powder 600-800-fold solution, 75% chlorothalonil wettable powder 600-fold solution, 50% zineb 500-600-fold solution or 40% kitazin 600-700-fold solution, spraying once every 7-10 days for 2-3 consecutive sprays.
2. Leaf blight
[Damage] Leaf blight mainly damages leaves. Initial infection starts from the leaf tip, showing pale circular small spots, which then gradually extend downward along the leaf edge, turning yellow-brown and drying up. When humidity is high, the diseased area produces black mold. The mycelium of the pathogen overwinters in the soil with diseased residues, and spores produced the following year spread through wind and rain to cause infection. Warm and rainy conditions favor disease occurrence. Weak plant growth, excessive planting density, low-lying terrain and poor drainage lead to more severe disease.
[Control] Commonly use equal-amount 0.5-0.6% Bordeaux mixture or 75% chlorothalonil wettable powder 800-fold solution for foliar spraying. After disease appears, spray once every 7-10 days for a total of 2-3 sprays.
3. Leaf spot
[Damage] Leaf spot mainly damages leaves and flower scapes. Leaves initially develop light yellow small spots, which after expansion become elliptical dark green lesions, and finally develop into spindle-shaped or fusiform large spots, with dark brown edges, the center changing from yellow-brown to gray-white, and a yellow halo around the lesion. When humidity is high, pink mold appears on the underside of the lesion. When dry, it easily ruptures; when severe, the entire leaf turns yellow and dies. When flower scapes are infected, symptoms are similar to those on leaves. Sometimes multiple lesions merge into sunken diseased areas up to 10 cm or more, and the lesions often have a relatively thick pale red mold. In mild cases, flower scape growth and flower bud formation are affected; in severe cases, the flower scape breaks and dies.
[Control] Select disease-resistant varieties, fertilize reasonably, and enhance plant disease resistance. After picking, promptly remove diseased residues and burn or bury them deeply in a centralized manner. In the early stage of disease, promptly use 50% procymidone wettable powder 1500-fold solution, 40% carbendazim · sulfur suspension or 36% thiophanate-methyl suspension 500-fold solution, 50% carbendazim wettable powder 800-1000-fold solution, spraying once every 7-10 days for 2-3 consecutive sprays.
4. Anthracnose
[Damage] Anthracnose mainly damages leaves, starting from the leaf tip turning dark green, then dark yellow, and spreading toward the leaf base. Lesions have brown edges and are densely covered with small black spots. In severe cases, leaves wither and die. The pathogen overwinters on diseased residues and spreads through rain. Damage is severe in May-June.
[Control] In the early stage of disease, promptly spray 1:1:100 Bordeaux mixture, 50% thiophanate-methyl or 50% carbendazim wettable powder 800-1000-fold solution, 75% chlorothalonil wettable powder 600-800-fold solution.
5. Southern blight
[Damage] Southern blight mainly occurs at the base of leaf sheaths near the ground, on the whole plant or the base of outer leaves. It begins with water-soaked brown lesions, which then expand and become slightly sunken, with the affected area taking on a brown wet rot appearance. White silk-like threads are produced on the diseased area, spreading to the entire base, and even the nearby soil has white silk-like mold. When moist, purple-yellow sclerotia are produced, later turning tea-brown to dark brown, the size of rapeseed. Affected leaves turn yellow and die because water and nutrient transport is blocked. Mycelium spreads from outer leaves to inner leaves, ultimately killing the entire plant.
[Control] Clean the garden after harvest to reduce overwintering inoculum. In the early stage of disease, use 50% carbendazim 500-800-fold solution or 70% thiophanate 800-1000-fold solution, spraying once every 7-10 days for 2-3 consecutive sprays.
6. Brown spot
[Damage] Brown spot damages leaves. The diseased area initially develops water-soaked small spots, which then become light yellow to yellow-brown spindle-shaped or long spindle-shaped lesions, with a very obvious reddish-brown halo at the edge, and outside that a ring of water-soaked dark green at the boundary with healthy tissue. The lesions are slightly smaller than leaf spot, generally 0.1-0.2 cm × 0.5-1.5 cm. Sometimes lesions merge into irregular shapes, and in later stages the center of the lesion is densely covered with small black spots.
[Control] In the early stage of disease, spray 50% carbendazim wettable powder 800-1000-fold solution, 75% chlorothalonil wettable powder 600-800-fold solution, 50% thiophanate wettable powder 500-800-fold solution.
7. Red spider mite
[Damage] Red spider mites damage leaves. Adults and nymphs gather on the underside of leaves and suck plant sap. The damaged areas show gray-white small spots, and in severe cases the entire leaf turns gray-white and eventually dies.
[Control] Spray with 15% saomanjing wettable powder 1500-fold solution, or 73% propargite 2000-fold solution.
8. Aphids
[Damage] Aphids mainly occur in May, first damaging leaves, then gradually moving to flowers and flower buds to suck sap. After damage, flower buds become thin and small and easily drop.
[Control] Spray with malathion emulsion 1000-1500-fold solution or dimethoate solution. Grind fresh small chili peppers and mix with water to spray directly to kill them. In areas where daylily is eaten fresh, because fresh daylily is picked and sold directly every day, once aphids are found on flower buds, pesticide spraying is strictly prohibited, and biological control methods must be used.