How can avocado seedling quality be improved? A detailed guide to practical methods
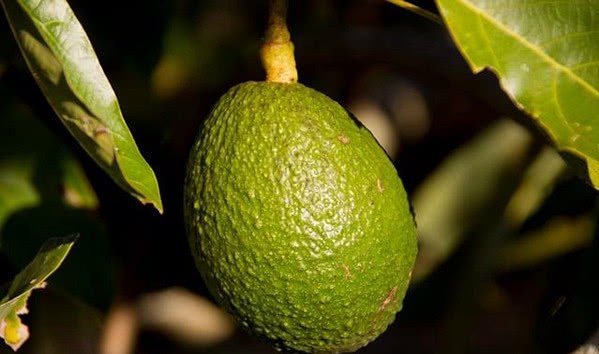
Avocado is an exotic fruit with very high nutritional value, containing various vitamins, fatty acids and protein and other elements, and has the reputation of "forest butter". However, because the avocado's flavor is rather mild, in our country, apart from variety preservation and selective breeding, there is basically no commercial cultivation. With the improvement and change in consumer attitudes, the imported consumption volume of avocados has increased geometrically every year, which has driven domestic commercial cultivation. Today, the editor will explain the methods for improving avocado seedling quality.
1 Introduction of planting material
Introduction of planting material refers to the selection and introduction of avocado seeds. Avocado seeds are mostly purchased from neighboring countries Vietnam or Myanmar, and there is basically no selectivity in seed variety and quality. As a seedling grower, the following points need to be addressed.
1.1 Seed size
Seed size refers to the amount of nutrients directly available to the seed during germination and seedling growth. Larger seeds contain more nutrients, and after planting, the sprouts are strong, the stems thick and the seedlings good, allowing earlier grafting and faster release from the nursery.
1.2 Removal of the seed coat
Avocado seeds are wrapped in a waxy seed coat, which needs to be removed. This helps the seed kernel absorb water and shortens the time to sprouting. For those difficult to peel, the fruit flesh and debris attached to the outside of the seed coat should be cleaned off thoroughly.
1.3 Seed classification
Seeds should be sorted by size and by good or poor quality. Sorting by size: facilitates later lifting of seedlings and bagging, as well as separate management of strong and weak seedlings. Sorting by good or poor quality: seeds damaged during harvest and transport, and seeds that are not rotten, are classified and separated for sprouting to avoid possible disease infection.
2 Sprouting
After the seeds harvested or purchased have been processed, they enter the sprouting stage. The following points need attention during sprouting:
a, Sprouting bed: choose relatively flat ground that drains easily; there must be no low-lying waterlogged spots.
b, Sprouting bed material: choose clean coarse river sand, permeable to water and air, and reusable.
c, Sprouting bed specifications: the bed width should preferably be 80-100 cm, the sand layer thickness of the bed should be no less than 20 cm, and the beds should be separated by bricks between the rows. At the same time, drainage channels must be left to prevent waterlogging when it rains.
d, If the ground beneath the sprouting bed is ordinary mud: first lay a thick plastic film or rigid waterproof board to prevent the seedlings from growing down through the ground, reducing root damage when lifting seedlings for bagging; if it is a hardened surface: build the sprouting bed directly on it, and be careful to leave good walkways.
e, Management before seeds are placed in the bed for sprouting: soak in a medicinal solution of a commonly used broad-spectrum fungicide for disinfection and sterilization for 5-10 min.
f, Seed planting spacing: open shallow furrows at a row-to-plant spacing of 15 cm x 10 cm and bury the seeds in the sand bed, cover with about 3 cm of sand, and water thoroughly.
3 Lifting seedlings and bagging
a, Once the seed sprout tip emerges about 8 cm above the bed surface, it can be lifted and moved into a seedling bag to continue growing. It is best to dip the roots in mud mixed with a disinfecting and sterilizing agent before bagging.
b, Choice of seedling bag or cup: after the bag or cup is filled with substrate, the height must not be less than 20 cm, preferably 25 cm or more, and the mouth diameter should preferably be about 12 cm. Degradable non-woven seedling bags or cups are preferred.
c, Choose a water-retaining and breathable seedling substrate + a small amount of mountain soil + an appropriate amount of organic fertilizer; avoid using pure soil alone.
d, After bagging, the width of the bed surface on which the fruit seedlings are placed should preferably not exceed 80 cm, to facilitate grafting operations later.
e, Under the bagged seedlings, use bricks, small pebbles or raw bamboo strips and similar items as a cushion layer so they do not directly contact the ground, avoiding waterlogging.
f, Install automatic sprinkler facilities to improve spraying quality and reduce workload.
g, Erect a frame above and lay shade netting with about 50% light transmittance; once the fruit seedlings have adapted, they can enter open-air cultivation.
4 Grafting
4.1 Scion selection
When the fruit seedling stem has grown thick and short to more than 0.6 cm (10 cm above the bag surface), grafting can be carried out. Scions with plump buds and from non-fruiting outer sunny branches are superior.
4.2 Grafting method
Branch grafting is preferred, but excellent mother trees are currently scarce and the number of scion sticks that can be taken is greatly constrained. Therefore, the feasibility of bud grafting can be explored to increase the utilization rate of scion buds and the number of grafted seedlings.
4.3 Preparation before grafting
Three days before grafting, select and place the fruit seedlings in separate beds according to whether the stem has reached the grafting standard in thickness and shortness. After grafting, water thoroughly once, and note that grafting must not be done on rainy days.
5 Management after grafting
a, After grafting is completed, provide shade for a period. After the scion sprouts and produces shoots, remove the netting to harden the seedlings. During the period, try to avoid watering for 3-5 days after grafting; afterward, replenish water to the fruit seedlings at the appropriate time, keeping the substrate moist as the standard.
b, When the weather is clear, promptly remove sprouts below the graft union and new shoots from the seed kernel to ensure nutrient supply to the scion.
c, Timely supplementary fertilizing is an important step in cultivating strong, superior seedlings. For supplementary fertilizing, alternate root application of dilute multi-effect water-soluble fertilizer with foliar fertilizer spraying.
d, When the scion shoots have grown to about 20 cm, insert a small fixed wooden stake for each fruit seedling and tie the avocado seedling's main stem against the stake to guide the seedling to grow upright and cultivate a good tree shape.
e, Pay attention to observing the healing condition of the graft union. When healing is complete or when the grafting film is binding too tightly, promptly remove the grafting film.
6 Other points to note
a, Avocado has a fleshy root system and is susceptible to root rot, so attention must be paid to it when necessary, and various preventive measures such as sterilization should be strengthened.
b, When sprouting, the seed handling method should be placement in an upright heart shape, with the small end downward and the wide end upward.
c, The harvest period for avocado seeds is relatively long and scattered. Seeds harvested or purchased should be processed and sprouted promptly.