Making a circular fingertip bonsai is not hard; the fun lies in giving it character
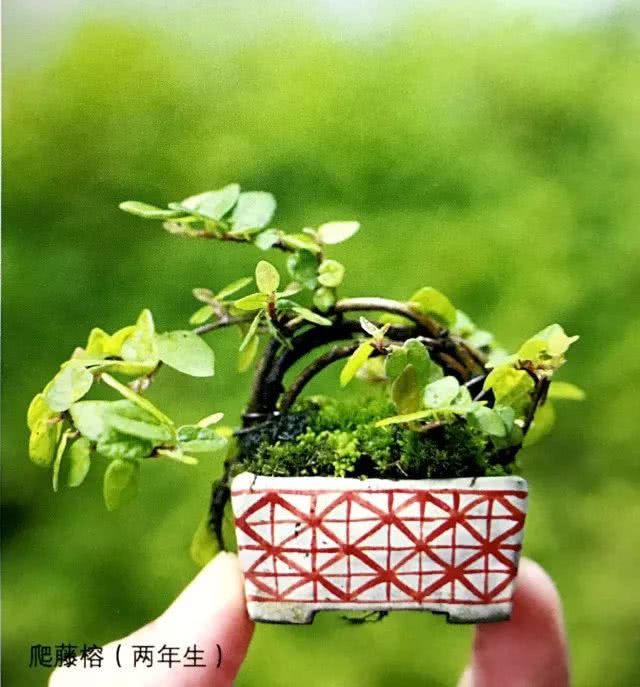
It's not the difficulty of making it that we fear, but the lack of character
A circular fingertip bonsai is made by curling the branches and stems of a plant into a ring shape, creating a fingertip bonsai that resembles a small Christmas pine wreath.
If you use a vine-like plant, this shape is easy to create.
Materials to prepare
·Vine-type seedling (about 30cm long)
·Pot · Soil
·Sphagnum moss · Moss
Tools to prepare
·Scissors
·Tweezers
·Binding wire (aluminum alloy wire about 0.8mm thick)
·Wire cutters
·Small spoon (for adding soil to the pot)
·Bucket, or a large-volume container (for soaking the bonsai in water)
Materials for making a circular fingertip bonsai
Green vine-type plants that climb on house walls are the most suitable choice.
Since the branches and stems of vine-type plants can produce roots, when planting we can directly plant the bent branches and stems into the soil and let them root naturally.
Because of this natural rooting characteristic, the step of raising cuttings before making the bonsai is skipped.
In the case shown in this article, we used the climbing fig (Ficus pumila), a vine plant.
Besides this, you can also choose plants such as English ivy (Hedera helix) or Fortune's euonymus (Euonymus fortunei), which are used as ornamental plants or balcony decoration plants, and the method of making is similar.
Choose seedlings whose branches are relatively soft and will not break when bent.
Circular fingertip bonsai
Making steps
One: Decide the starting point
First, design and plan the overall shape of the circular plant, including the size of the ring and the position of the visible parts of the plant.
Try arranging the plant according to the design, see whether the whole looks suitable, and then decide the starting point of the entire plant shape.
Two: After curling, secure with binding wire
At the starting point, wrap the binding wire around the plant about three times, then cut the binding wire with the wire cutters.
This is how it looks after curling the plant one full turn, then remove the excess leaves below.
Editor's tip: The starting point will ultimately be buried in the soil. Normally, people can only see the upper half of the plant ring. Based on this design, adjust the overall balance of the plant.
Three: Coil the vine
Carefully curl the vine, then wrap it two or three more turns.
Bind it with binding wire at the middle position to prevent the plant from loosening and deforming.
Four: Secure after curling
After completing three turns, bind the binding wire at the ending point, and cut away the excess leaves nearby.
Editor's tip: The position secured after curling should be consistent with the starting point. Similar to the starting point, the ending point should also be placed in the soil inside the pot.
Use the wire cutters to cut off the excess binding wire, completing the preparation of the plant material.
Five: Test the fit between the seedling and the container
Compare the plant with the container to confirm whether it fits and whether it meets your expectations.
Actually place the seedling into the container to observe whether it can maintain balance. Besides planting the plant in the exact center of the container, you can also plant it on one side of the container.
Editor's tip: The key point in choosing a container is to choose a relatively deep one. This is to ensure that the lower half of the curled vine plant is completely buried in the soil.
Six: Plant the plant
Put about one spoonful of soil at the bottom of the container, slowly plant the circular plant into the container, and add soil to cover it.
Repeatedly add soil and then press it firm with tweezers, until the soil is filled solidly to a position slightly lower than the rim of the container.
Editor's tip: For the planting of the seedling, the covering with sphagnum moss, the way the moss is arranged, the way of watering, and so on, the entire making process of any thumb bonsai can refer to this method.
Seven: Cover with sphagnum moss
Prepare a small amount of sphagnum moss that has been soaked in water and chopped, and cover the soil with the sphagnum moss.
Eight: Add moss accents
At three different positions on the sphagnum moss, plant moss with tweezers.
Nine: Finished
Soak the finished bonsai in water and let it fully absorb moisture. Before the seedling and soil have fully settled together, place the bonsai quietly in a semi-shaded spot for 7~10 days, watering daily and tending it carefully.
With such detailed making steps in hand, hurry up and give it a try!
Grow it on the balcony
Alright, that's all for this article. If you fellow gardeners still have any questions, check in at the comment section below.